Homebrew is a free macOS open-source software package that simplifies the installation process on your Mac by running commands in the Terminal. On Mac, Homebrew helps the users to install software that isn’t available on App Store. With this software, you can install, update and manage developer tools like Python, Wget, Ruby, Node.js, and more on your Mac.
Contents
Requirements
Before installing Homebrew software on your Mac, make sure that your system fits the following requirements.
| Chip | Apple Silicon or 64-bit CPU |
| macOS version | 10.14 or later |
| Shell | bash or zsh syntax |
| Required tool | Xcode |
How to Install and Use Homebrew for Mac
For better understanding, we have divided the procedure into four halves. To install Homebrew on your Mac, you must install the Xcode command line tool. Before installing the tool, update your Mac to the latest version.
Step 1: Installing Xcode Command Line Tool
Xcode is Apple’s native IDE which has all the tools that you need for developing software on a Mac.
To install Xcode;
[1] Go to Spotlight Search and search for Terminal.
[2] After that, launch Terminal on your Mac and input the following command, and hit Return.
xcode-select --install
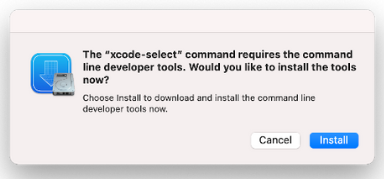
[3] A new dialog window will display to confirm you want to install the Xcode tool.
[4] Hit Install.
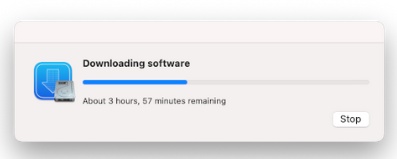
[5] Wait for the process to complete.
[6] Finally, a message will pop up indicating The software was installed.
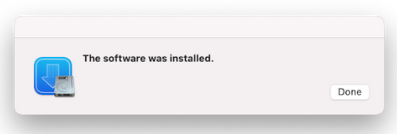
[7] Hit Done, and you’re done.
Step 2: Install Homebrew
[1] Once the Xcode tool is installed, open Terminal again on your Mac and input the following command, and hit Return.
- Command for macOS High Sierra, Sierra, El Capitan, and earlier version,
/usr/bin/ruby -e "$(curl -fsSL https://raw.githubusercontent.com/Homebrew/install/master/install)"
- Command for macOS Catalina, Mojave, Big Sur, and later,
/bin/bash -c "$(curl -fsSL https://raw.githubusercontent.com/Homebrew/install/HEAD/install.sh)"
[2] Input your Admin password and click Return.
[3] After a few minutes, you can see the Installation successful pop-up on the Terminal.
Note: You can also visit the official website to copy the Homebrew link for your Mac
Step 3: Turn off Analytics
By default, Homebrew collects the information about your Mac and transmits analytics to the developers. They collect information like,
- Homebrew user agent
- Google Analytics
- Homebrew analytics tracking ID and user ID
If you don’t want the Homebrew to collect your data, then disable the analytics by entering the following command,
brew analytics off
Step 4: Use Homebrew on Mac
Finally, run the brew help on Terminal to get started. From here, you can install, update or remove packages on your Mac via Homebrew.
For Installing Packages
You can install any package on your Mac by using the following command on Terminal,
brew install [package name]
For example, if you want to install a tree command, enter,
brew install tree
For Updating Packages
After installing software, you should regularly update the packages to experience the latest features on your Mac.
Follow the command to check the list of packages that need to update,
brew outdated
To update a specific package, enter,
brew update [package name]
To check whether you have the latest Homebrew version, enter,
brew update
For Removing Packages
If you no longer need specific software, enter the below command to remove it from your Mac,
brew uninstall [package name]
Tips! Visit our best uninstaller for Mac guide to remove the apps that you aren’t able to remove.
How to Uninstall Homebrew on Mac
[1] Launch Terminal on your Mac.
[2] Follow the below command to uninstall Homebrew on Mac.
- Command for macOS High Sierra, Sierra, El Capitan, and earlier,
ruby -e "$(curl -fsSL https://raw.githubusercontent.com/Homebrew/install/master/uninstall)"
- Command for macOS Catalina, Mojave, Big Sur, and later,
/bin/bash -c "$(curl -fsSL https://raw.githubusercontent.com/Homebrew/install/HEAD/uninstall.sh)"
[3] After entering the above command on Terminal, hit Return to uninstall Homebrew.
Frequently Asked Questions
The brew command on Mac is used to manage your command-line utilities.
Yes. Homebrew performs pretty well on arm64, Apple Silicon, and M1.
It depends upon your macOS version. Generally, Homebrew takes about 100 Mb, and the Xcode package about 10 GB.