Key Highlights
- Before adding the location, you should change from a personal account to a professional/business account.
- After changing into a business account, open the profile page and the location under Contact Options.
One of the important things while promoting your business on Instagram is providing your location on the bio. You must add your exact location on the bio so that the customers can find the routes for your location without any difficulties.
It also helps potential customers find reviews and comments on your business on Google Maps to boost your brand’s visibility and creditability. You can add a location on Instagram Bio only by using the mobile app. The feature is currently not available on the web version.
Contents
Can I Add the Location to my Personal Account on Instagram?
No. Instagram doesn’t allow users to add a location to the bio on their personal accounts. It is possible only on a professional/business account. On the contrary, if you’re using a personal account, switch to a professional account to add location.
How to Switch Your Personal Account to Business Account
Before adding the location, update your Instagram app to use it without any errors.
[1] Launch the Instagram app.
[2] After launching the app, log in with your username and password.
[3] Click the Profile icon at the bottom right.

[4] Press the Menu (hamburger) icon at the top right and select Settings.
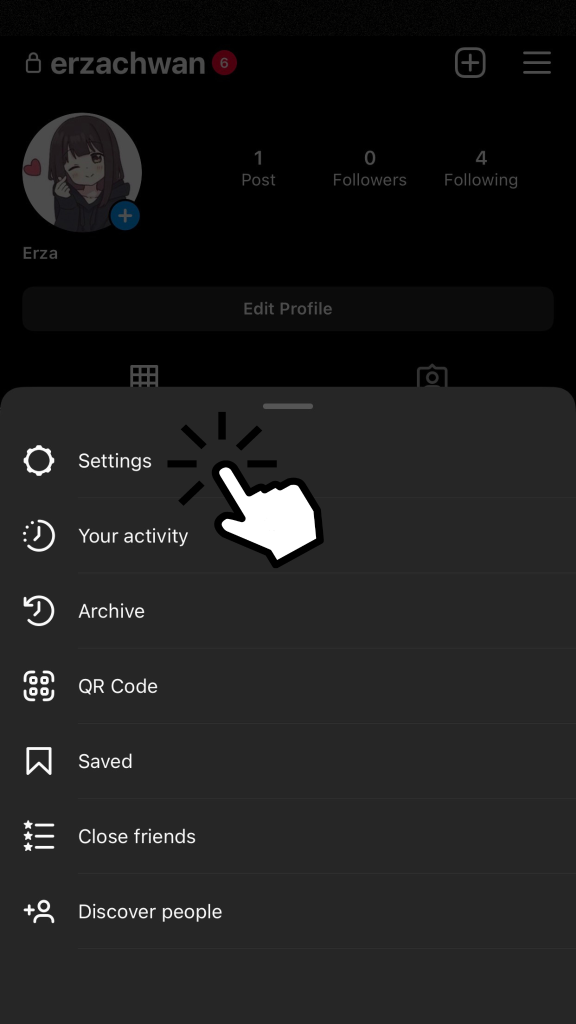
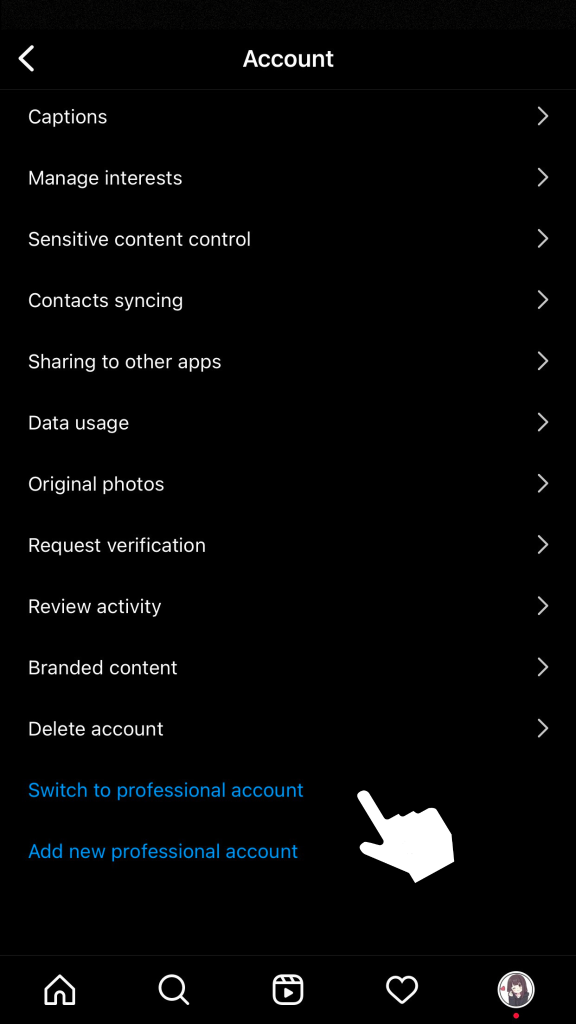
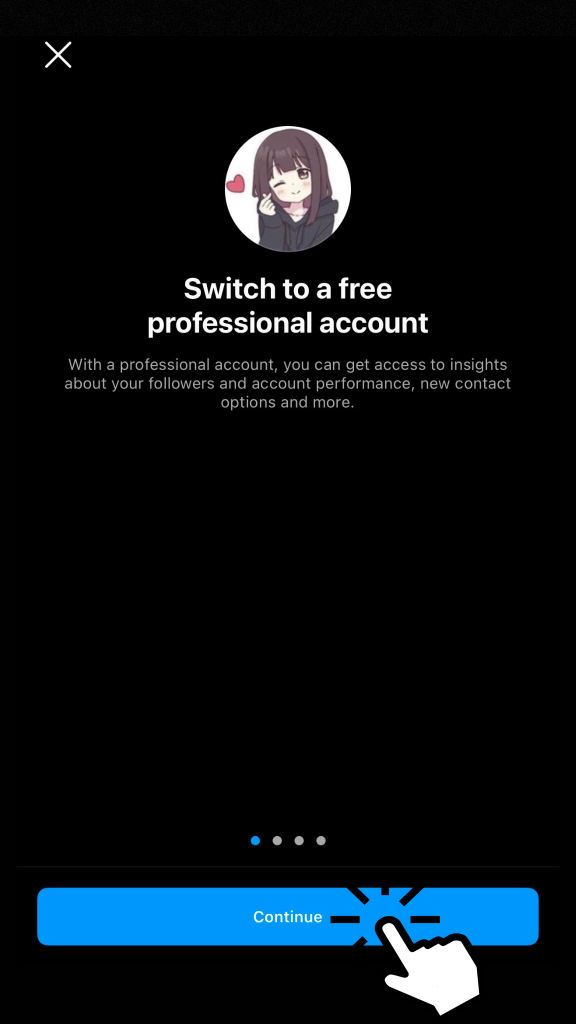
[5] Under Settings, navigate to Account and click Switch to professional Account.
[6] Tap Continue.
[7] Choose a category for your professional account and hit Done.
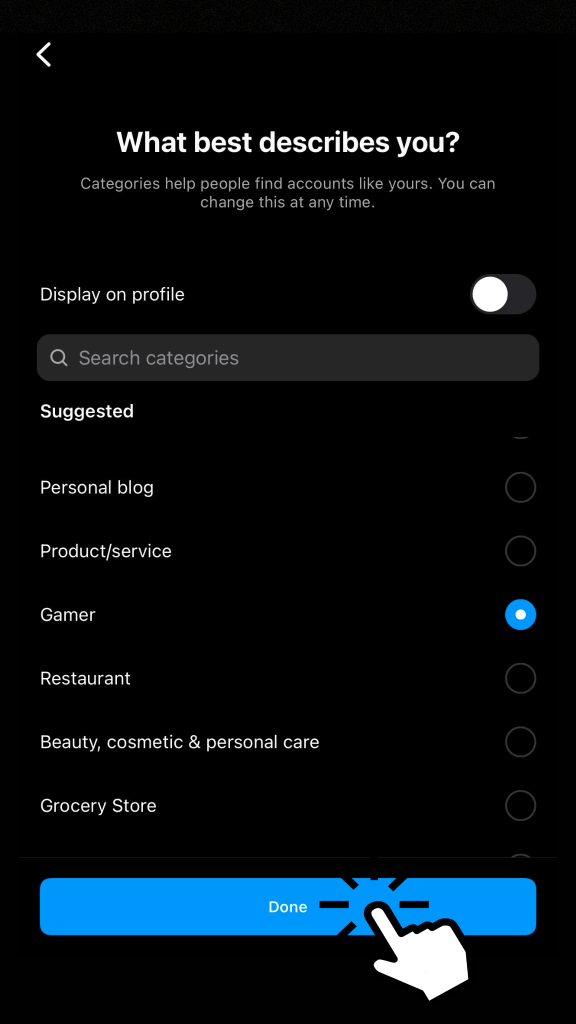
[8] Then, choose Business.
[9] Afterward, select Next and click the cross icon at the top to adjust the settings further.
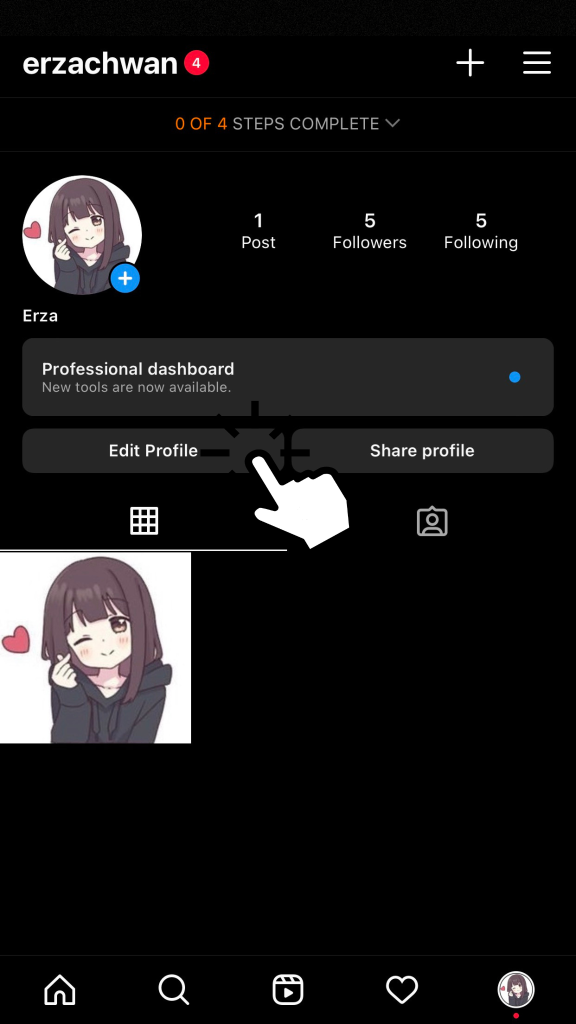
You’ve successfully changed your account type to a business account. Now, you can add a location on the contact page.
Tip! Enable Quiet Mode on Instagram and stop getting annoying notifications and messages at any particular time interval.
How to Add Location on Instagram Bio
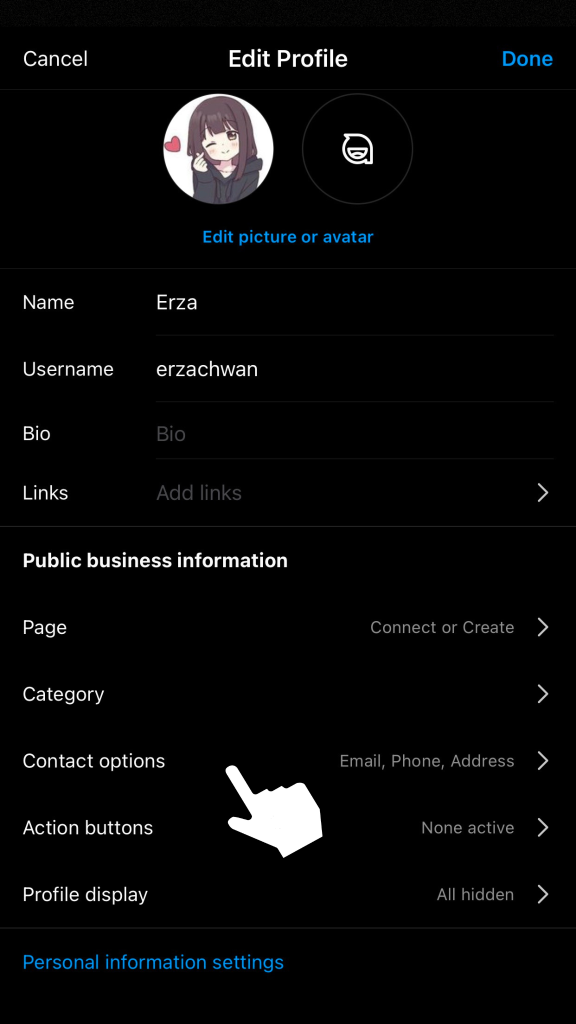
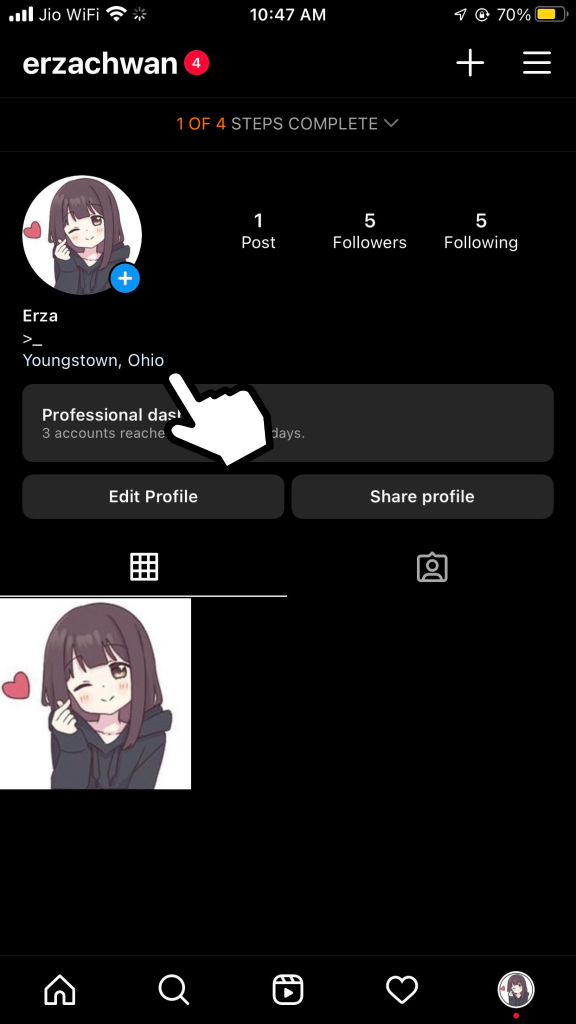
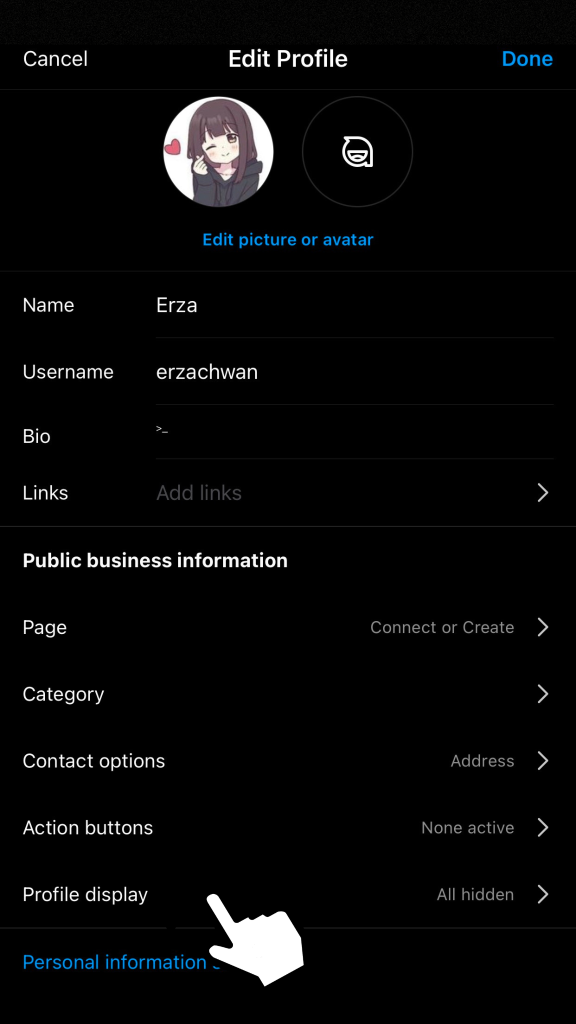
[1] Navigate to your profile page and click Edit Profile.
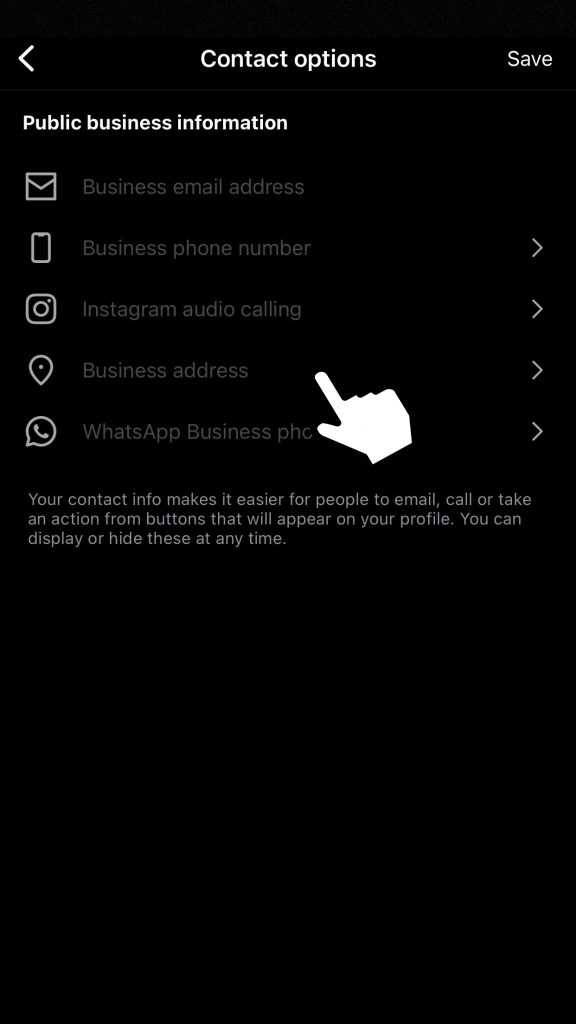
[2] Under the Public Business Information menu, click Contact Options.
[3] Choose the Business Address option.
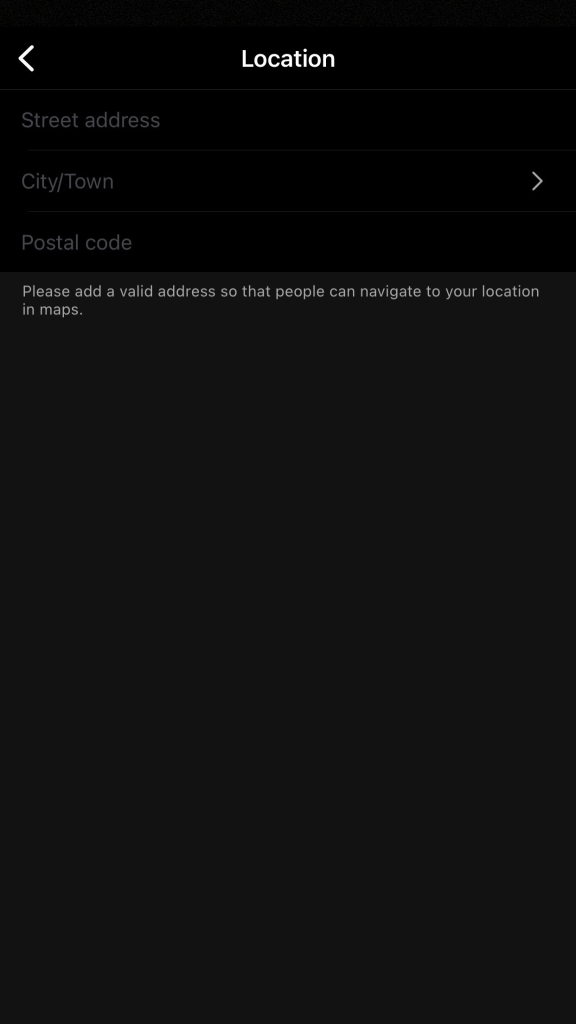
[4] Under the Location menu, specify your Street Address, City/Town, and Postal Code.
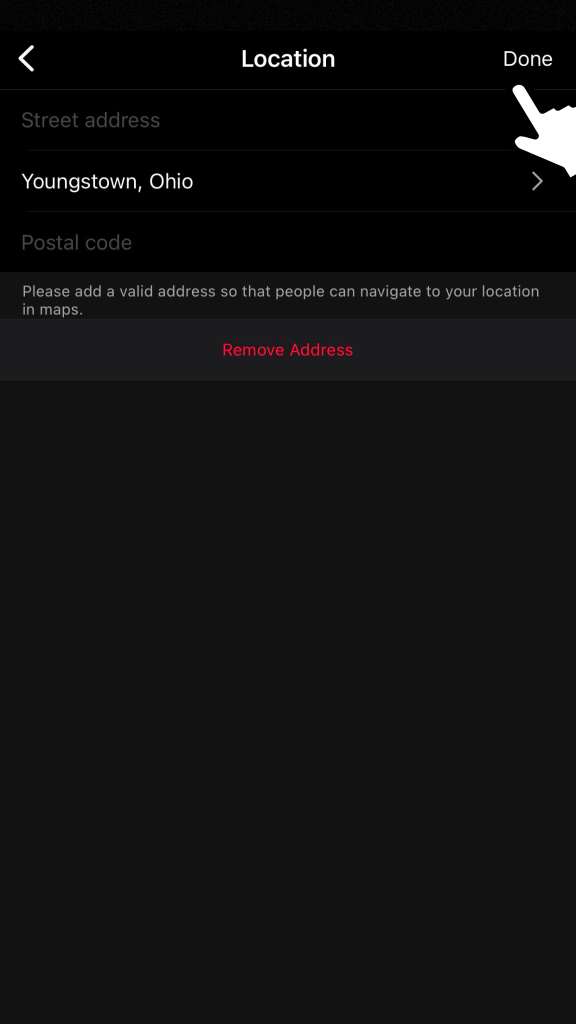
[5] After entering the specific location, click Done.
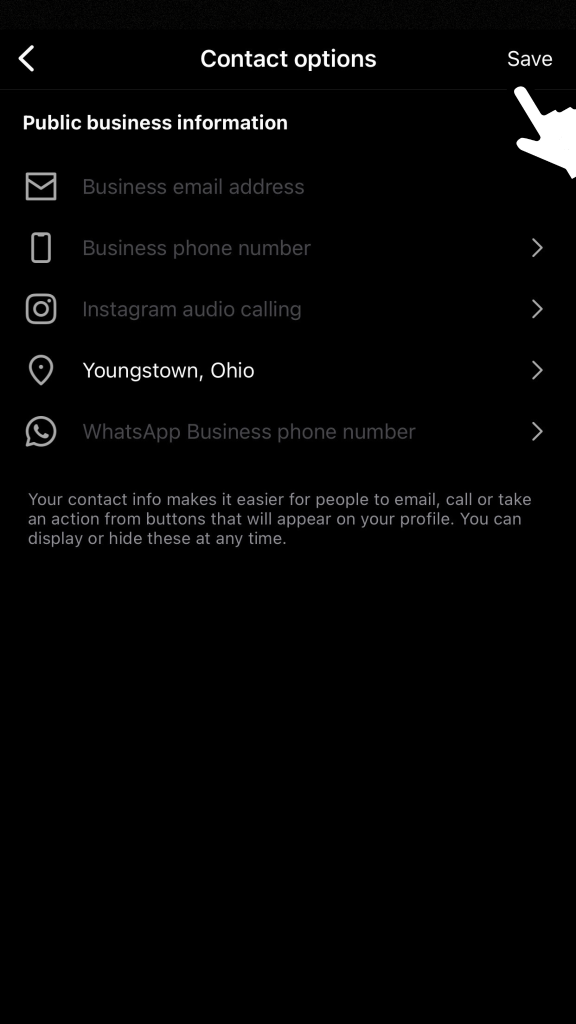
[6] Next, click Save.
[7] Further, click Done to add the location to your Instagram bio.
How to Fix Location Not Showing on Instagram Bio
If you have turned off the Display contact info, the location will not be visible to customers. So, enable this setting to fix the issue immediately.
[1] After launching your Instagram app, click on your business account profile picture at the bottom right.
[2] Click Edit Profile and choose the Profile Display option.
[4] Under Profile Display, toggle on the Display Contact Info option if it’s turned off.
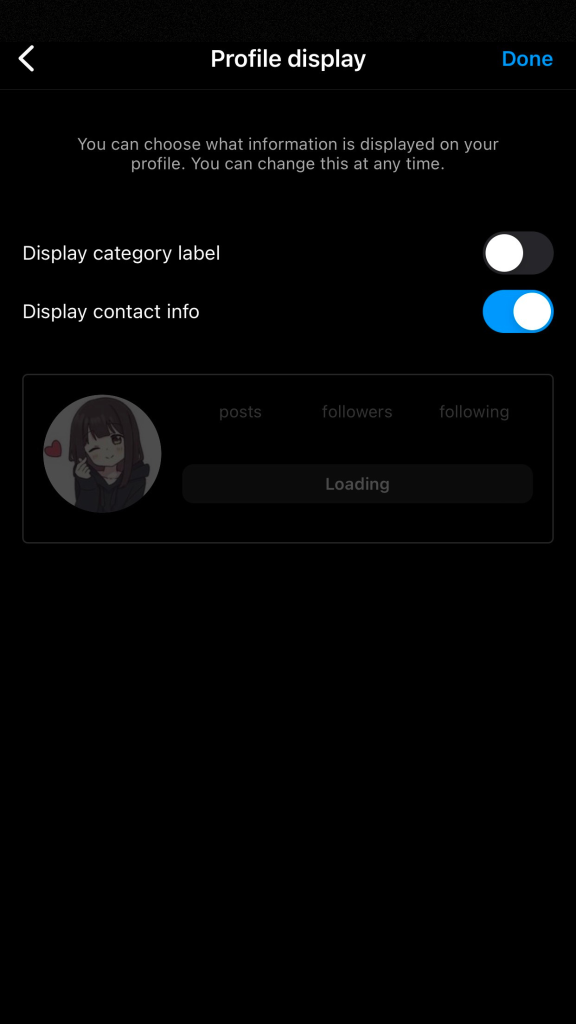
[5] Click Done at the top right and further hit Done.
Now, customers can view your location on the Instagram bio. By tapping on the location, they can track the route with the Google Maps or Apple Maps application.
Frequently Asked Question
Open your Instagram business account and navigate to your profile page. From there, select Edit Profile → Contact Options → Business Address and click Remove Address. Finally, click Done to remove a location.