Chromebook is a lightweight that is widely preferred by those who have got to deal with the Google Chrome browser. It is the most affordable laptop and hence is useful for productivity tasks. Hence is used by school students and office workers working on Chrome-based. It has relatively low storage but Google compensated it with the cloud storage support. So, all your works get saved on the cloud and not on your Chromebook. Adding a printer on ChromeOS is an added advantage to print anything on the go. Whether you want to carry a hard copy of your school assignment or office project, Chromebook lets you take advantage of it. The primary thing you should do is to connect the printer with the Chromebook. If you want guidelines on how to add a printer on Chromebook, then proceed further into the section below.
How to Add Printer on Chromebook?
To add a printer on Chromebook using a WiFi connection, you need to carry out the steps given below.
Note: This method is ideal if your printer is the latest model and supports WiFi connection. Those have older model printers that can skip to the next section.
(1) On your Chromebook, click on the System Clock icon from the rightmost corner.
(2) Choose Settings (gear icon).
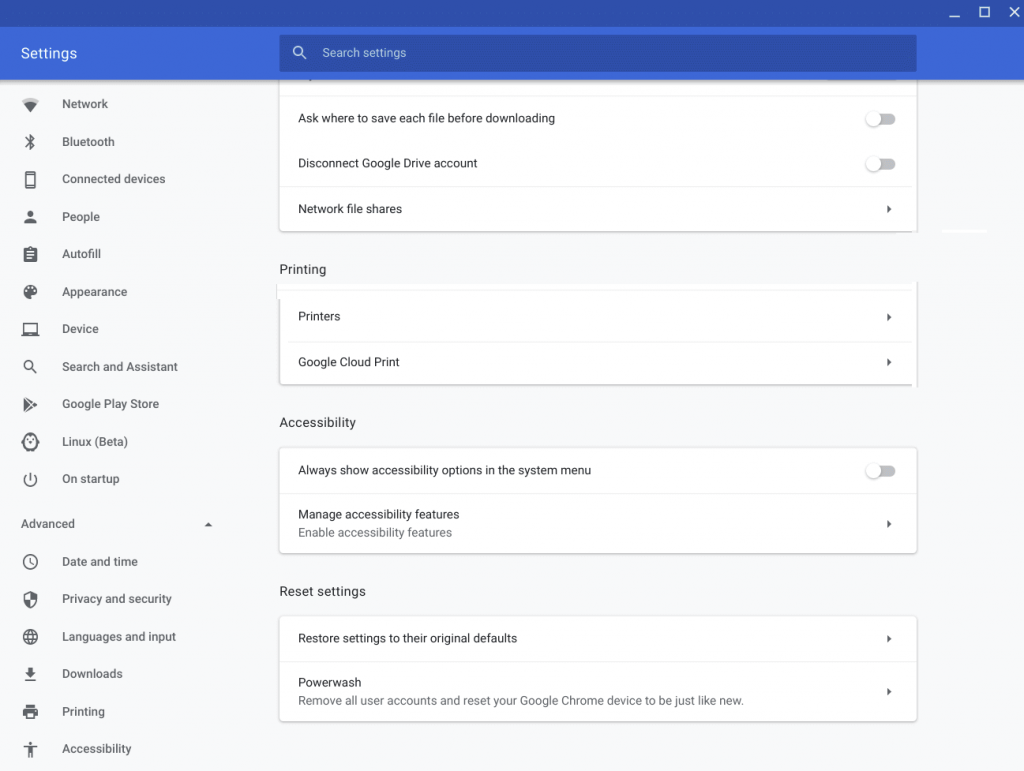
(3) Select Advanced option.
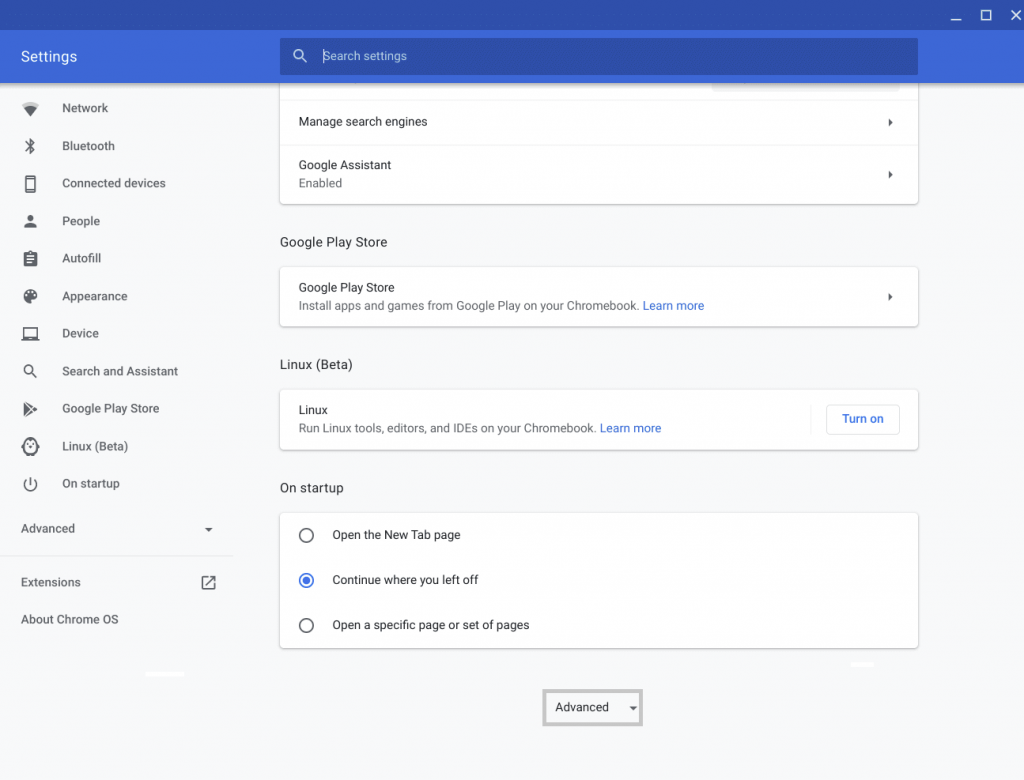
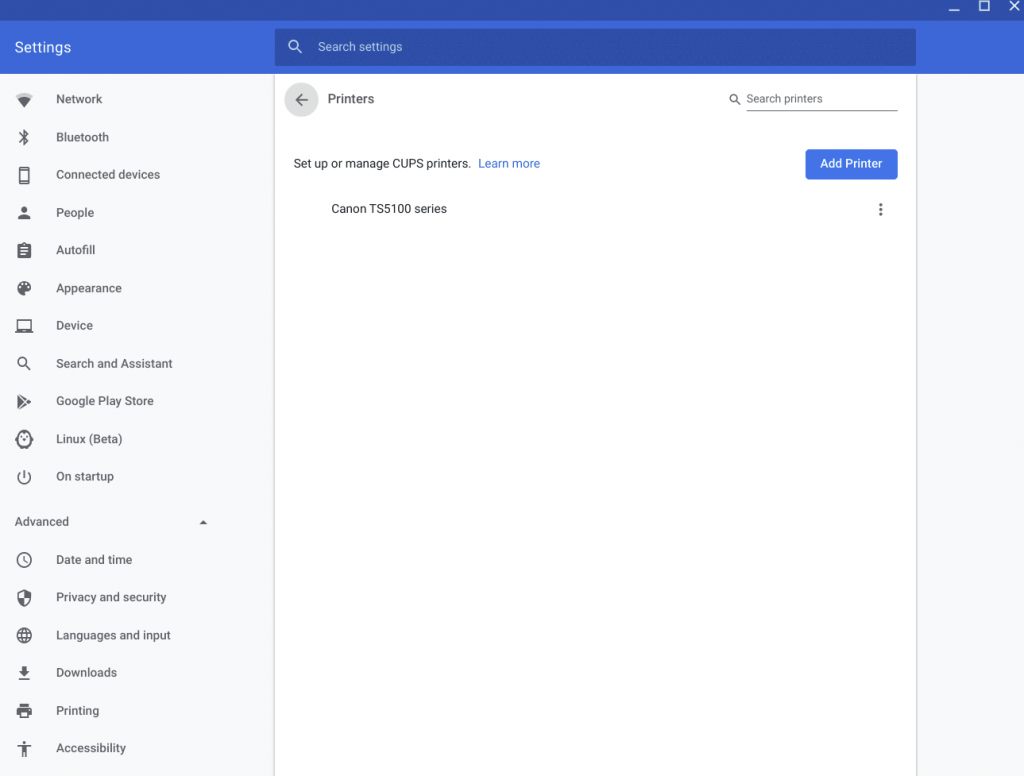
(4) Click on Printers under Printing section.
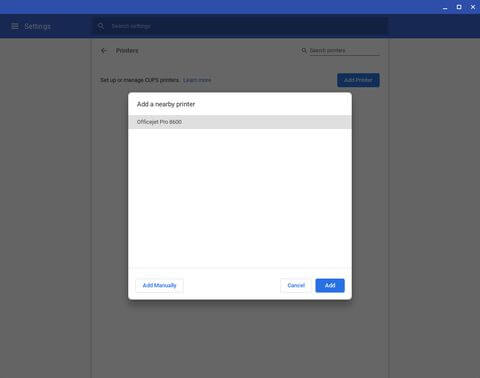
(5) Make a tap on Add Printer button.
(6) If your printer is shown on pop-up, then click on it add it.
Alternative: To add the printer manually, click on Add New Printers. Enter printer name, address, protocol, etc., and click on Add.
(7) Finally, check if the printer appears at the top under Saved printers.
Note: If you don’t find your printer, then turn off WiFi on ChromeOS and turn on it back.
Try the Alternative!
If you currently have a printer without WiFi, then connect the USB cable of the printer into the Chromebook directly.
(1) After plugging the printer into Chromebook, click on System Clock.
(2) Select Settings.
(3) Click on the downward arrow on the Advanced button.
(4) Choose Printing to select Printers.
(5) When Chromebook detects your printer, click on Save.
Also check the best printers for Chromebook as well.
Our Opinion
That was all about adding a printer to Chromebook with WiFi and USB cable. It is a time-consuming factor when you have something to print frequently. Because Chromebook will auto-connect to the printer when you click on the Print option.
If you found this section useful, then drop us your views about it as comments. For more informative articles, you shall follow us on Facebook and Twitter.