Apple devices are known for their user privacy and user comfort rather than user customization. A lot of basic features in Windows are more complex or even don’t exist in Mac PCs. One such complex feature is the Admin name. If you misspelled the admin name while creating your Apple ID, it involves a long process to change the admin name on Mac.
There are situations like you want to include your life partner’s name or your child’s name in the admin name. For that, you need to do some work around things. Before stepping into the process, make sure that you are using the latest version of Mac or at least the macOS X Yosemite and above.
Contents
Steps Involved in Changing the Admin Name on Mac
- Creating a New User
- Rename the Home Folder
- Rename the Account
Step 1: Change Admin Name on Mac: Creating a New User
If you are the only user on the Mac, you can’t change the admin name. For that, you need to create a new user with admin rights. If you already have an additional user with admin rights, go to the next section of the article. If not, follow the below steps to create a new user with admin rights on Mac.
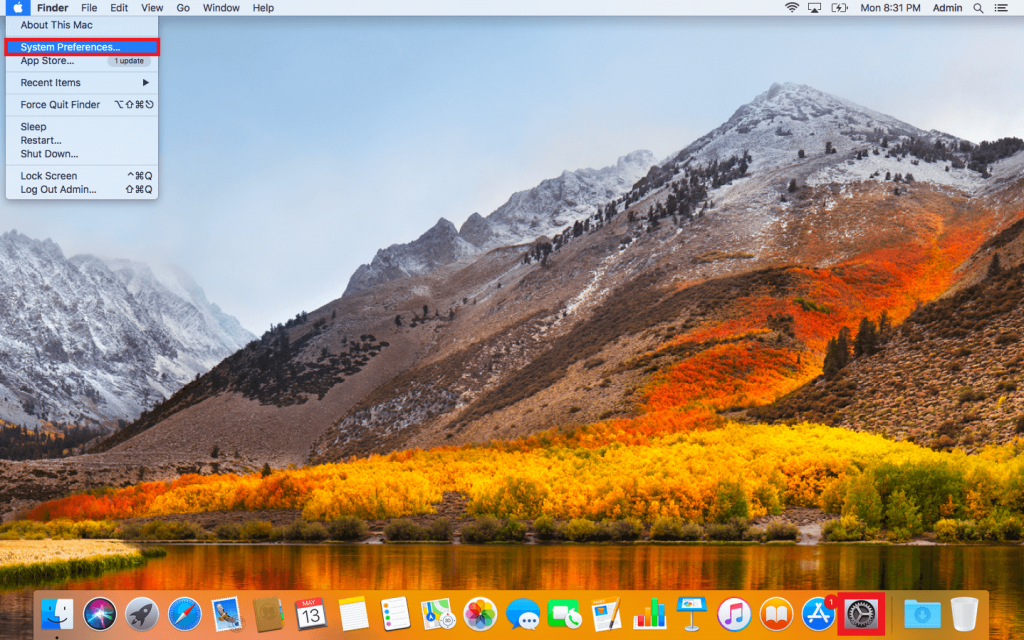
(1) Click the Apple logo on your Mac screen and choose the System Preferences option.
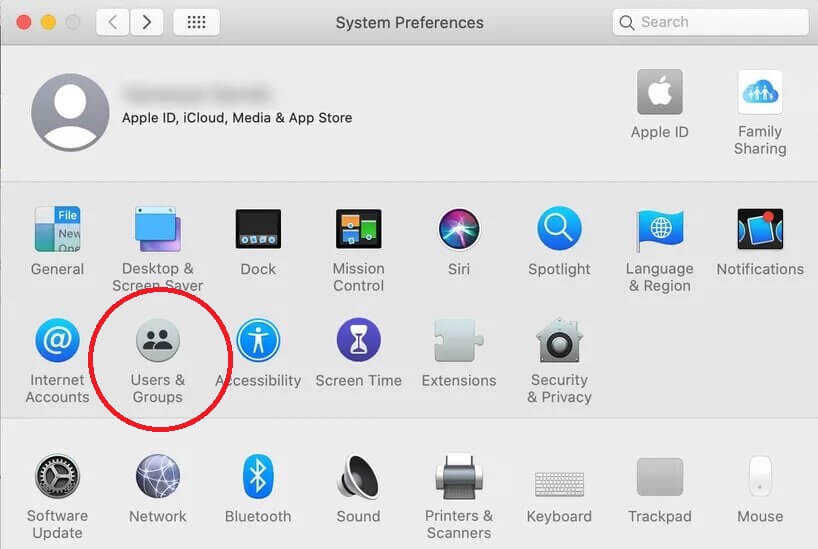
(2) Select the Users & Groups option.
(3) The Users & Groups window will open. Click the Lock icon to make changes.
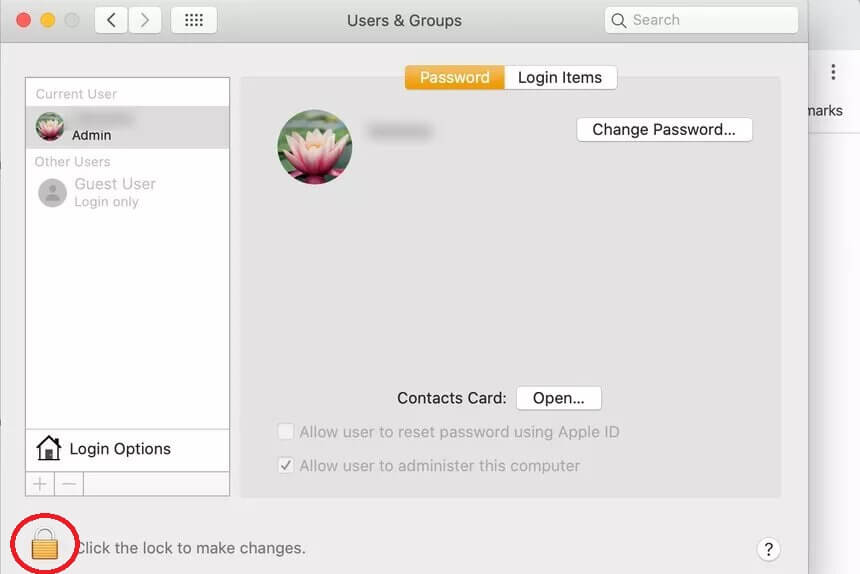
(4) It will ask for your password. Enter your password.
(5) After that, click the Plus icon (+) on the top of the Lock icon.
(6) Click the New Account drop-down button and choose Administrator.
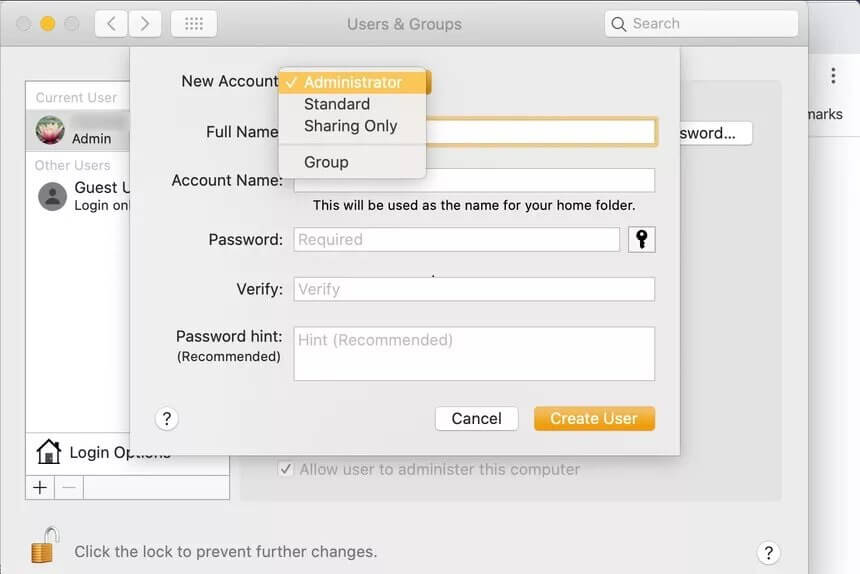
(7) Now, enter all the specified information like Full Name, Account Name, Password, and Password hint. Click the Create User button.
Note: The Account Name is the Admin Name.
(8) The created new user will be listed under the Other Users tab.
Step 2: Change Admin Name on Mac: Rename the Home Folder
This process is a tricky one. If you do anything wrong, the data in the account will be erased. So, backup all the important files.
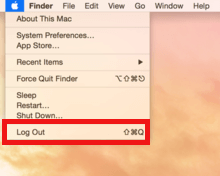
(1) Log out from the account that you want to change the admin name. (Apple Menu –> Log Out Username).
(2) Then log in with the account you just created above.
(3) Open the Go to Folder (Go –> Go to Folder) and search for /Users.
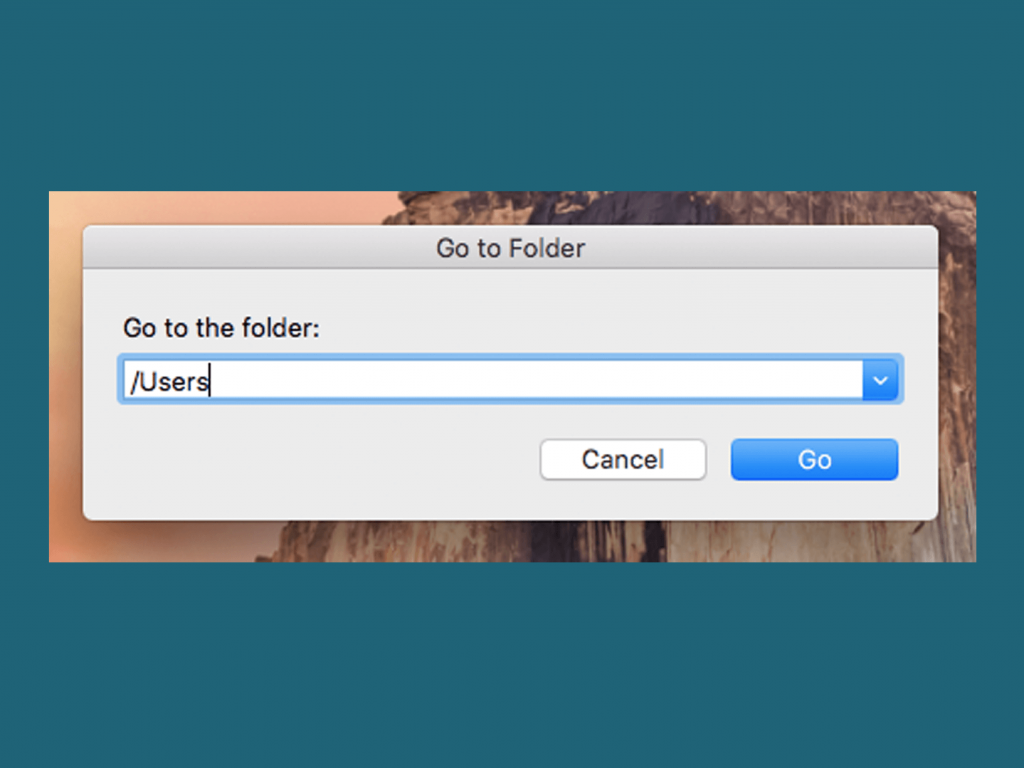
(4) The Users window will open. Rename the user’s home folder with any name you want without any spaces.
(5) It will ask for your account password. Enter the password and click OK. The name on the Home folder will be changed.
Step 3: Change Admin Name on Mac: Rename the Account
Now, half of the work is done. The remaining one is to rename the account. The account name and the Home folder must be the same. You can’t choose different names for it.
(1) Go to Users & Groups in the same way mentioned above.
(2) Click the Lock icon and enter the password to make changes.
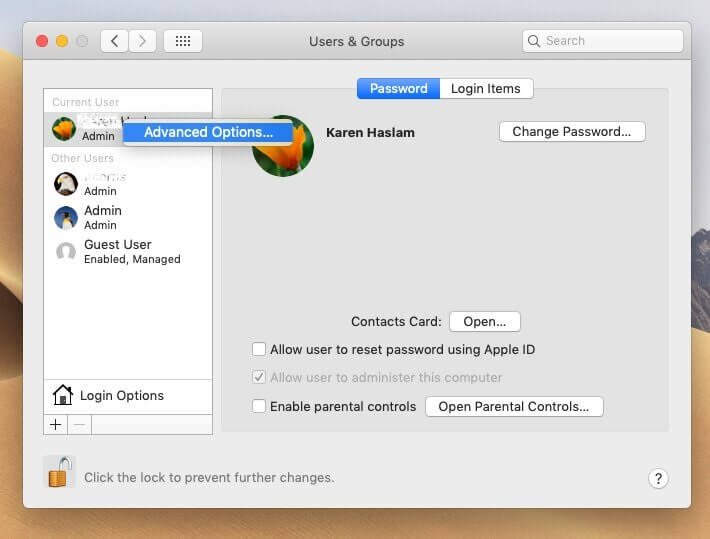
(3) Press the Control key and make a click on the account that you want to change the name. You can also right-click the account name.
(4) Choose Advanced Options.
(5) Change the Account name to the name you used for the Home folder.
(6) Also, change the Home directory (after /Users).
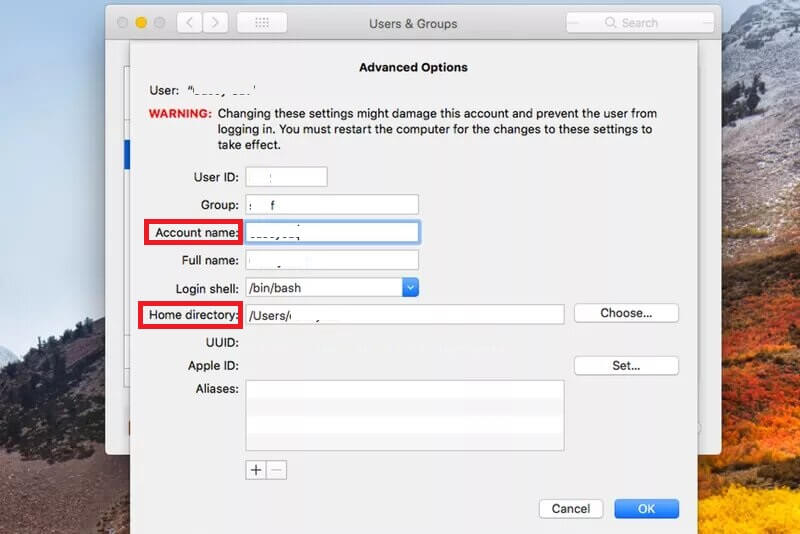
(7) After making all the changes, click the OK button.
(8) Restart your PC and sign in with the changed account. If you can’t sign in, the Home folder name and the admin name is not matching. Check the names and try again.
That’s it, you have successfully changed the admin name on your Mac PC. In older macOS, you can’t change the admin name in any way after the account is created. The feature is added to the newer versions.
Choose a cool admin name for your Mac.
Follow our social media platforms, Facebook and Twitter to get instant updates about Mac.