Windows 11 is an upcoming version of the Windows series from Pioneer Microsoft. It is the successor of Windows 10 OS and will be available as an update for all Windows 10 users. It is the major release from Microsoft since 2015 so as a user we can expect lots and lots of inbuilt features with ease of use and flexibility. With the Beta test results, we came to know how to use the Windows 11 functions. It is no harm to learn before the release. There is a lot more to know but here we are discussing how to change the date and time in Windows 11.
Contents
- How to Change Date and Time in Windows 11
- 1. Through Settings
- Change Date and Time in Windows 11
- Change Date and Time Format in Windows 11
- 2. Via Control Panel
- Change Date and Time in Windows 11
- Change Date and Time Format in Windows 11
- 3. Through PowerShell
- Change Date and Time in Windows 11
- Change Date and Time Format in Windows 11
- 4. With Command Prompt
- Sync your PC with Global Server for Automatic Date and Time adjustment
How to Change Date and Time in Windows 11
The following are the methods that are used to change date and time in Windows 11.
- Change Date and Time through Settings
- Via Control Panel
- Using PowerShell
- With Command Prompt
1. Through Settings
Change Date and Time in Windows 11
1. Right-click on the Date and Time on the bottom-right corner of the screen.
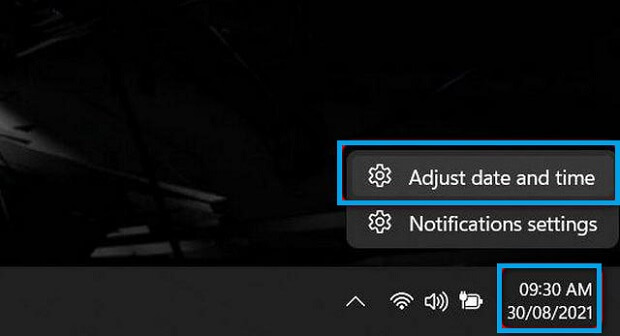
2. Choose Adjust Date and Time option. Or go to Settings >> Time and Language >> Date and Time.
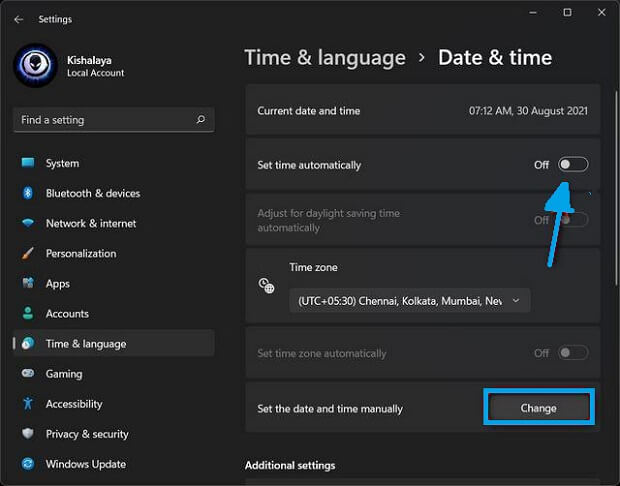
3. If you are okay with the automatic time update, turn on the Set Time Automatically option. If not, turn it off and click Change.
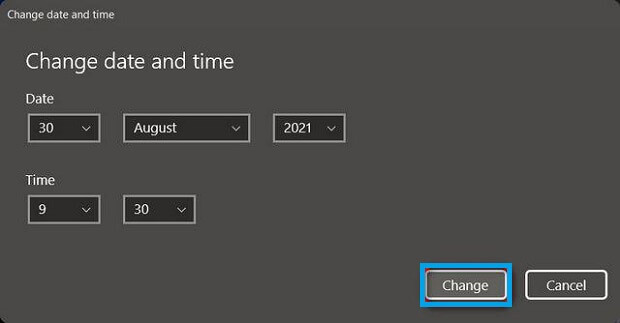
4. Set the date and time manually by using the drop-downs on the next Window.
Related Guide: How to Enable Dark mode in Windows 11
Change Date and Time Format in Windows 11
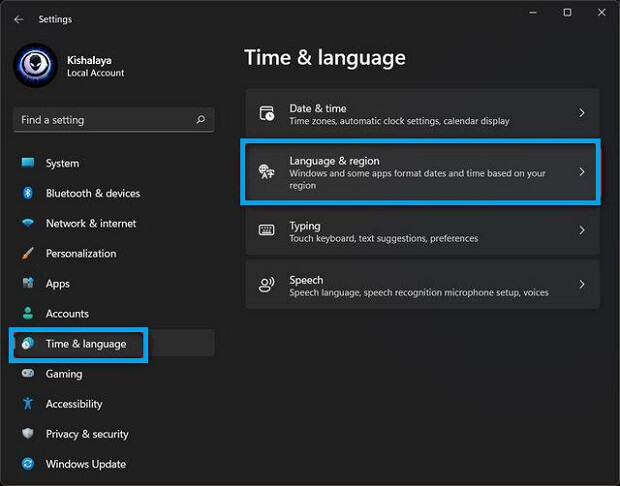
1. In order to change the Time and Date Format, go to Settings >> Time and Language.
2. Click on the Language and Region.
3. Click on Regional Format choose the region you want and click Change Formats.
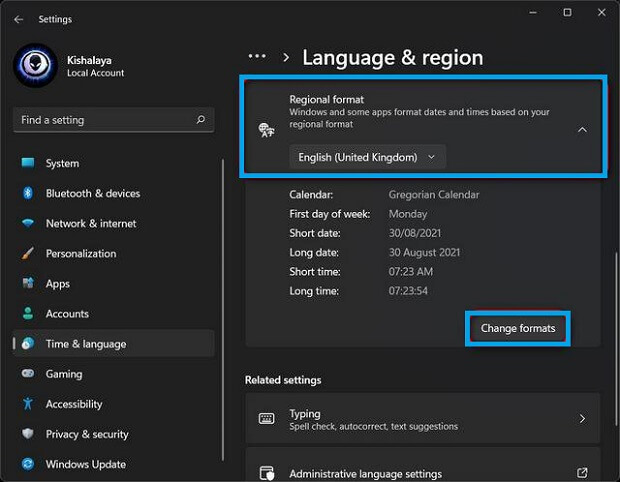
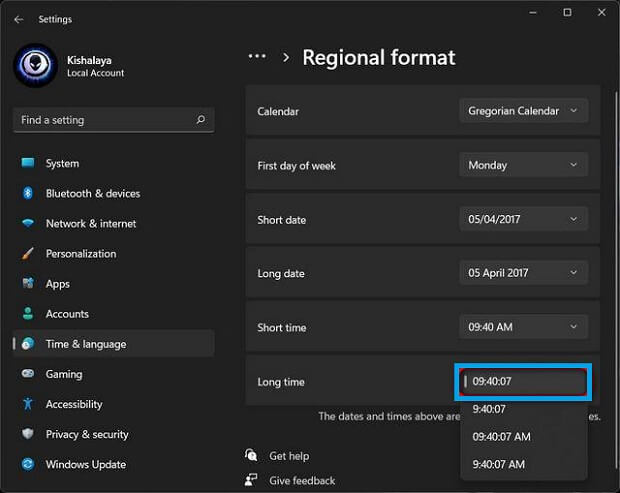
4. For date, choose the desired format, and for the time, choose either a 12-hour clock or 24-hour clock.
2. Via Control Panel
Change Date and Time in Windows 11
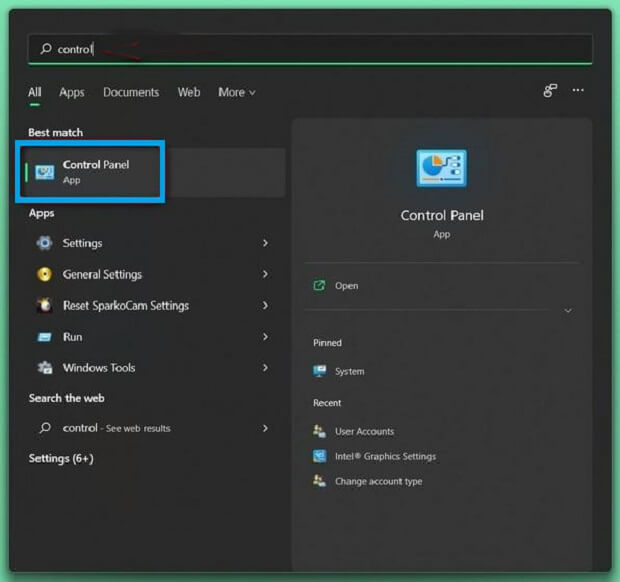
1. Click on the Start Menu and search for the Control Panel.
2. Launch the Control Panel on your Windows 11 PC.
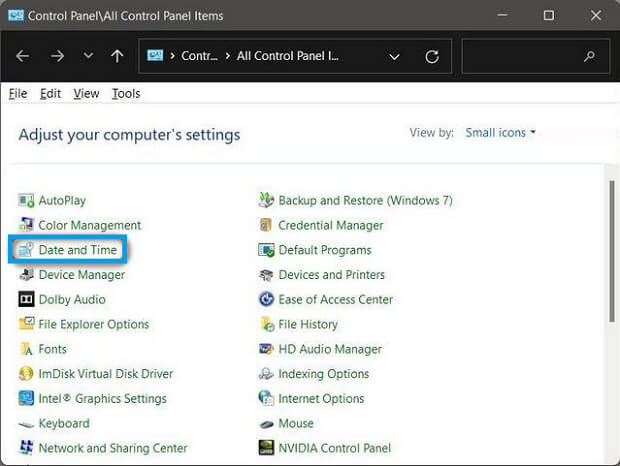
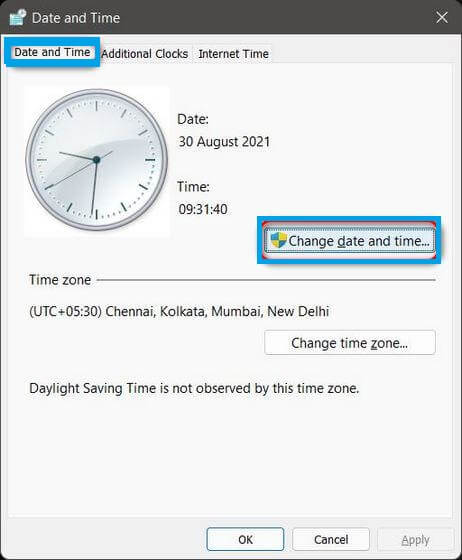
3. Select the Date and Time option.
4. On the pop-up window click on the Change Date and Time option.
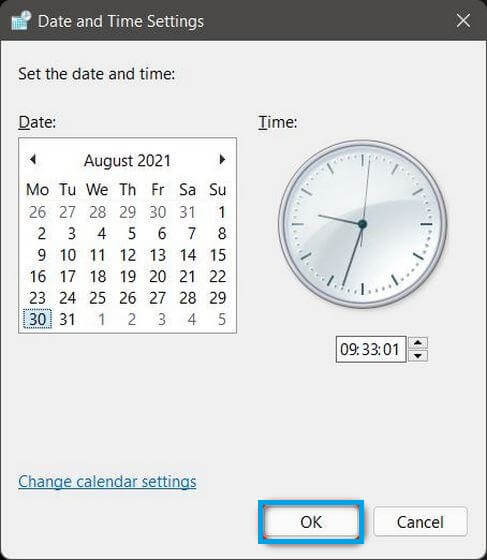
5. Click on the correct date and also set the time using the analogue clock.
6. Click OK and you are done.
Change Date and Time Format in Windows 11
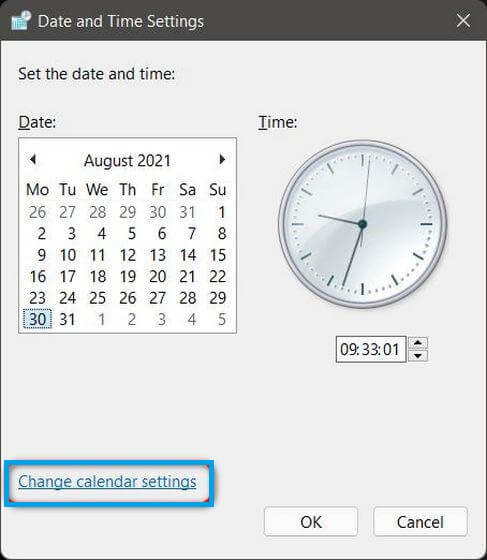
1. Open the Control Panel >> Date and Time >> Change Date and Time.
2. Click on the Change Calendar Settings.
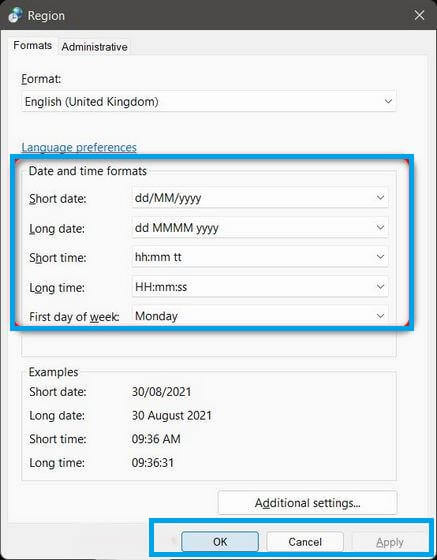
3. Choose the Time and Date format as you want.
4. Click Ok and then click Apply.
3. Through PowerShell
Change Date and Time in Windows 11
1. Open the Start Menu and search for PowerShell.
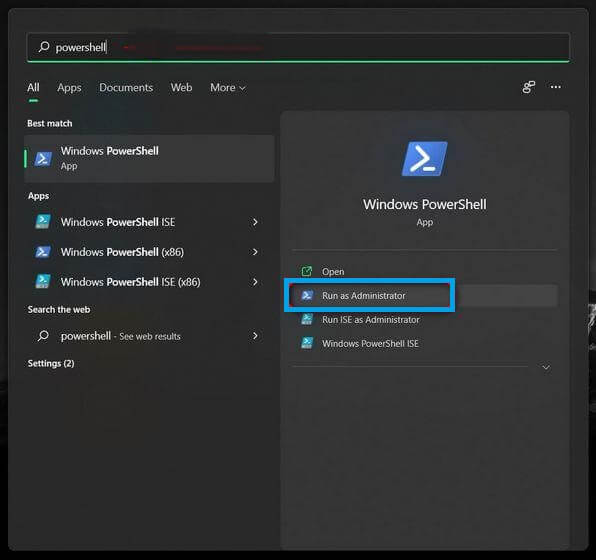
2. Choose the Run as Administrator option.
3. One simple comment will change the Date and Time.
4. Enter Set-Date -Date “dd/mm/yyyy HH:MM AM” or use Set-Date -Date “dd/mm/yyyy HH:MM PM”.
For instance Set-Date -Date “09/10/2021 06:04 AM” or Set-Date -Date “09/10/2021 06:04 PM”.

5. Press Enter and it is all set.
Change Date and Time Format in Windows 11
You can change the format by specifying the command in a different way. For instance, instead of Set-Date -Date “dd/mm/yyyy HH:MM PM” you could try Set-Date -Date “mm/dd/yyyy HH:MM PM”.
Related Guide: How to Roll Back to Windows 10 From Windows 11
4. With Command Prompt
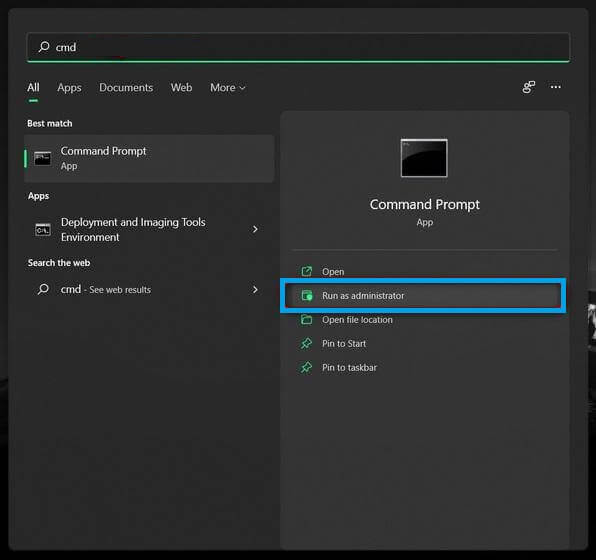
1. Click on the Start Menu and search cmd.
2. Choose Run as Administrator.
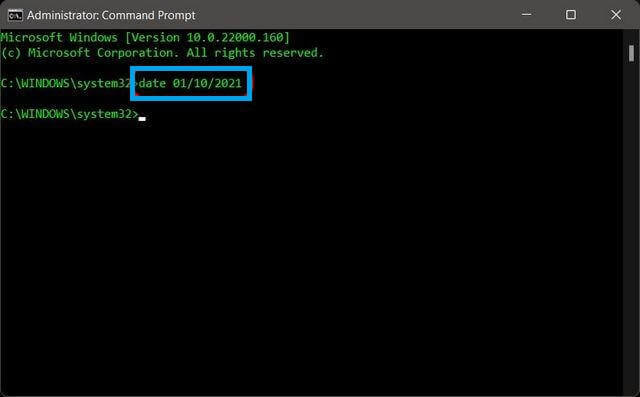
3. Enter the command as date dd/mm/yyyy or date mm/dd/yyyy. For instance, to set the date as 16th Sept 2021, you can type as Date 16/09/2021 or 09/16/2021.
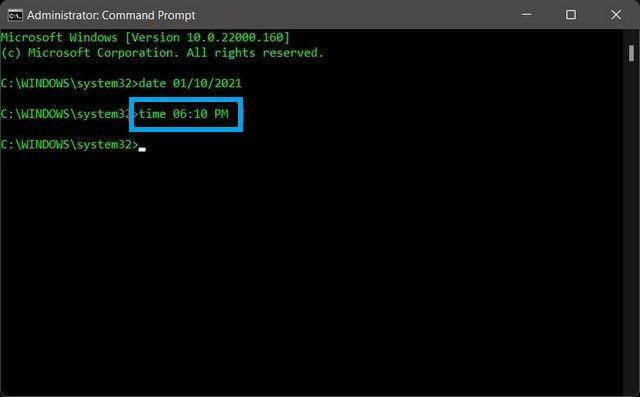
4. To set the time, use the command: time HH:MM. To set time as 6.10 PM you can either use time 06:10 or time 18:10.
Sync your PC with Global Server for Automatic Date and Time adjustment
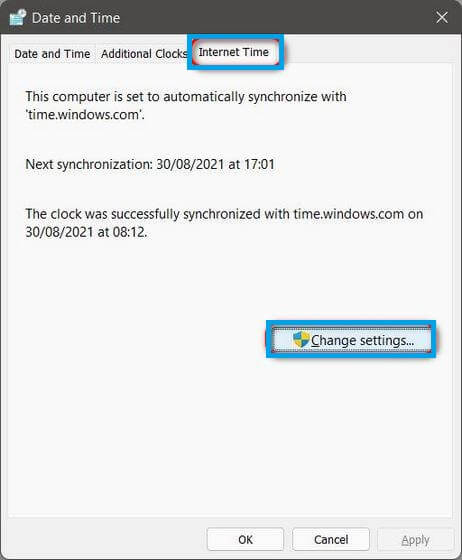
1. Go to Control Panel and choose Change Date and Time.
2. Click on the Internet Time tab.
3. Choose Change Settings.
4. Choose your preferred server.
5. Click on Update Now and click OK.
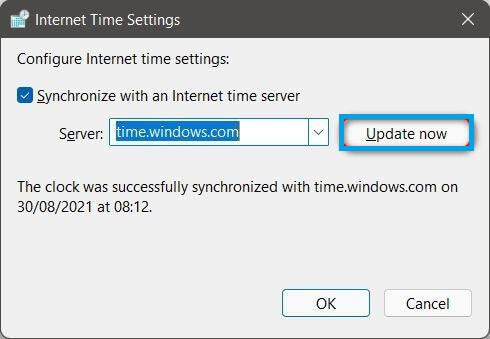
6. If you don’t want to sync your time with an Internet server. Uncheck the box near “Synchronize with an internet time server.”
And that is it. You have successfully changed the time and date settings on your Windows 11 PC. It is the same as that of Windows 10 but with minimal differences. If you have any queries related to this, do let us know in the comment section below. Make sure to communicate with us on our Facebook and Twitter pages.