When browsing the internet, did you ever wonder why the website or webpage is loading slowly even with the faster internet connection? This may be due to the DNS services provided by your network carrier or your WiFi carrier. Luckily, you can change the DNS on Android manually by tweaking the WiFi settings.
What is DNS?
DNS (Domain Name System) is a naming system for the internet. The main function of the DNS is to convert the domain names into IP addresses so that it can be accessed over computers and smartphones. For instance, techowns.com can’t be read by your smart devices directly. With the DNS, techowns.com will be translated into an IP address like 102.25.26.184
The problem with the built-in DNS service is that it will take more time to convert the domain name into an IP address. In some basic Android devices, it is less secure. To avoid those issues, you need to change the DNS on your Android smartphone manually.
Available DNS Services
When changing the DNS, you need to what are the services available. Right now, only two DNS services are available.
- 8.8.4.4. & 8.8.8.8 (Google)
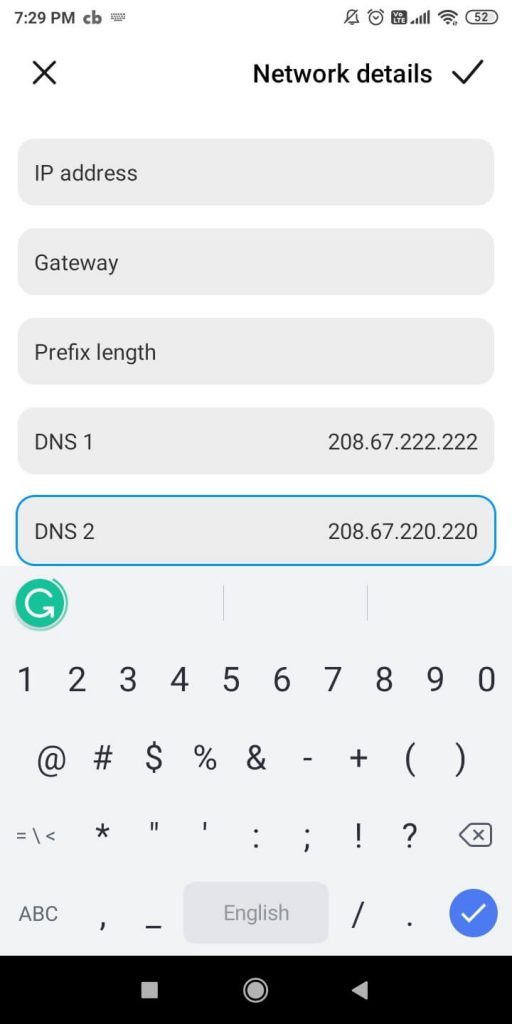
- 208.67.222.222 & 208.67.220.220 (OpenDNS)
Both are reliable and fast. You can choose anyone from the two.
How to Change DNS on Android Smartphones?
In the manual method, you will have the limitation. You can’t change the DNS service of your SIM carrier. You need to root your smartphone to do that. But, you can change the DNS when the device is connected to a WiFi network.
(1) Make sure that your Android smartphone is connected to a WiFi network.
(2) Open Settings on your smartphone and go to WiFi settings.
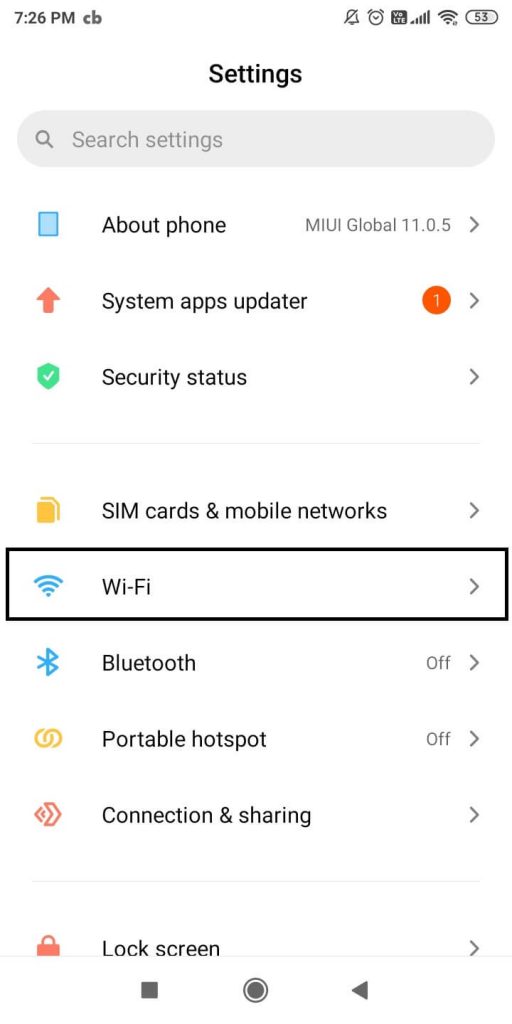
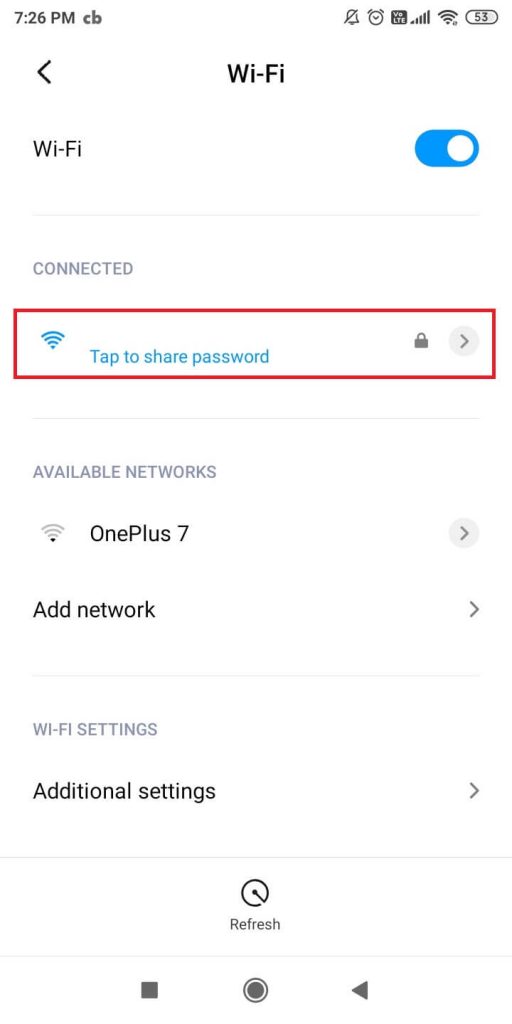
(3) Choose the WiFi network that you are connected to.
(4) Scroll down and tap on the IP settings option.
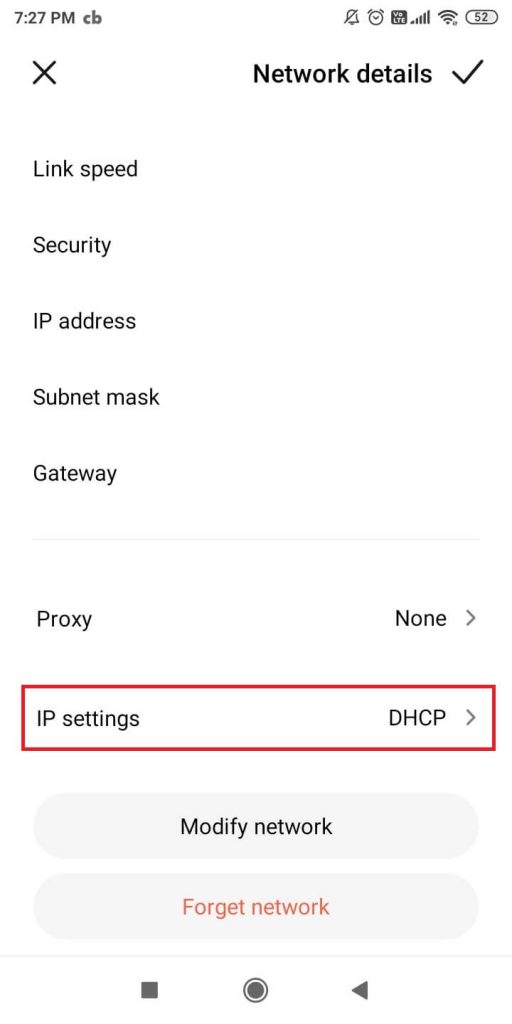
(5) Change it from DHCP to Static.

(6) Now, you will get some additional options. Change the DNS 1 and DNS 2 to any of above mentioned IP.
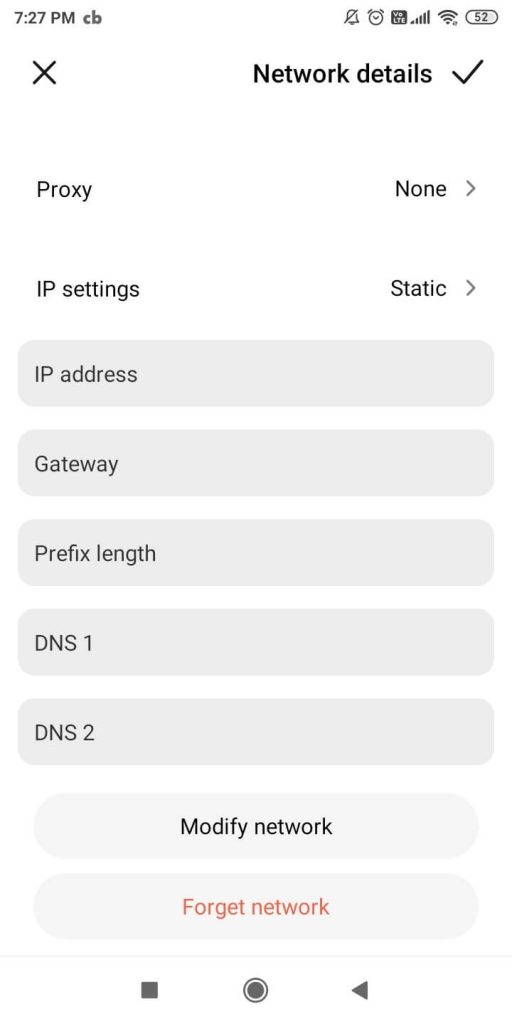
(7) Click the Tick icon on the top right of the screen.
Note: If you want to change the DNS for two or more WiFi networks, you need to change in one by one on all the WiFi networks.
Techowns Tip: How to See WiFi password on Android?
That’s it, you have successfully changed the DNS on your Android. Now, you will get a faster internet with a secure connection. If are willing to root your Andriod, you are free to change the DNS for your SIM carrier. If you have any doubts about the DNS, tell us in the comments below.
Follow our social media platforms, Facebook and Twitter to get more hacks for Android smartphones.