Generally, all the windows device comes with support for several languages. You can choose a particular language as a default one based on your preference. However, you don’t need to modify the input settings for changing the keyboard language. Instead, Windows 10 language settings let you add an unlimited number of languages to your library. While doing so, you will be able to change your keyboard language whenever you want. Likewise, you can remove a language from your default list directly anytime. To add a language and change the Windows 10 keyboard language settings, you could follow the below instructions.
Contents
How to Change Keyboard Language on Windows 10
#1: Open the Windows Settings, by pressing the Windows key + I key on the keyboard.
Note: Alternatively, click Start and select the Settings icon.
#2: Tap the Time and Language option.
#3: Click the Language menu on the left pane.
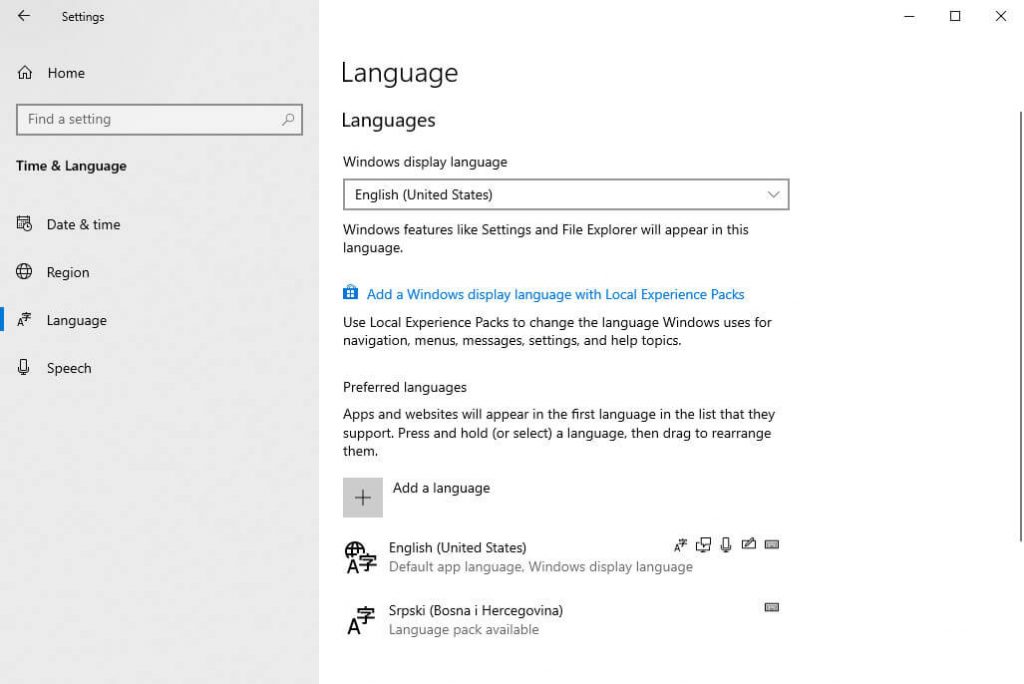
#4: Next, Click the Add a Language option.
#5: Select the default language from the list.
#6: Click Options.
#7: Under the Keyboards section, select the Add a Keyboard option.
#8: Choose the new keyboard language that you want to add.
How to Switch Between Languages
Once you added more than one language, you can switch between the languages whenever you want.
#1: Click the Language Abbreviation button on the taskbar.
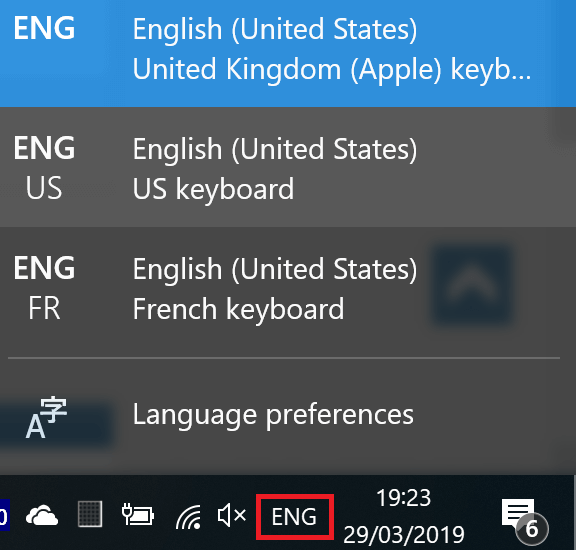
#2: Choose the input language that you want to use.
Change Keyboard Language Shortcut: You can press and hold the Windows key and continuously press the spacebar to change the input language.
NOTE – The procedure to switch between input languages is very similar in Windows versions.
How to Remove Added Keyboard Language
If you want to remove the input keyboard language on your Windows device, you can remove it from the settings.
#1: Go to Language settings and select the Language option.
#2: Now, choose the default language from the list.
#3: Next, select Options.
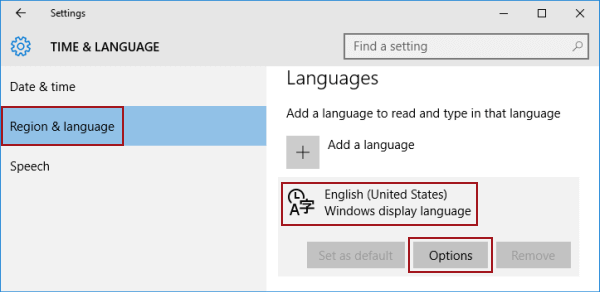
#4: Hover to the keyboard section and click on the keyboard language that you want to remove.
#5: Click the Remove option and it will remove the selected keyboard language from your Windows device.
Change Keyboard Language on Windows 8
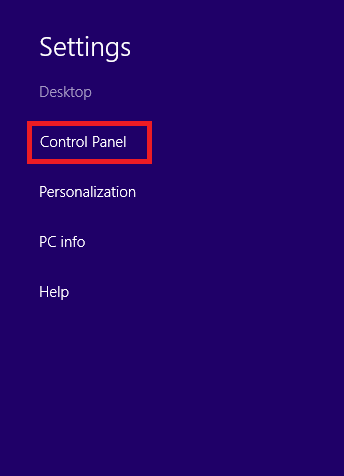
#1: Swipe the mouse pointer to the top right corner of the screen.
#2: Click on the Control Panel menu.
#3: Locate Language and click on it.

#4: Under the Language preference screen, select Add a Language option.
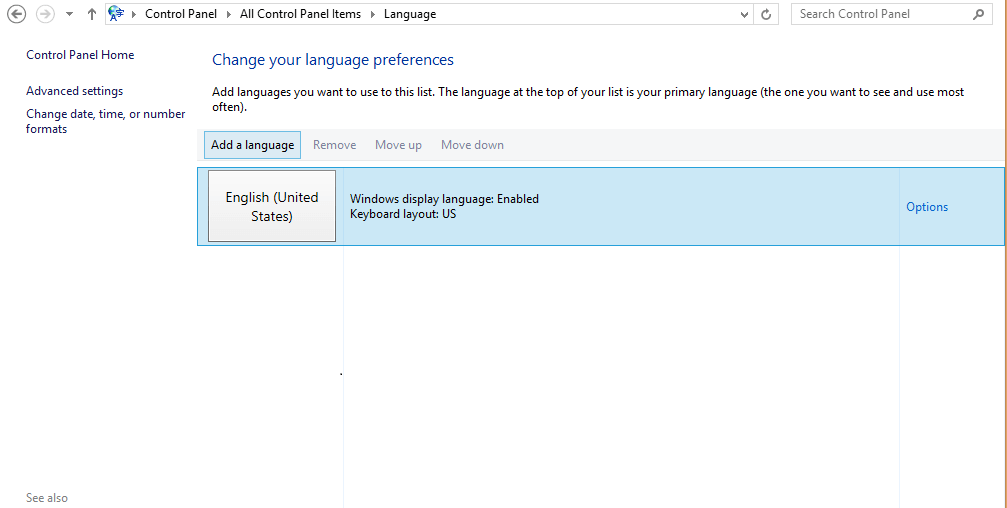
#5: Choose the language that you want to add.
Change Keyboard Language on Windows 7
#1: Click the Start button at the lower-left corner of the screen.
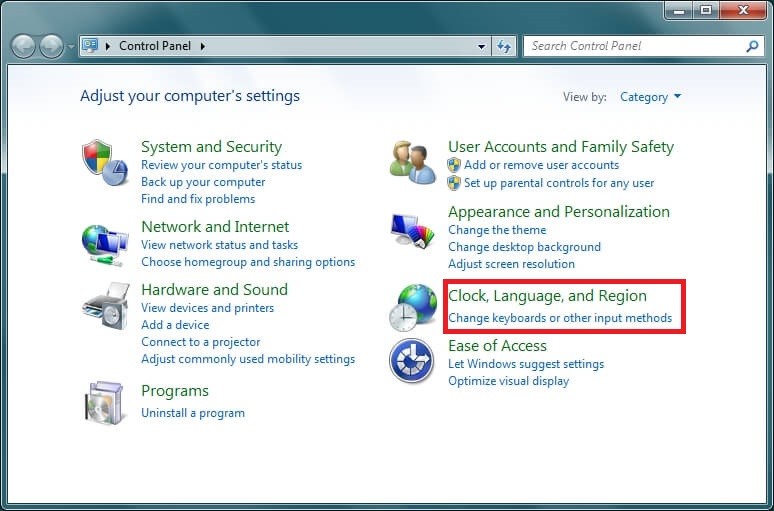
#2: Select Control Panel.
#3: On the control panel window, locate Clock, Language, and Region option and click on Change Keyboards or other input methods.
#4: Next, click on Keyboard and language tab followed by the Change Keyboards option.
#5: After that, select the General tab. You will see the list of currently added languages and click on the Add button to add a new one.
#6: From the list of the available languages, select the Language you wish to add and click OK.
Have you found this guide really helpful? Share your feedback below. Hit the follow button on our Twitter and Facebook pages to get our latest guides instantly.