Twitch is a platform to show your gaming skills to people worldwide. With Twitch, you can stream videos related to gaming, cooking, vlogs, singing, etc. While streaming a video on Twitch, you may want to save or record a certain part for future use. For that, Twitch offers a built-in feature called Clip. You can use the Clip feature on Twitch to capture your favorite part of the video. You can share that clip with your family and friends by sharing a link on social media or Twitch Whisper.
Contents
How to Use Clip on Twitch (Windows & Mac)
The Clip feature in Twitch helps in saving the desired moment in the video stream, and even you can publish, edit and download it on your device.
1. Launch Twitch on your Windows or Mac browser.
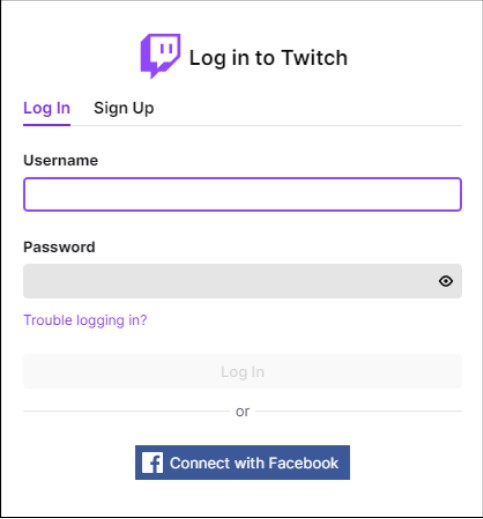
2. Log In to your Twitch account.
3. Click on any video you would like to capture and then play it.
4. Click on the specific time track you need.
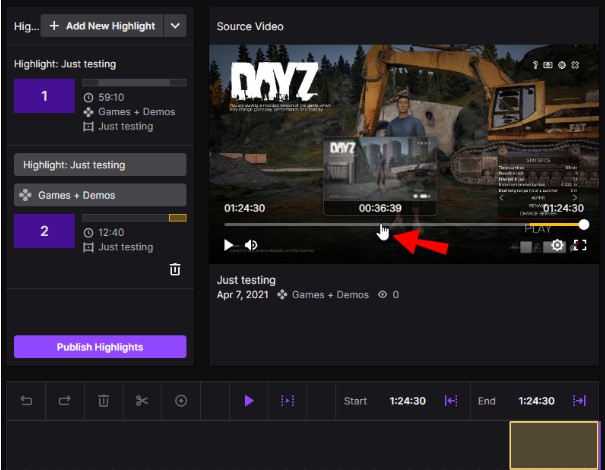
5. Click on the Clip icon on the bottom right.
6. You can also use the shortcut keys to clip your favorite part. For Windows, press Alt + x. For Mac, press Option + x.
7. A new window will appear. Using your mouse, drag the slider to fix the start and ending points of the video.
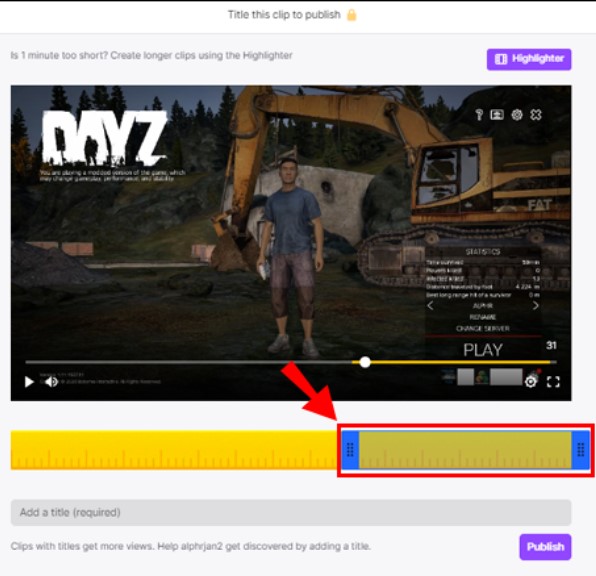
Note: You can clip a video from 5 secs to the max of 60 secs only.
8. Once you have selected your favorite part, add a title to it.
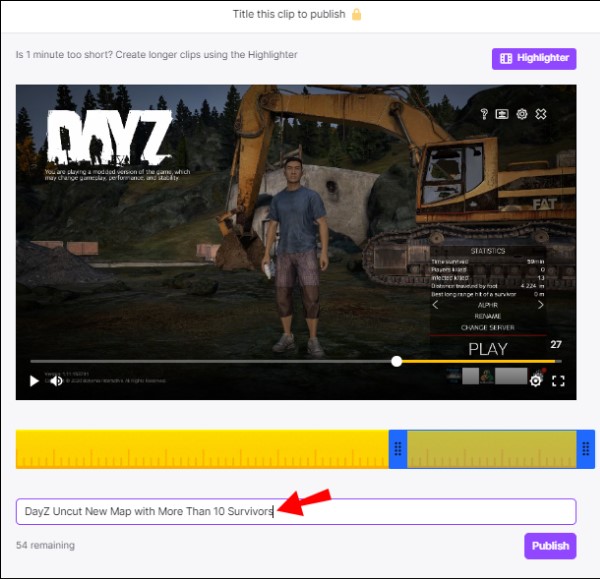
9. After adding, you can publish the video on Twitch by clicking on Publish option.
How to Delete Clip on Twitch
The published clip can be deleted from your Creator dashboard at any time.
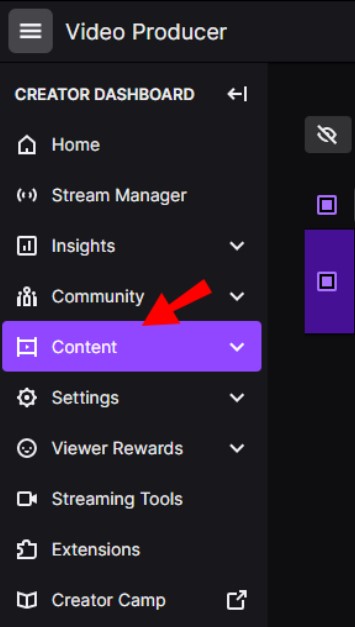
1. Tap on your Twitch profile picture → select Creator Dashboard → choose Content.
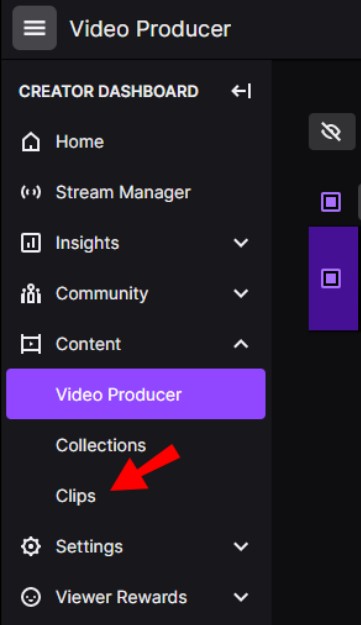
2. Select Clips.
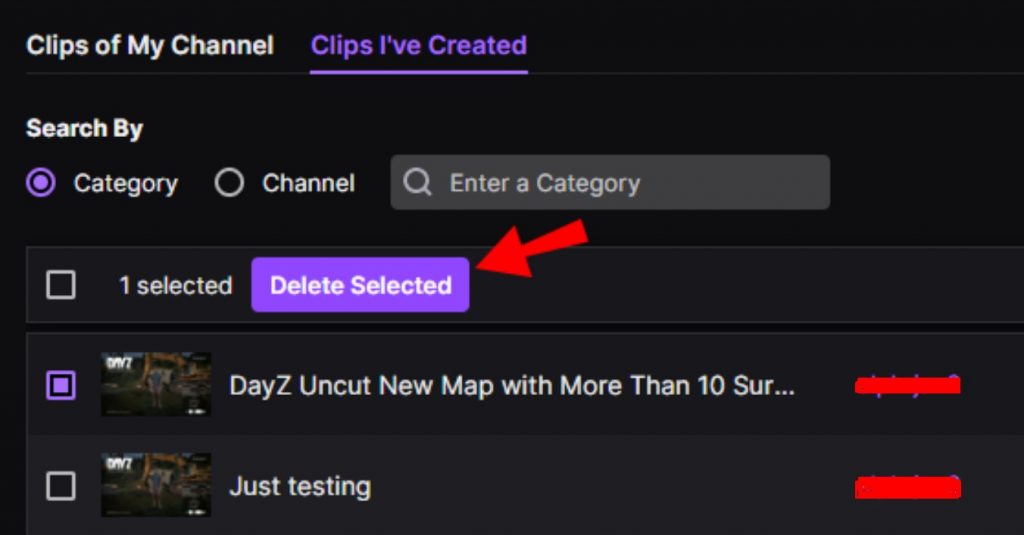
3. Go to Clip Manager -> Clips I’ve Created.
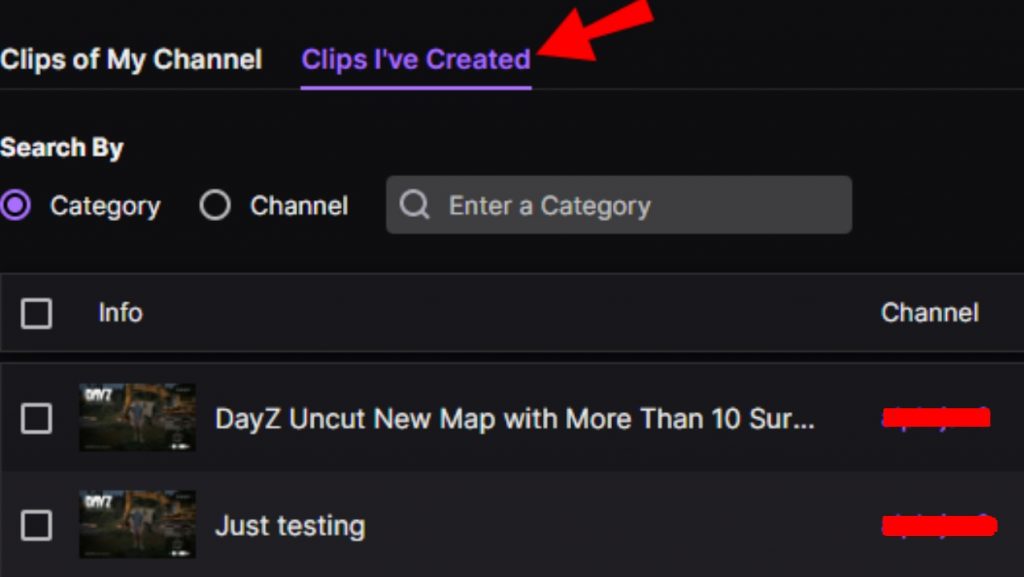
3. Choose the clip you want to delete and click Delete Selected.
How to Use Clip on Twitch (Android & iPhone)
Using the Clip feature on a smartphone is very much easier compared to the browser version.
1. If you haven’t installed the app on the smartphone, install it from the Google Play Store and App Store.
2. Launch the app and log in using your credentials.
3. Tap on the video you like to make a clip.
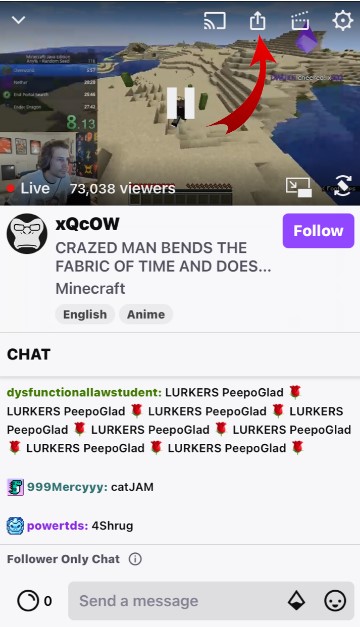
4. Click on Play.
On iOS, click the Share icon > Create Clip. For Android, click on Create Clip icon at the bottom.
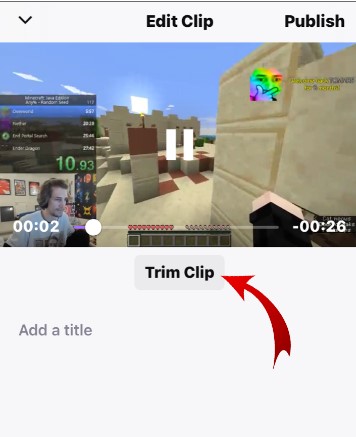
5. Once you click on the clip, Twitch will create a 30 secs video.
6. You can also use the Trim Clip feature to alter the clipping.
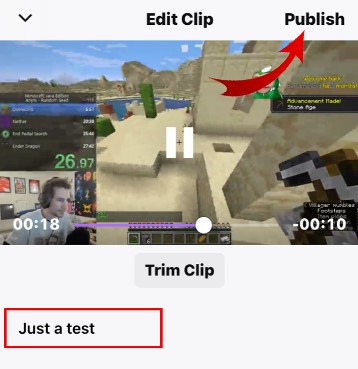
7. If everything is fine, click Done.
8. Similar to the browser version, enter a title for the clip and click on Publish.
Managing Clips on Twitch
After recording a clip, you can edit, manage and save your clips.
1. Click on Content on the Creator Dashboard.
2. Click Clips -> Clips Manager.
3. The Clips of My Channel section contains clips you have created on your own.
The Clips I’ve Created section contains clips that you have created from other channels. Choose any one section.
4. Under the specific section, you can select a clip and edit, delete, or download the clip from Twitch.
Frequently Asked Questions
>On Twitch, go to Creator Dashboard → Content → Clips → select a clip → click on Share -> copy the clip URL.
>Now, open Instagram and swipe the screen from left to right. Tap on Aa and paste the clip link.
>You can change the background color of the story by tapping the color icon at the right bottom.
>Click Next and share the story.
To add a Twitch link to your TikTok bio,
[i] Copy your Twitch profile URL.
[ii] Open the TikTok app on your smartphone, and go to your Profile → Edit Profile → Website.
[iii] In this section, paste your Twitch profile URL and click Save.
On Twitch, go to Creator Dashboard → Content → Clips → select a clip → Share → Download.