Creating content is an excellent way to showcase the beauty, and promote and share knowledge. For example, if you’re making a how-to video that may require you to show how to use a particular product, you may need to capture the screen flow to share the basics of the product. You’ll also need webcam footage to demonstrate how it works. This type of project may require a program that can record both Webcam and screen on Windows 11. Many programs in the market can help to record both Webcam and screen.
These programs allow you to capture the video and create high-quality content that your audience will find helpful.
This article will tell you how to record screens and webcam simultaneously on Windows 11.
Contents
- The Best Tool to Record Webcam and Screen Simultaneously
- Features of DemoCreator
- How to Use DemoCreator to Record the Screen and Webcam?
- How to set webcam recording?
- How to set virtual webcam?
- How to edit a video?
- Add media files to Timeline
- Trim/Crop video clips
- Resize videos
- Rotate video clips
- Change the speed of the video
- Delete unwanted media
- Voice recorder
- Compositing
- Export
- How to remove the background?
- How to add a caption?
- Annotation
- Stickers
- Conclusion
The Best Tool to Record Webcam and Screen Simultaneously
If You want a screen recorder for Windows 11 with webcam and audio. The next thing you need is to have to capture these components separately and put them together in one video.
Therefore, the best software that you can use to record a video that includes both screen and Webcam is the one that makes it easy to capture these aspects at the same time.
In this regard, Wondershare DemoCreator is an ideal solution. It is a desktop capture tool that allows you to record the screen on any Windows version including 11, edit it and export the video. It offers free updates and multiple features.
- It allows you to create presentations and capture screen-flow to record lectures.
- Recording screen and Webcam simultaneously is the only matter of turning these options on in the settings.
- It has a friendly user interface that makes it one of the most straightforward recording programs.
- It covers a full-fledged screen and comes with an editor interface that you can use to edit your videos.
Features of DemoCreator
- All-in-one screen recorder
The video capture software allows you to record screen, Webcam, and audio simultaneously. You can also edit your created content.
- 2k video quality
It provides high-quality videos up to the resolution of 2048*1080
- Record with camera
It lets you record your screen with the camera simultaneously
- Green screen technology
An advanced feature of DemoCreator, green screen technology allows you to change the background.
- Record with microphone
You can also narrate the video by recording with a microphone.
- Noise removal
It allows you to denoise the video, which optimizes the clearness of the sound of the content.
- Cut and crop
You can cut or crop the video to keep the desired portion.
- Annotations
DemoCreator allows you to add dialogue boxes, lines, arrows, and shapes to the video.
- Stickers
Add stickers of animation effects to enhance the creativity of the video, such as gestures, background, education, game, social media, etc.
- Cursor modifications
You can also change the opacity and sound of the cursor by adding a highlight and click sound to the cursor.
- Multiple formats
It offers multiple formats that support your device, such as MP4, MOV, AVI, MP3, etc.
- Video speed control
You can control the video’s speed by increasing or decreasing it.
- Transitions
It lets your videos look natural and cool by adding transitions like erasing, evaporation, fading, and flashing.
- Captions
You can add captions to the video such as subtitles, end credit, lower-third, etc.
How to Use DemoCreator to Record the Screen and Webcam?
You can record a video with this program. For this purpose, you need to download it.
- Visit the DemoCreator website.
- Click on “Free download.”
- After downloading, install it.
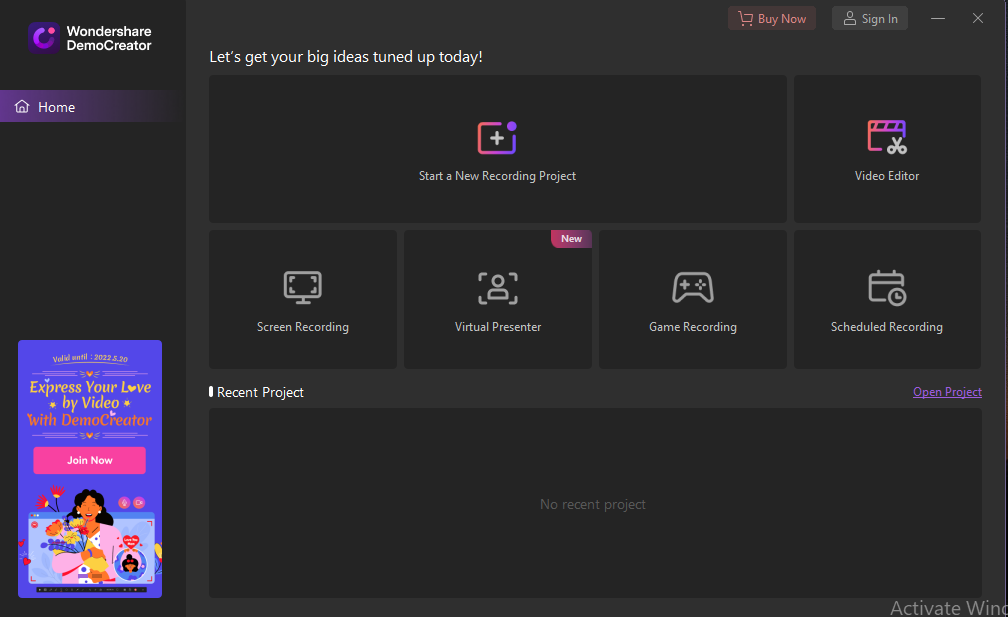
- Run DemoCreator and click on “Start a recording project” to begin the process.
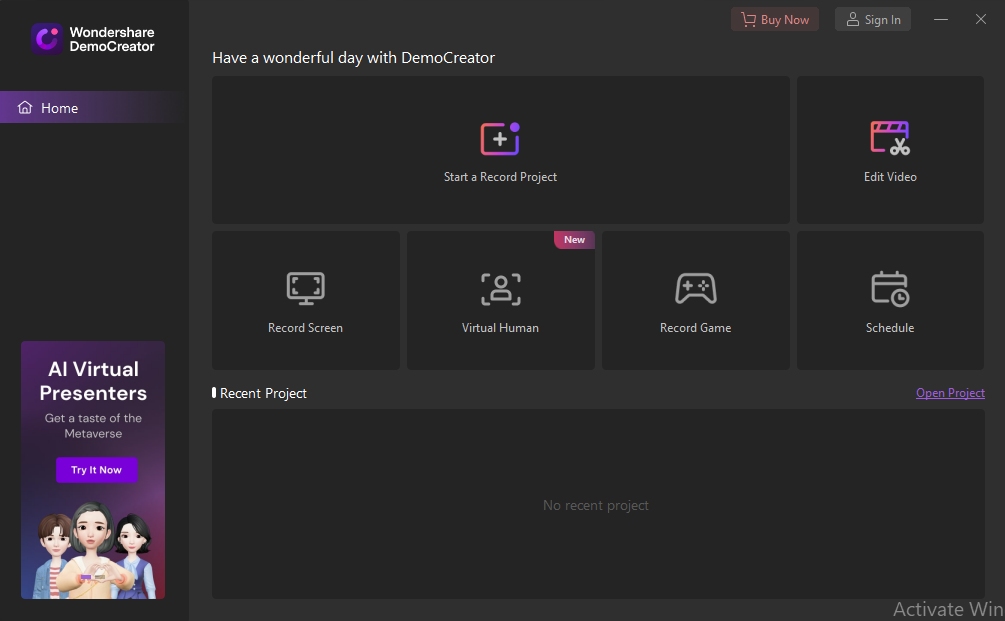
- It will show the number of options you can use to create the desired video. Enable microphone and Webcam. (Make sure it is well connected to the computer)
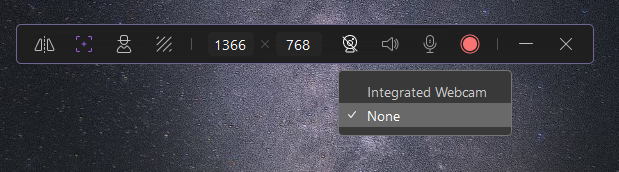
- After that, click on the big round button to start recording. While recording, you can use the screen drawing tool and spotlight tool. Once the recording is over, press the F10 key to stop it.
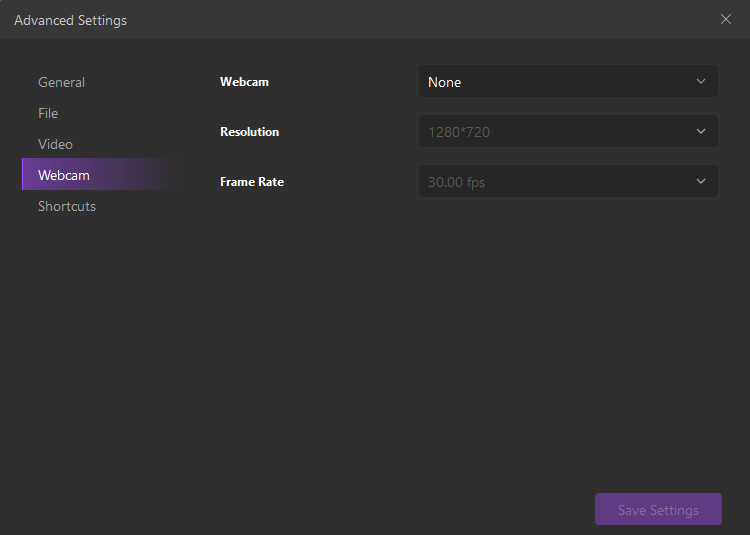
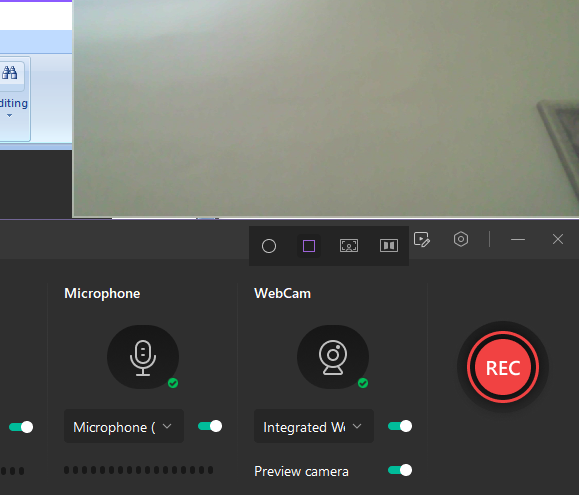
How to set webcam recording?
Let us tell you how to record your screen with the Webcam simultaneously.
For this,
- Open DemoCreator.
- A popup window will appear.
- Start a new project.
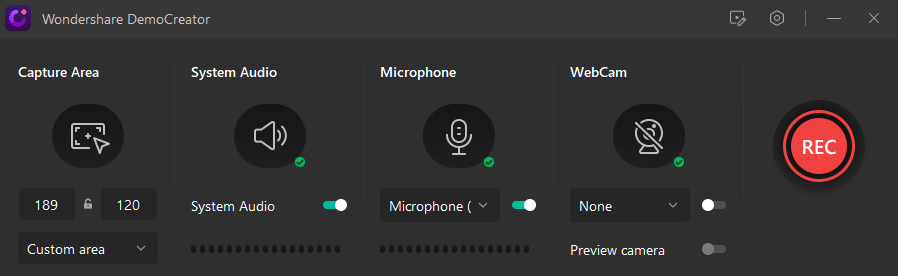
- Enable Webcam.
- Go to settings to choose the Webcam with framerate.
- Click on the red round button to start recording.
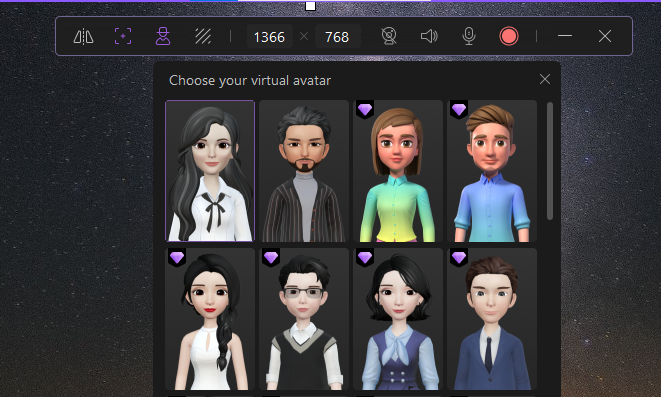
How to set virtual webcam?
Through this software, you can present virtually in your live sessions, Webinars, presentations, etc. You can Capture your screen with a webcam using one of the most excellent tools; DemoCreator.
- Launch DemoCreator.
- Click on “Virtual presenter.’
- Enable Webcam.
- Click on “Virtual avatar.”
- Choose the avatar with whom you want to present in the video.
How to edit a video?
People attract more to visual content. It’s necessary to create engaging content. It may be a time-consuming and challenging task, but with DemoCreator, you can do that in a few clicks.
After recording the video, the next step you need to take is editing. DemoCreator has provided us with basic editing features that we can use to make the content creation.
Let us explain how to edit through this software.
- Open DemoCreator
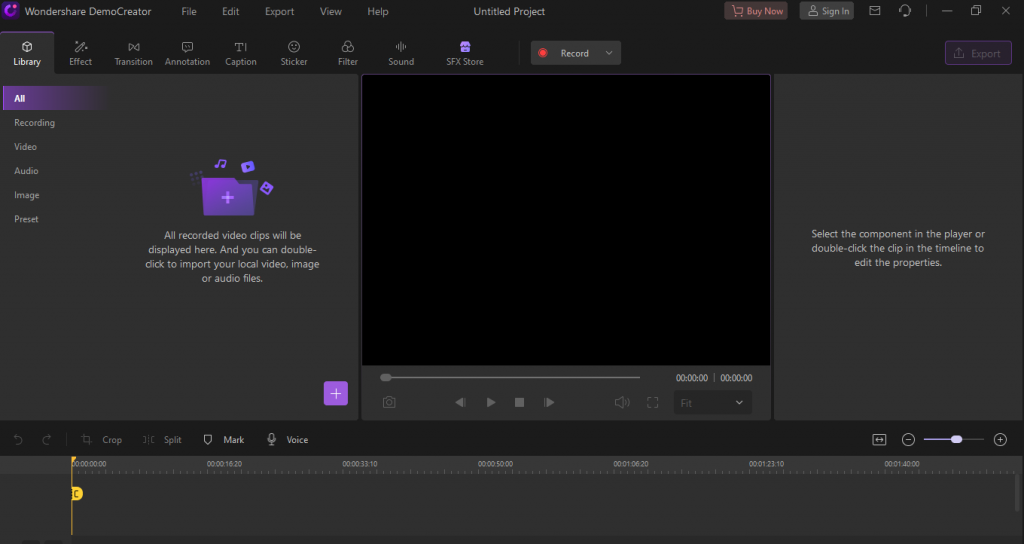
- Click on “Video editor”.
- You’ll see an Editor interface having four operating areas.
- Media library
Where you can import images and videos.
- Timeline
You can drag the media library videos and drop them to the Timeline to crop and cut them.
- Preview window
You can view the changes you’re making to your content.
- Properties window
You can change settings such as control speed, denoise, etc.
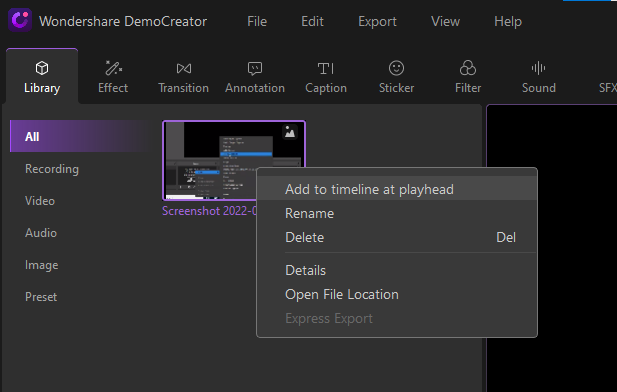
Add media files to Timeline
- Click on the “+” icon to add files from your computer in the media library.
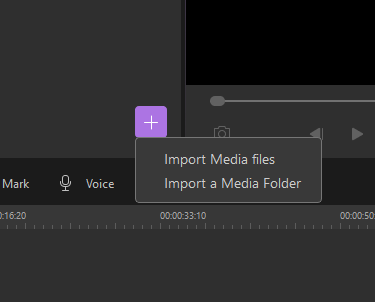
- There are two ways to add media files to timeline
- Drag the file from the media library to the Timeline or the preview window.
- Double-click the file and select “Add to the timeline at playhead.”
Trim/Crop video clips
- In Timeline, select the video and then the cursor to the clip edge. Trim the video by dragging it forward and backward
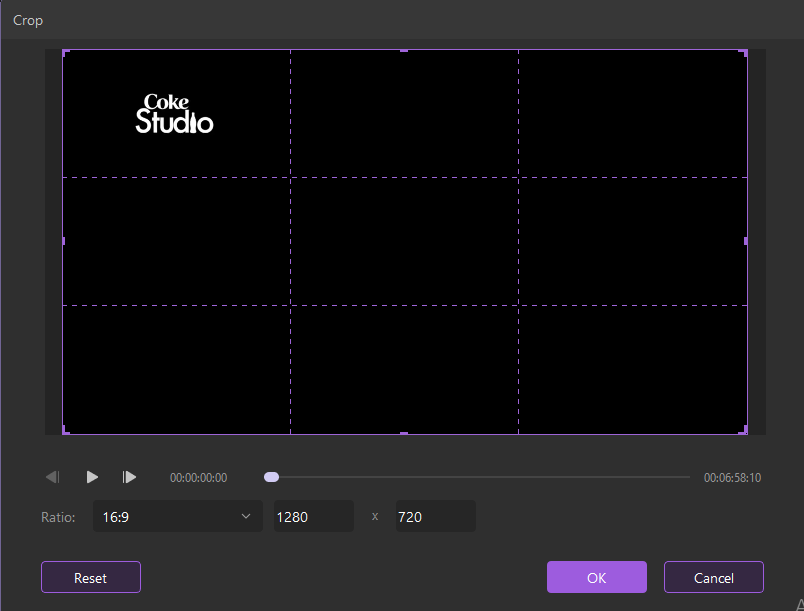
- Click the “Crop” button above the Timeline to crop the clip.
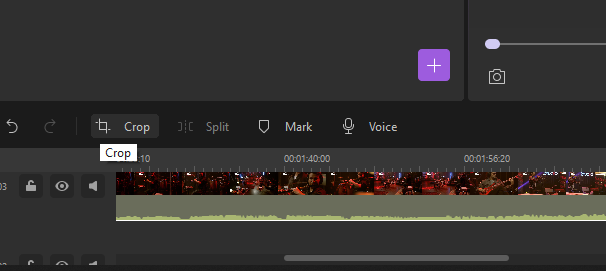
- A popup window will appear. Change the portion of the clip you want to crop and then click “OK.”
Resize videos
There are two ways to resize the clips.
- Click on the clip. On the preview board, drag the purple frame to resize the video.
- Go to the properties area and change the percentage of scale.

Rotate video clips
- Under the properties area, you can adjust the “Rotation” settings.
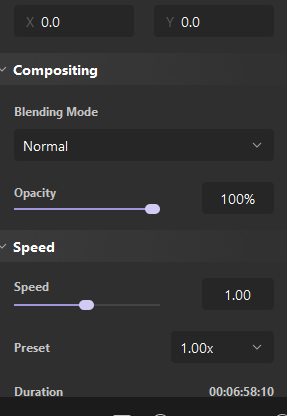
Change the speed of the video
- Select the clip to increase or decrease the speed of the video.
- From the properties window, scroll down to the option”Speed.” Drag the slider forward and backward to increase or decrease it.
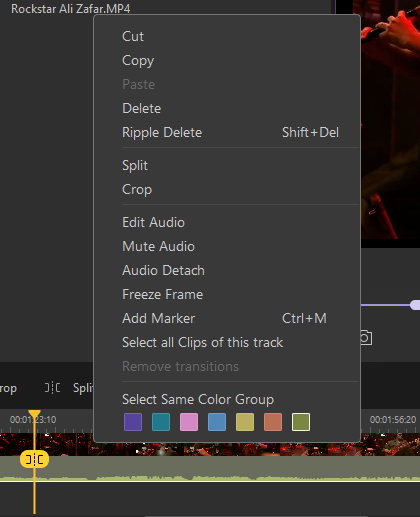
Delete unwanted media
- Right-click on the clip and select delete.
Voice recorder
You can also voiceover to narrate your recording, which is an excellent way of interacting with viewers and sharing knowledge.
- From the toolbar of the Timeline, click the Voiceover icon.
- For this, ensure that your microphone is connected to the computer.
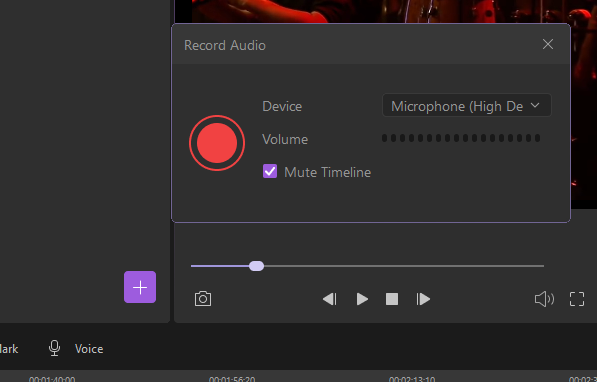
- Click on the red round button to start recording the voice.
Compositing
You can add several effects such as Darken and color dodge. You can adjust the opacity of the image. DemoCreator allows you to access the feature of “Compositing” to add such effects.
- Go to the properties area and adjust blending mode and opacity.
Export
After the editing is finished, you can export your video in multiple formats compatible with your device. DemoCreator allows you to export in multiple formats such as MP4, MP3, AVI, WMV, GIF, etc.
- Click “Export”
- Choose format.
- Name your video.
- Choose the location to store the exported file.
- You can also adjust your video’s
- Resolution
- Frame rate
- Bitrate
- Size
- Preset
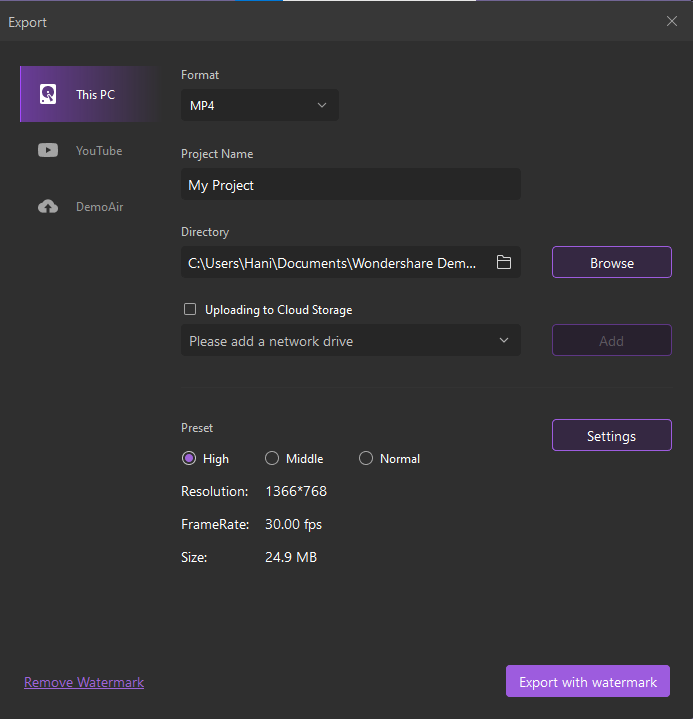
- Once you’ve finished settings, click on “Export.”
How to remove the background?
Sometimes unwanted objects like hair or harsh light, or even dust may appear in your background that can make your content worse.
You’ll need a background remover to remove such unnecessary distractions to attract viewers.
DemoCreator is the solution to your problem. It will help you to remove the background without using green screen technology.
You’ll need a background remover to
- Make your visuals better
- Adding objects to your video
- Use the video for multiple purposes
- Add special effects
- Make content effective
Let’s get started.
- Open DemoCreator
- Click on “Start a new project”
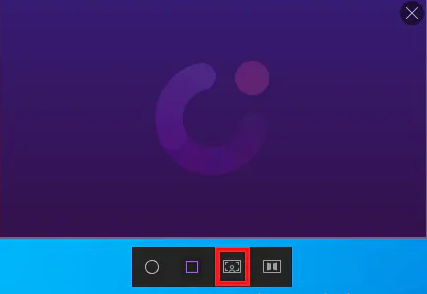
- Change recording settings. It will allow you to change the microphone and webcam settings and the frame
- Ensure that your camera is well connected to the computer. If you’re recording a face Cam, you’ll need to adjust the settings.
- Go to the option under camera overlay; choose the third option from the left.
- You’ll see that your background is removed.
How to add a caption?
Caption allows you to connect with a larger audience. Anyone can view and understand your content, whether they are a deaf or hard-of-hearing problem. It makes your content easy to engage an audience without sound. It also improves the accessibility of your video.
Through DemoCreator, you can make your content more engaging.
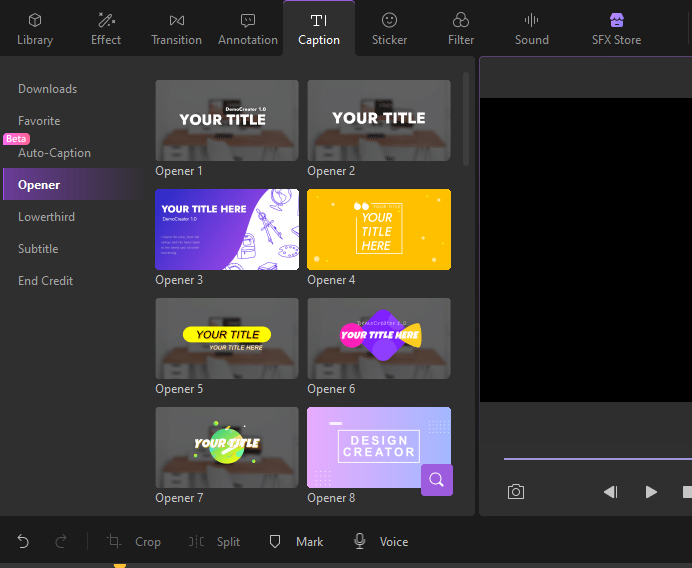
- Click on “Caption”
- You’ll see the number of options, such as
- Auto caption
- Opener
- Subtitle
- Lower-third
- End credit
Annotation
Video annotation helps you enhance your content by adding information, interactivity, and engagement. It increases the viewer’s understanding. It provides consistency and accuracy.
For this,
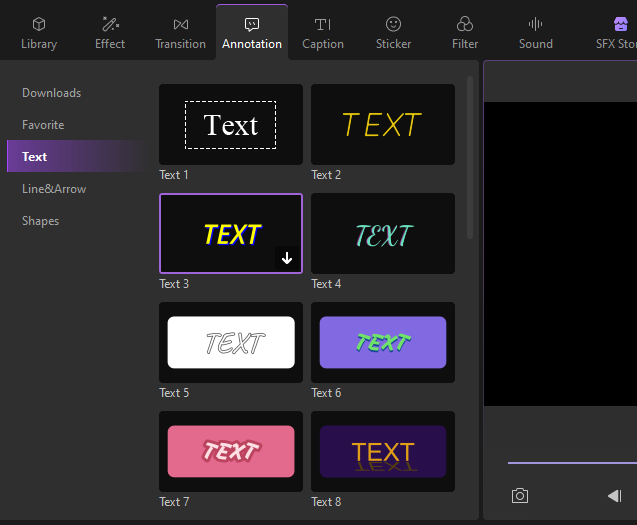
- Click on “Annotation”
- You’ll see many options, such as
- Text
- Arrow&line
- Shapes
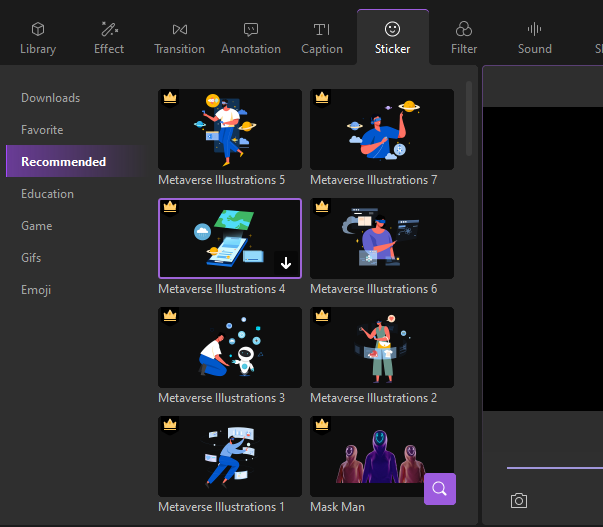
Stickers
Content should be entertaining, so the audience doesn’t get bored. For this purpose, DemoCreator has prepared a variety of stickers to use relevant to your content.
It is an easy way to engage an audience and compel them.
- Click on “Stickers”
- You’ll see many categories, such as
- Education
- Gifs
- Emoji
- Game
Conclusion
Content creating is trending everywhere. It is an easy way to attract viewers and drive more traffic. Whether you’re a teacher, businessman, YouTuber, or gamer, you can create videos and post them on social media. Also, read our guide on the best methods to screen record on Windows 10 systems.
People like visual content more than reading paragraphs. Most people create videos to promote their business. For this, you’ll need this all-in-one screen recorder and demo video maker for your Windows 11 or any older version.