Accessing the iPhone data is a bit intricate when compared with Android OS. iOS devices are highly famed for the camera, resolution and the clarity of the photos. While the iPhone camera gets better with every new iteration, it is vital to note that the high-resolution photos take much of the device space. In such a case, it is good to download or transfer photos from iPhone to PC so as to backup it.
Moreover, transferring iPhone photos will free up device space and you can store your camera roll photos further. Exporting iPhone photos isn’t rocket science, and you can download iPhone photos to any of your preferred devices. The article will guide you on how to transfer photos from iPhone using different devices in brief.
Techowns Tip: How to Export Contacts from iPhone in Easy Ways
Contents
- Table of Contents
- How to Download Photos from iPhone to Computer?
- Steps to Download iPhone Photos to PC/Computer (Using USB Cable)
- How to Download Photos from iPhone to Mac/Macbook (Using Cable)
- Download Photos from iPhone to Macbook/Mac
- How to Download Photos from iPhone to PC/Computer Wirelessly
- Download Photos from iPhone to PC using iCloud Photos
- Download Photos from iPhone to PC using iCloud.com
- How to Transfer Photos from iPhone to Mac Wirelessly?
- Download Photos from iPhone to Mac using iCloud Photos
- Download Photos from iPhone to Mac using AirDrop
- How to Download Photos from iCloud to iPhone?
- To Download Select Images,
- To Download All Images,
- Winding Up
Table of Contents
- How to Download Photos from iPhone to Computer?
- How to Download Photos from iPhone to Mac/Macbook (Using Cable)
- How to Transfer Photos from iPhone to PC/Computer Wirelessly
- Download Photos from iPhone to PC using iCloud Photos
- Download Photos from iPhone to PC using iCloud.com
- How to Transfer Photos from iPhone to Mac Wirelessly?
- Download Photos from iPhone to Mac using iCloud Photos
- Download Photos from iPhone to Mac using AirDrop
- How to Download Photos from iCloud to iPhone?
- Conclusion
How to Download Photos from iPhone to Computer?
With Windows Photos app, it is possible to download photos from iPhone 5 on Windows 10 PC. If your running on Windows 7, the ‘Auto Play‘ will pop-up. Whereas the Windows 8 or above will auto-detect the iPhone and you will get a ‘Tap to choose what happens to this device’ pop-up. Just click the Import Photos and Videos option. Other than this, the guidelines given below is the same for all Windows OS versions including Windows 10/8/8.1/7.
Steps to Download iPhone Photos to PC/Computer (Using USB Cable)
Step 1: Connect your iPhone with your computer or laptop using a USB cable.
Step 2: Photos app will launch automatically. Alternatively, you can also go to the Windows Start menu to search and open Photos app.
Step 3: Navigate to the top right corner to select Import icon that looks like a box with an inverted arrow inside.
Step 4: On the next screen, choose the photos that you want to download or transfer.

Step 5: Then, click the Continue button from the lower-left corner to proceed.
Step 6: The next screen will show you the location in which the iPhone photos will be saved. If you want to change, then click on the link.

Step 7: Further, you can click the checkbox to delete the imported files. Click on Import button to transfer them.
Step 8: After importing, you may view photos in Collections menu or choose Album icon from the left sidebar to view any specific albums.
By following the above guidelines, you will be able to successfully download iPhone photos to Windows PC.
How to Download Photos from iPhone to Mac/Macbook (Using Cable)
Importing or downloading photos from iPhone to Mac is an easy process. With a USB cable, anyone can transfer iPhone photos to Mac PC effortlessly. Make use of the iPhone lightning cable to download iPhone photos on MacBook.
Download Photos from iPhone to Macbook/Mac
Step 1: Connect the iPhone with your Mac PC using the USB cable/iPhone cable.
Step 2: Photos app will launch automatically. Else, open Photos app from Dock, Launchpad, or Applications folder.
Step 3: The photos and videos from the iPhone you have connected to Mac will be shown on the Import screen of Photos app.

Note: If you don’t find Import screen, then click the Import tab icon on Photos app or tap the device name on the Photos app sidebar.
Step 4: Now, select the photos that you want to download.

Step 5: Then clicking on the Imported Selected option to download the iPhone photos on PC. If you want to import new photos, then select Import All New Photos option.
Step 6: Click Last Imported option on the left pane to view the downloaded photos. Opening Imports album will show the list of photos that you have imported.
How to Download Photos from iPhone to PC/Computer Wirelessly
There are two best ways available in which you can transfer photos from iPhone to Windows computer or laptop wirelessly. The section below will discuss the same in detail
- Download Photos from iPhone to PC using iCloud Photos
- Download Photos from iPhone to PC using iCloud.com
Both the methods require your iCloud Account, a storage service by Apple. With iCloud, any iPhone user can upload media onto it and thereby download the same on any other devices like PC.
Download Photos from iPhone to PC using iCloud Photos
To transfer iPhone photos to PC, you can use iCloud Photos app. The instructions given below will help you out with the same.
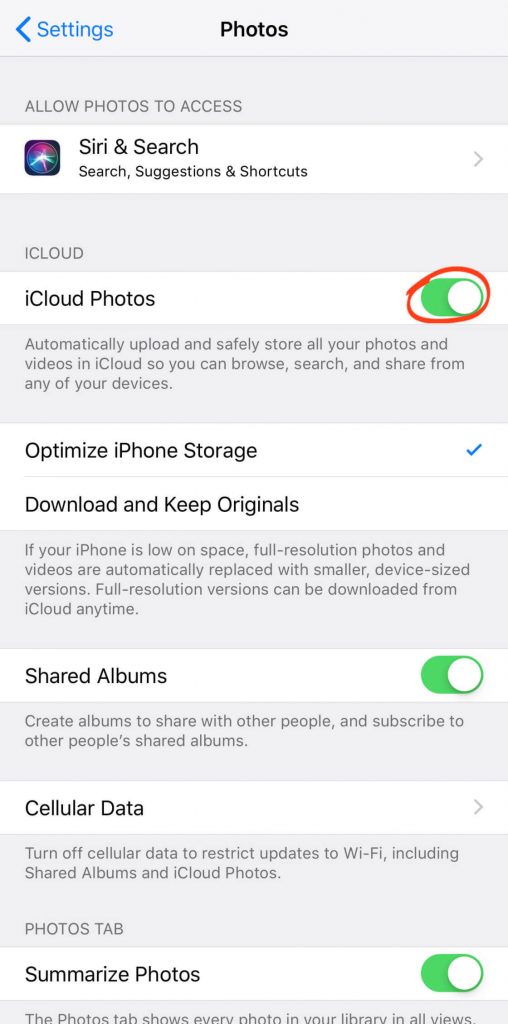
Step 1: On your iPhone, go to Settings > select Photos > choose iCloud Photos/iCloud Photo Library.
Step 2: On your laptop/computer, download iCloud for Windows by clicking on the link https://support.apple.com/en-gb/HT204283
Step 3: After the installation, provide the same Apple ID as your iPhone and sign in to it on Windows PC.
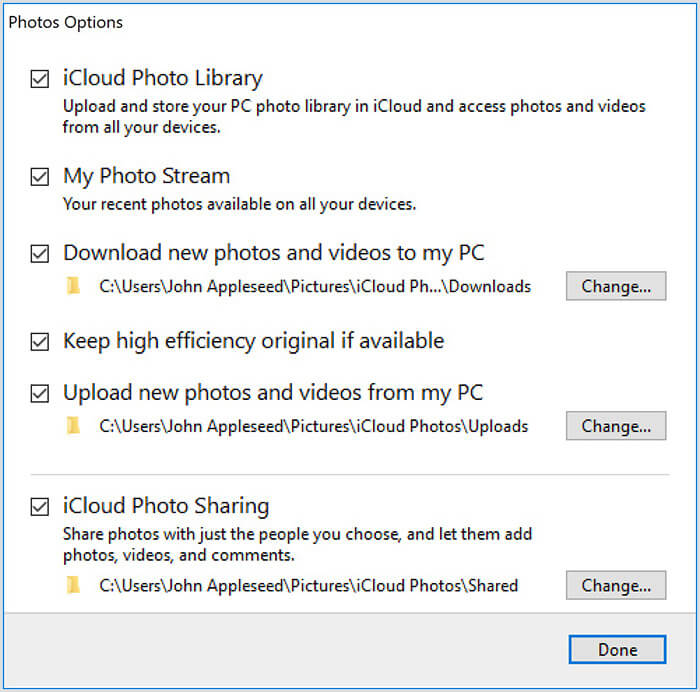
Step 4: When you launch iCloud for Windows app, put a check in for the Photos option and click on the Options button corresponding to it.
Step 5: On Photos Options pop-up, you may check-in any options like iCloud Photo Library, Download new photos and videos to my PC, etc.
Step 6: Finally click on the Done option and then tap on Apply.
With this, any new photo you take on the iPhone will be downloaded on PC (connected with the internet).
Download Photos from iPhone to PC using iCloud.com
It is possible to download iPhone photos from iCloud.com. The guidelines given below will help you get the iPhone photos on PC Windows easily.
Step 1: On your iPhone, click on Settings > select Photos > choose iCloud Photos at first.
Step 2: Open a web browser on PC and go to iCloud.com. Sign in to it by providing your Apple ID and password.
Step 3: If the iPhone uses two-factor authentication, then you should enter the 6-digit PIN on Windows PC.
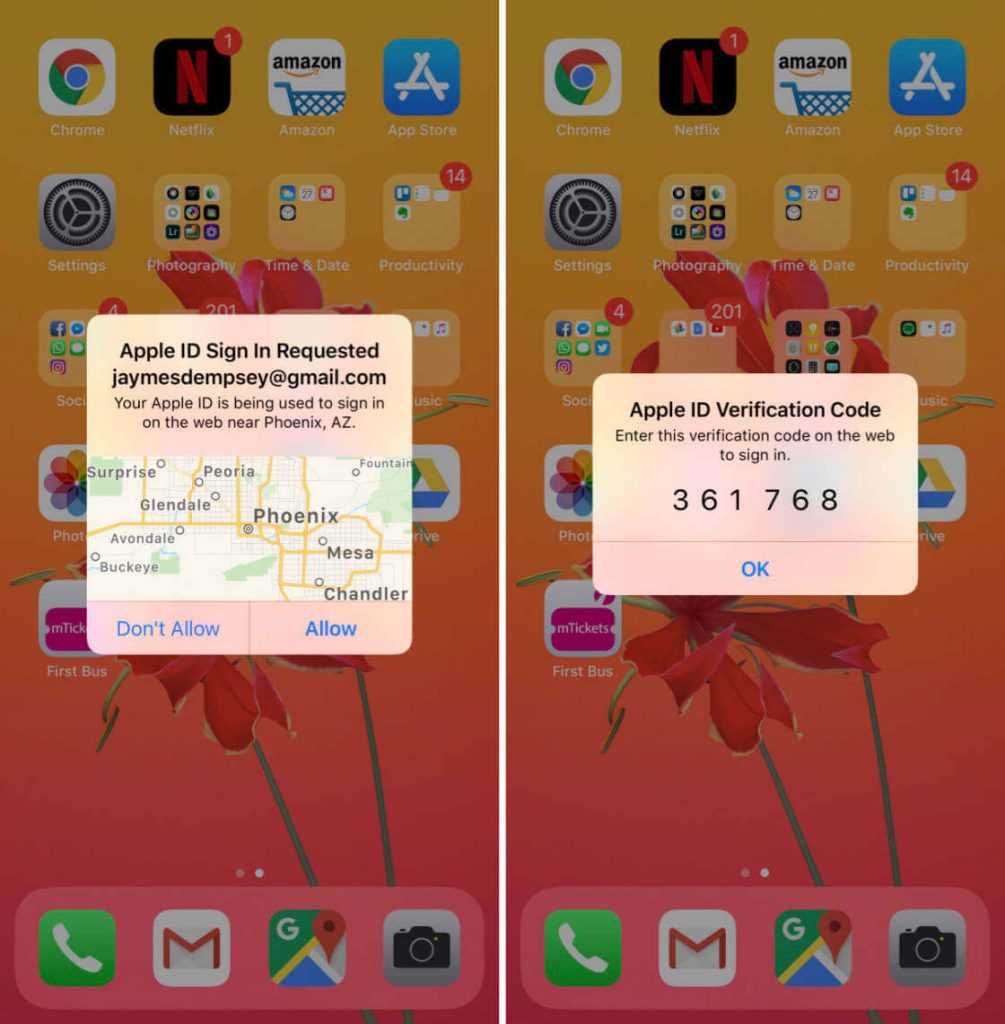
Step 4: Meanwhile on your iPhone, click on the Allow button to confirm. Now the PIN will be shown and enter the same on PC.
Step 5: On iCloud.com, select Photos from the list of options to access photo library of your iPhone.
Step 6: Select Media Types or My Albums option on the left pane to choose the photos you want to download.
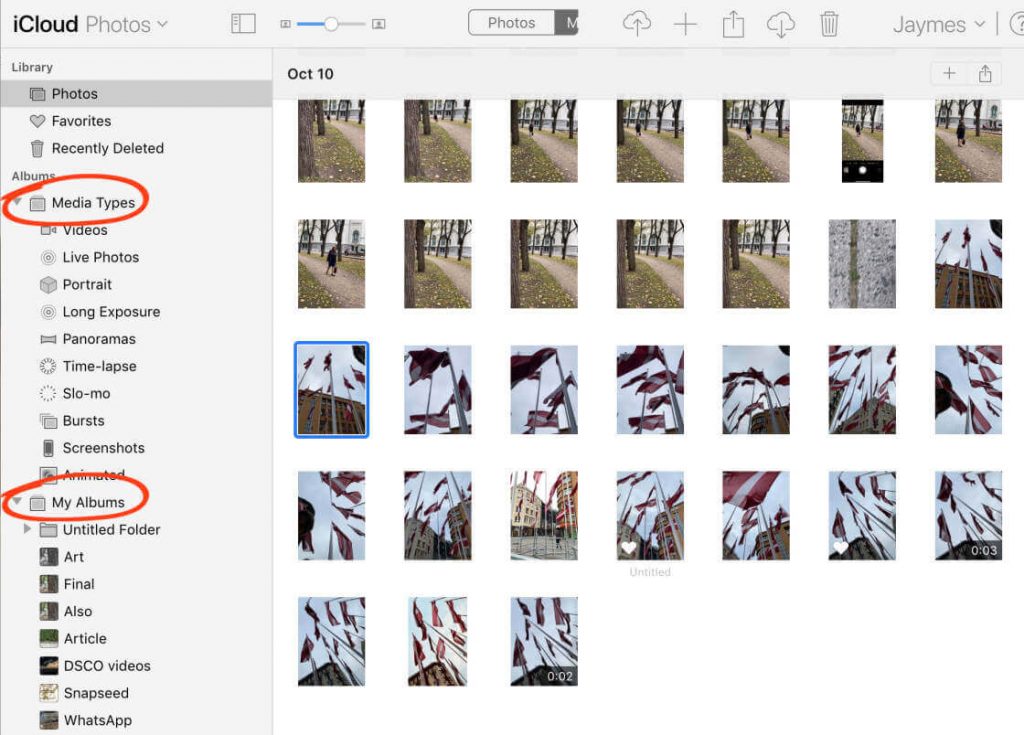
Step 7: Click on the cloud download icon from the top to download iPhone photos on PC.
How to Transfer Photos from iPhone to Mac Wirelessly?
With Mac PC, you can transfer or download iPhone Photos to Mac PC wirelessly. There are two different methods in which you can download photos from iPhone to Mac.
- Download Photos from iPhone to Mac using iCloud Photos
- Download Photos from iPhone to Mac using AirDrop
Download Photos from iPhone to Mac using iCloud Photos
Step 1: With iCloud, you can transfer photos from iPhone to MacBook wirelessly.
Step 2: To begin, click on iPhone Setting > choose Photos > and enable iCloud Photos.
Step 3: On your Mac PC, click on the Apple icon > select System Preferences > choose iCloud.
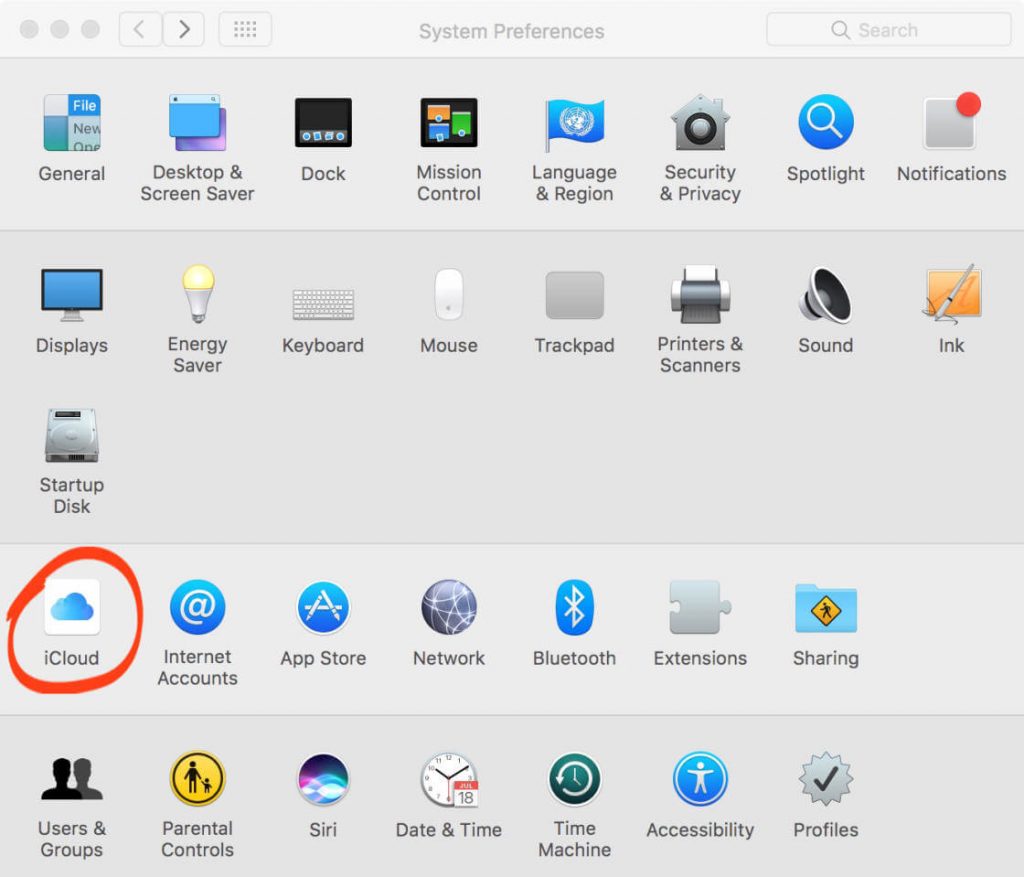
Step 4: Choose Photos and check in the box on the left. Click Options corresponding to it.
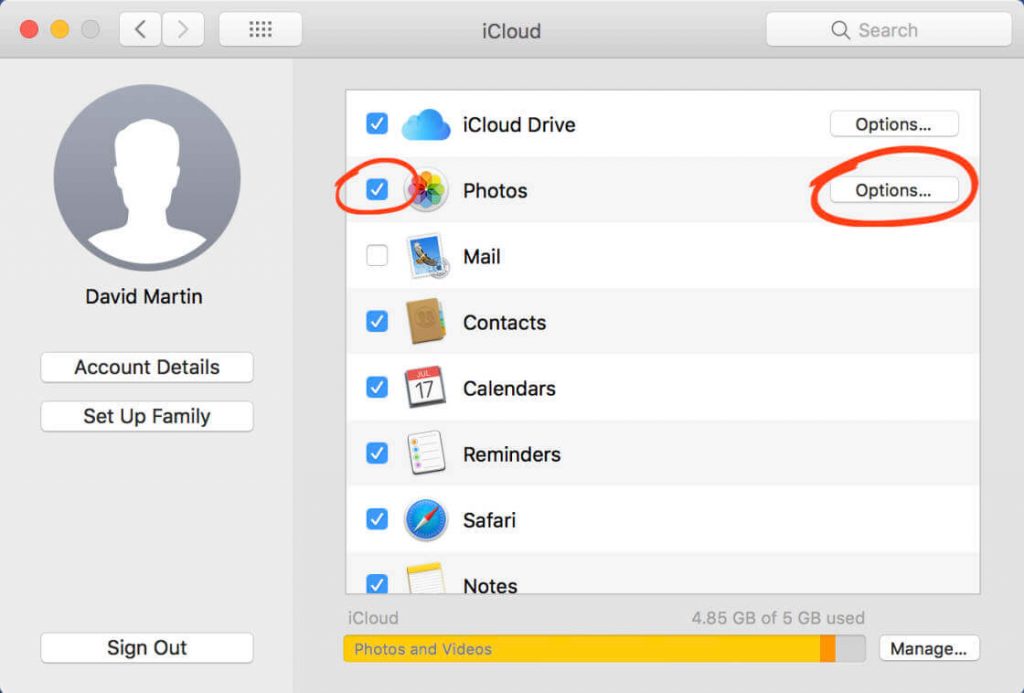
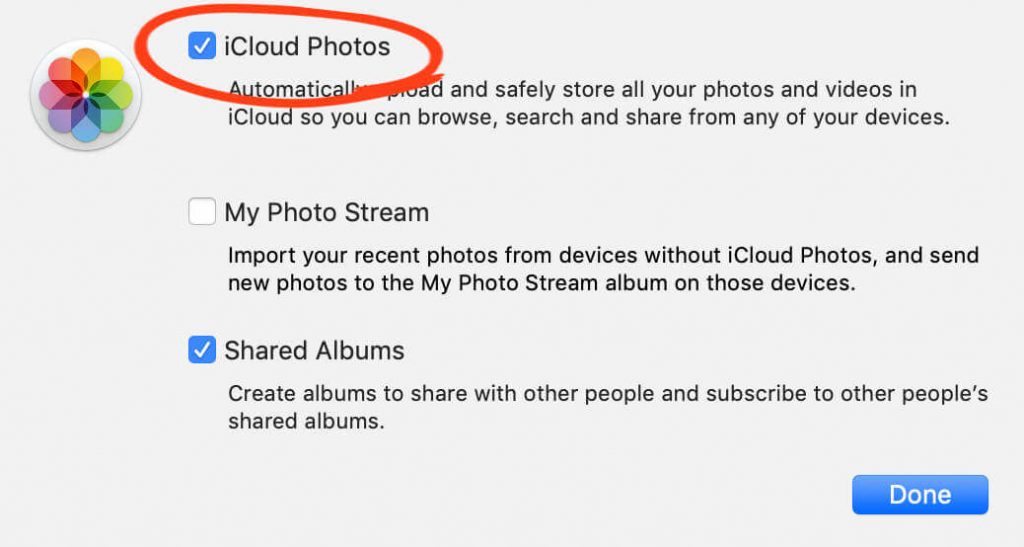
Step 5: Select the checkbox of iCloud Photos and tap on the Done button to close iCloud window.
Step 6: Open Photos App on your Mac PC and choose the photos that you want to download.
Step 7: iCloud Photos is setup on Mac and iPhone. The iPhone photos will be copied to the Photos app and can be accessed from both iPhone and Mac.
Step 8: Now, when you open Photos app on your Mac PC, all the iPhone photos will be downloaded and displayed on Mac.
Download Photos from iPhone to Mac using AirDrop
If you want to download iPhone photos on Mac wirelessly, then AirDrop can be used. With AirDrop, you can wirelessly transfer photos to Apple devices nearby.
Step 1: On the iPhone, turn on Bluetooth and Wi-Fi from Settings or from Control Center.
Step 2: Similarly, turn on the Wi-Fi and Bluetooth connection on Mac PC on the top of the screen.
Step 3: Open Photos app on iPhone and tap on the Select option from the top-right corner.
Step 4: Choose the photos that you want to download on Mac and click on the Share icon on the bottom left.
Step 5: Click the name of the Mac PC. With this, the photos you have selected will be transferred to Mac and stored on the Downloads folder.
That’s it. In this way, you can download photos from iPhone to MacBook.
How to Download Photos from iCloud to iPhone?
With iCloud, you can download photos to iPhone. It is possible to download select images or an entire library.
To Download Select Images,
Step 1: On your iPhone, open Photos and go to Shared Albums.
Step 2: Open an album and select the images that you wanted to download.

Step 3: Click on the Share button from the left corner.
Step 4: Select Save Image. With this, the images downloaded will be shown on the Camera Roll.
To Download All Images,
Step 1: Open iPhone Settings and tap on your name or Apple ID.
Step 2: When the Apple ID menu opens up, click on the iCloud option.
Step 3: Then, select the Photos option under Apps using iCloud.
Step 4: Tap to enable the slider next to iCloud Photo Library.
Step 5: Select Download and Keep Originals options to download all the photos.
Step 6: In this way, anyone can download photos from iCloud to iPhone 6 or later.
Winding Up
There are lots of ways in which you can transfer iPhone photos to Mac PC and Windows PC. Whether you want to download iPhone photos to iPhone, Mac or Windows PC, you will find this article useful. All of the methods are simple and you can follow anything to download photos effortlessly.
Do you suggest any other better way to transfer photos to PC, tell us through the comments. To get regular updates, follow us on Twitter and Facebook.