Time Machine by Apple is a backup and restore software that comes built-in with every macOS laptop and desktop. It supports backing up the important data to internal, external, and network drives. There is no need for any technical or coding knowledge to use the Time Machine. All you need to do is to select the backup drive and let the Mac does all the work for you. You can backup on a daily, weekly, or monthly basis. Are you wondering how to use Time Machine on Mac? Continue reading this detailed guide to set up an automatic backup and keep your data secured using Time Machine.
Special features:
- Create an automatic backup on a regular basis.
- No more third-party software is required if your Mac runs on macOS 10.10 and later. Check how to update your Mac to the latest version.
- Restore the backup files with a single click.
- If you bought a new Mac, copy the backup files and restore them on your new computer.
Contents
How to Use Time Machine on Mac
Time Machine can be used to take backups and restore them on a Mac computer. We have split this tutorial into two parts,
- Backup using Time Machine
- Restore using Time Machine
- Restore to a new Mac
How to Backup Using Time Machine on Mac
1. Connect an external storage device on your Mac, and it should have at least 25% of free storage of your Mac.
2. Tap the Apple icon in the menu bar and select System Preferences.

3. Select Time Machine from the list of settings.
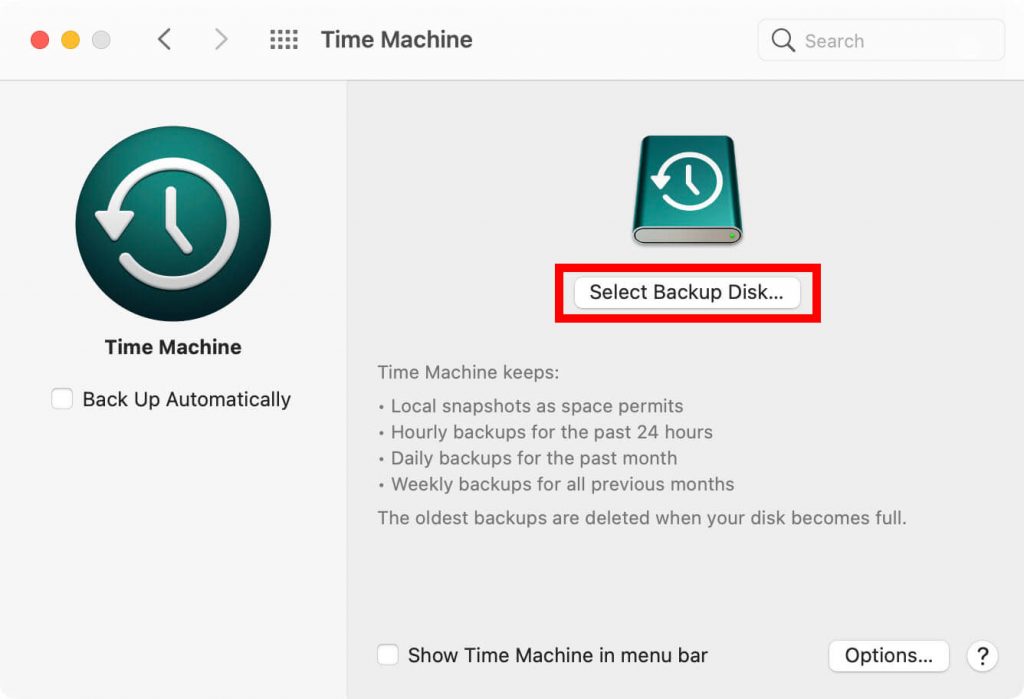
4. Click the Select Backup disk button on the next screen.
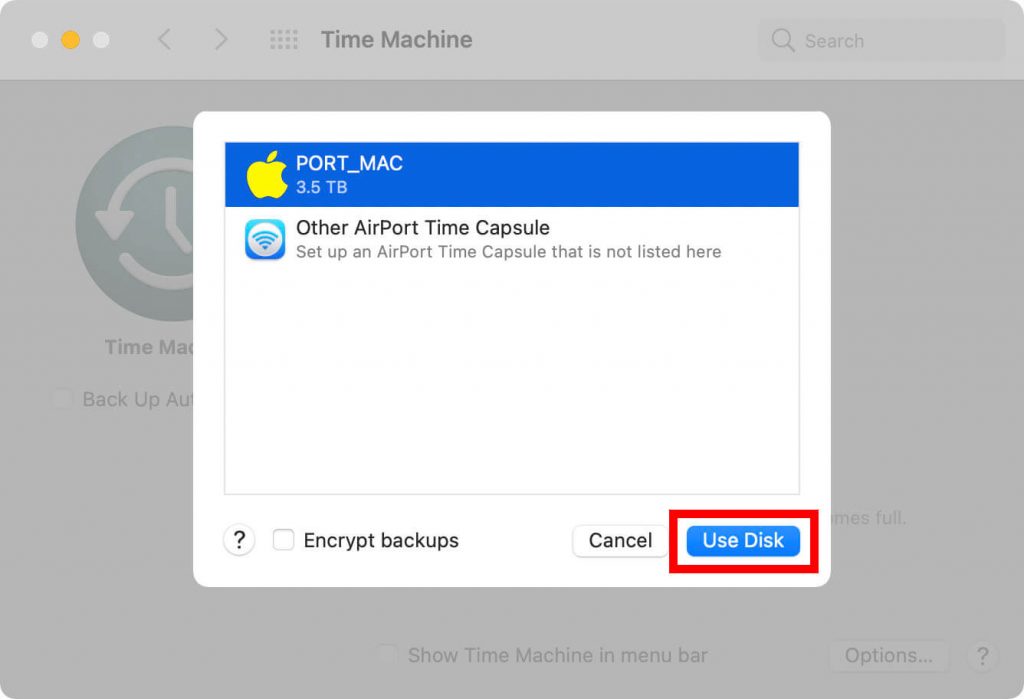
5. Select the disk you want to store the backup files and click Use disk.
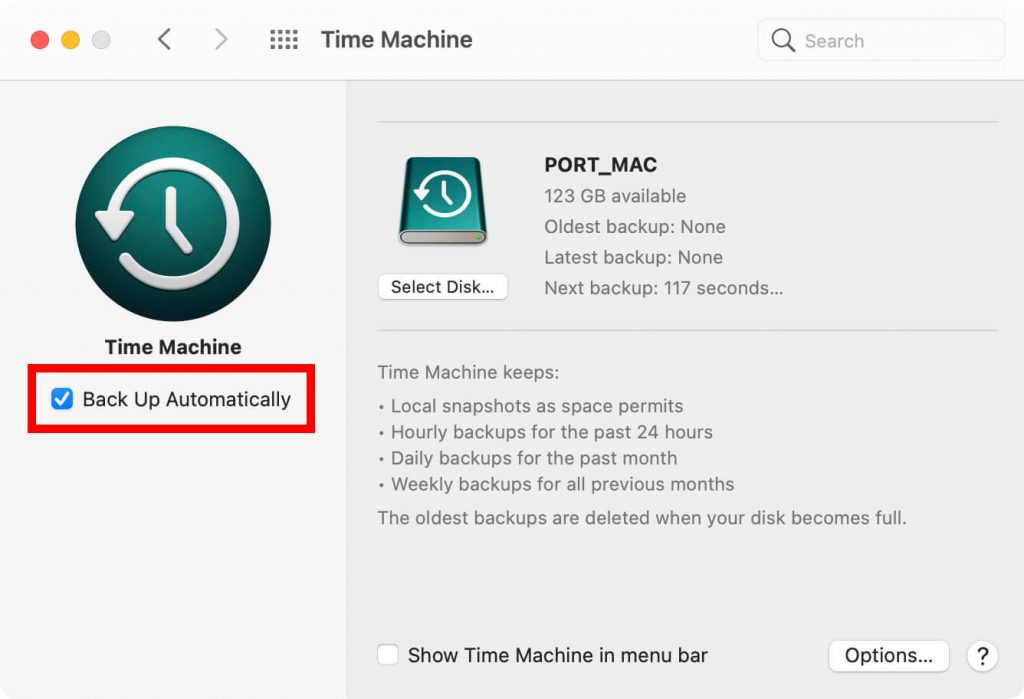
6. Don’t forget to check the Back Up Automatically box to let the backups occur automated on a scheduled time.
7. If you don’t want to back up the entire disk, you can skip backup on particular folders as per your wish.
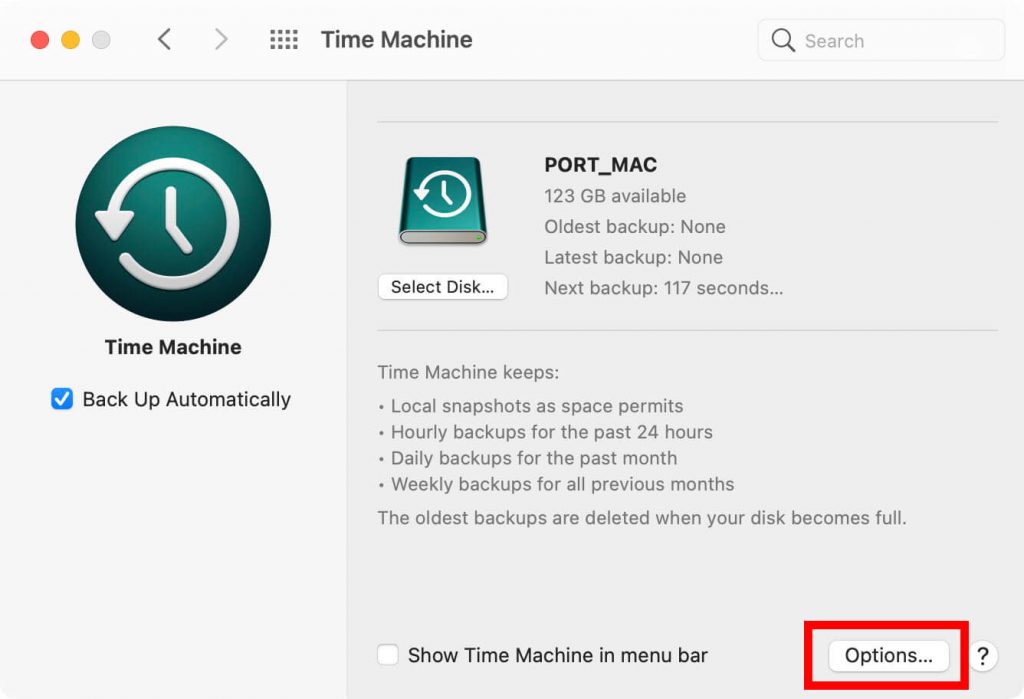
8. To back up select files, tap the Options button in the bottom left corner of Time Machine.
9. Tap the + button and add the folders you want to exclude from a backup, and click the Exclude button.
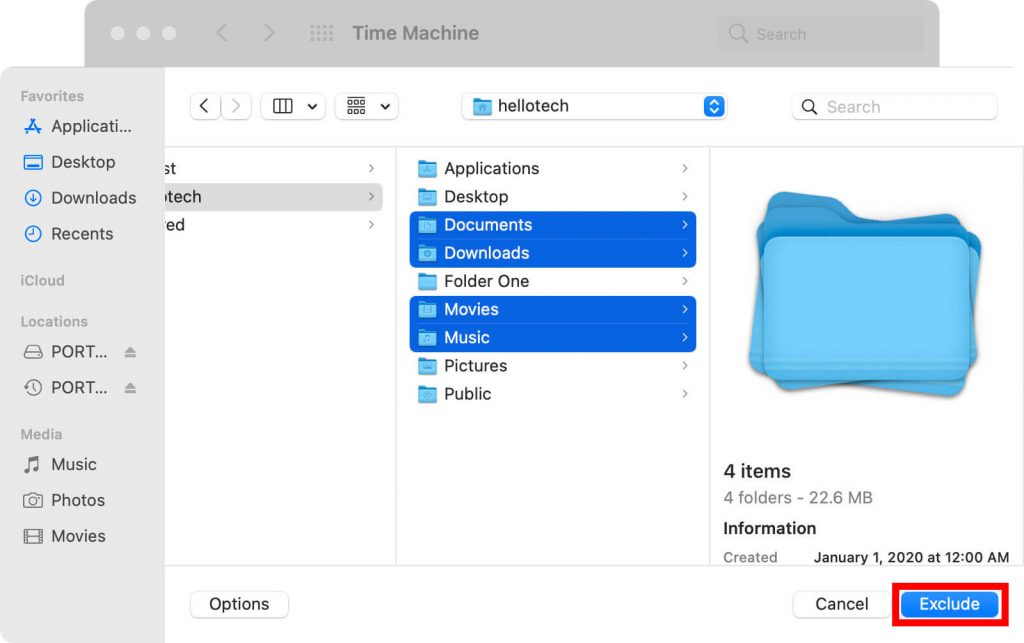
10. Click Save to close the dialog box, and the backup process has been set up perfectly.
How to Restore Using Time Machine on Mac
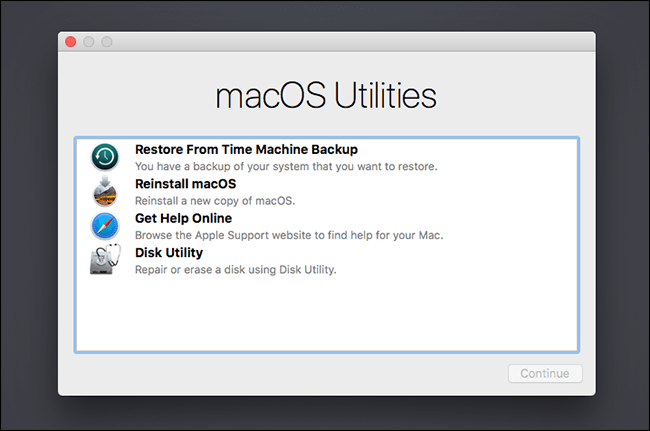
1. On the Mac home screen, press Command + R and hold down.
2. The Utilities window will open automatically, and tap the Time Machine Backup button.
3. Click the Continue button in the next two steps and select the backup file you want to restore.
4. Confirm the restoration by clicking the Continue button.
5. Wait for several minutes until your Mac gets restored and restart your computer.
How to Restore Using Time Machine to a New Mac
1. Turn on your new Mac and click Sign in.
2. Connect the backup storage device that has your old backup files.
3. In the sign-in screen, select the option named “From a Mac, Time Machine backup, or start-up disk.”
4. Select the backup disk on the next screen and click Continue.
5. The backup file will be processed, and then select the files you want to restore on your new computer.
6. Tap Continue, and your old data will be restored on your new Mac.
This is how you can backup and recover data using Time Machine on a Mac. You also have a backup and restore feature in Windows PC, but it doesn’t let you access the backup files manually and cannot be restored to your new PC. You need to purchase new third-party software to restore it on your new computer. But Apple gives you all the features built-in on every Mac.
Follow Techowns’ Facebook and Twitter pages to read our tutorials instantly.