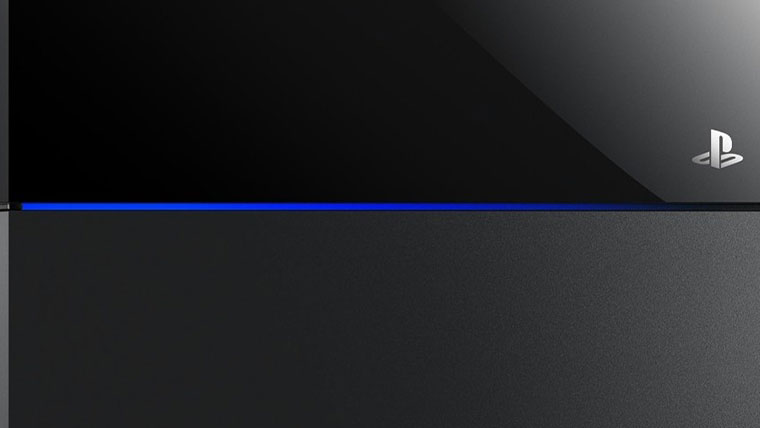
PS4 (PlayStation 4) has made a revolution among gamers, and it was a popular gaming console offering several high-resolution games. But imagine how it would be to handle a severe error on the console. The PS4 (PlayStation 4) will indicate a blue light on the device when there are severe hardware or software issues. However, the common cause of this error might be the TV compatibility, power cord, corrupted software, or hardware. If the issue is left unnoticed, there are high chances for the issue with PS4 turning on or shutting itself automatically. Let’s understand the cause and fixes to fix the blue light of death issue on PS4 (PlayStation).
Contents
- What Causes Blue Light of Death PS4 Issue
- Methods to Fix PS4 Blue Light of Death
- Power Cycle the Device
- Reset the Resolution on the Device
- Reset the Console to Factory Settings
- Check for Update
- Remove the Console’s Hard Drive
- Replace the Connecting Cables of PS4
- Replace the CMOS Battery
- Frequently Asked Questions
What Causes Blue Light of Death PS4 Issue
The common reason for this issue is the inadequate power supply to the console. So it would prevent the device from responding or sending a signal to the TV. Some TV will not display any signal if this issue occurs. However, there can be several other reasons behind the issue.
HDMI Cable Issue: The HDMI cable or the port can malfunction, stopping the ports from working normally.
Incompatible Resolution or Device: If the TV’s resolution is less, or the device might be running on older software.
Hard Drive Issue: If the Hard drive in the gaming console is malfunctioning or not working.
PS4 Power Supply Issue: There might not be enough power supply that the PS4 requires to function without interruption.
Corrupted Software: The console might experience random bugs that stop it from sending signals to the TV.
Methods to Fix PS4 Blue Light of Death
All the gamers should know the basic fixes to handle when some issue occurs. It would save a lot of time and effort. Also, it would stop the users from making the issue worse.
Power Cycle the Device
We must enter the Safe mode to fix the Blue Light of Death. Unfortunately, entering into a safe mode would not be that easy. So the next option is to power cycle the console. By doing this, we can remove the bugs and enter the safe mode.
- Turn off the PlayStation 4 and unplug all the cables connecting the Console.
- Now, press and hold the power button for 10 seconds for the device to discharge the power completely.
- Wait for about 60 seconds before connecting the wire to the device and turning it on.
Reset the Resolution on the Device
It is one of the common solutions that users generally depend on. But it needs some adjustments to be done with the HDMI cable.
1. After the power cycle, connect the console to the power supply.
2. Now, press and hold the PS4 power button for over 7 seconds and wait for the second beep sound. It indicates that the device has entered the Safe Mode.
3. Wait for the blue light to turn white. If it does not happen, try some other method. Try repeating the above method until it turns white.
4. Turn on the TV and connect the console using the HDMI cable.
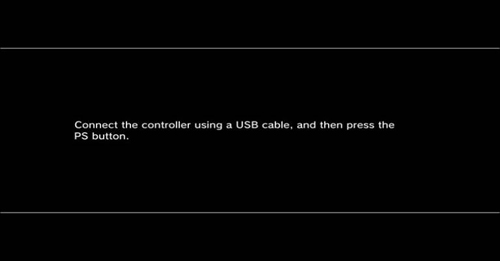
5. A screen will appear with a note, “Plug in the controller.” So, plug in the controller by using the USB cable.
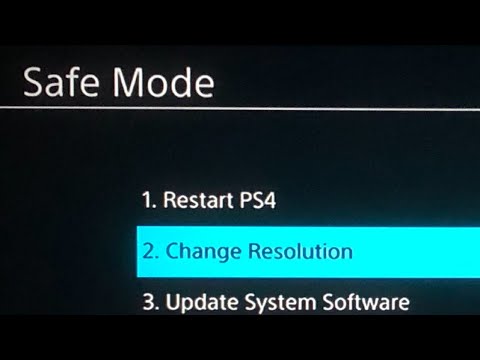
6. In the Safe Mode, scroll down and select the Change Resolution. Click OK to proceed further.
7. Wait for the PS4 console to restart, and it should return to the Safe Mode again. If it doesn’t work, start again from the first.
8. Finally, proceed with the Initialize PS4 option, and now we will be on the standard dashboard.
Reset the Console to Factory Settings
If you don’t see a white light or didn’t use the safe mode, reset the PS4 console. It will erase all the data in the console, so it’s better to make a backup of any important information.
1. Launch the browser on the PC and go to the official PlayStation website page.
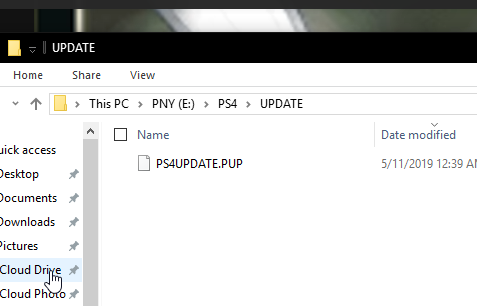
2. Navigate and locate the PS4 Console Reinstallion File from the website and get downloaded in the name PS4UPDATE.PUP.
3. Plug in the USB to the PC, and format it before copying the re-installation file.
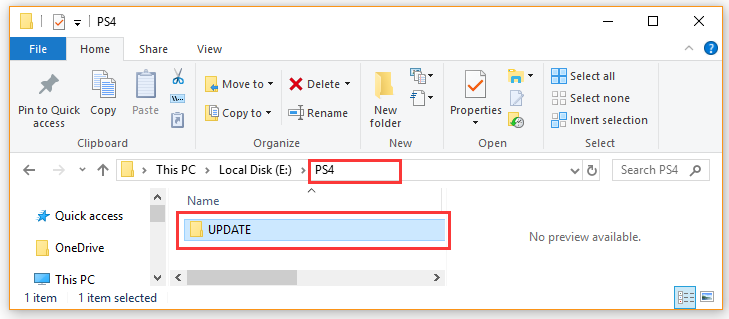
4. Create a folder on the USB drive with the name PS4 and a sub folder with the name Update.
5. Now, copy the reinstallation file inside the Update folder.
6. Plug in the USB with the re-installation file to the console.
7. Press and hold the power button and release it after the second beep. Connect the controller to the console via USB cable.
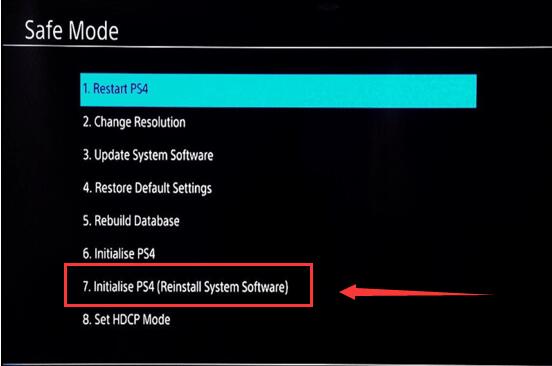
8. In the safe mode option, scroll down and click on the Reinstallation System Software.
9. Proceed by clicking on the X by selecting update from the USB storage device.
10. Finally, click on the OK to proceed with the re-installation of the system software from the USB. Once completed, it would automatically redirect to the dashboard.
Check for Update
For a smooth gaming experience, the TV’s firmware and the PS4 console should be up-to-date.
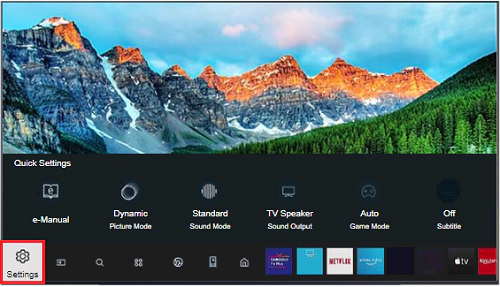
1. Press the Home or menu option on the TV remote.
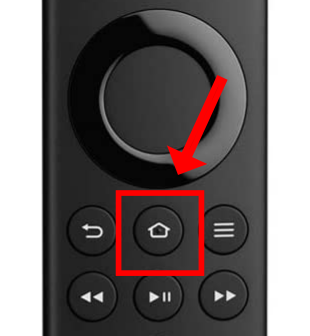
2. Go to the Settings menu and click on the Configuration menu.
3. Now, search for the Software Update option within the Technical Support option.
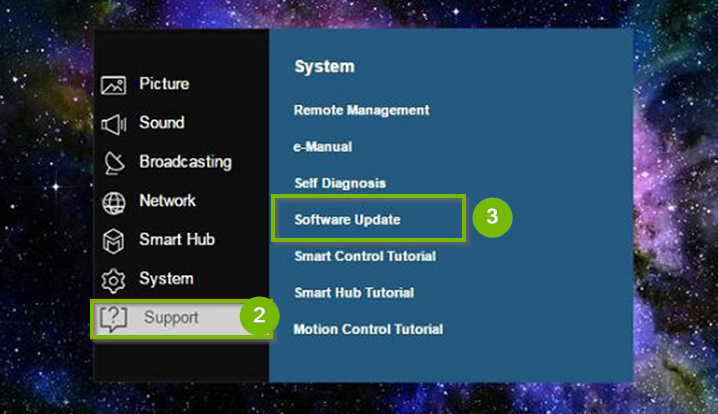
4. Proceed by updating the TV’s firmware as the process might vary depending on the brands. So it is better to check on the usual manual for better understanding.
Remove the Console’s Hard Drive
Sony recommends removing and checking the Hard Drive. Like the PS4, PS4 Slim and PS4 Pro have the Hard drive connected differently.
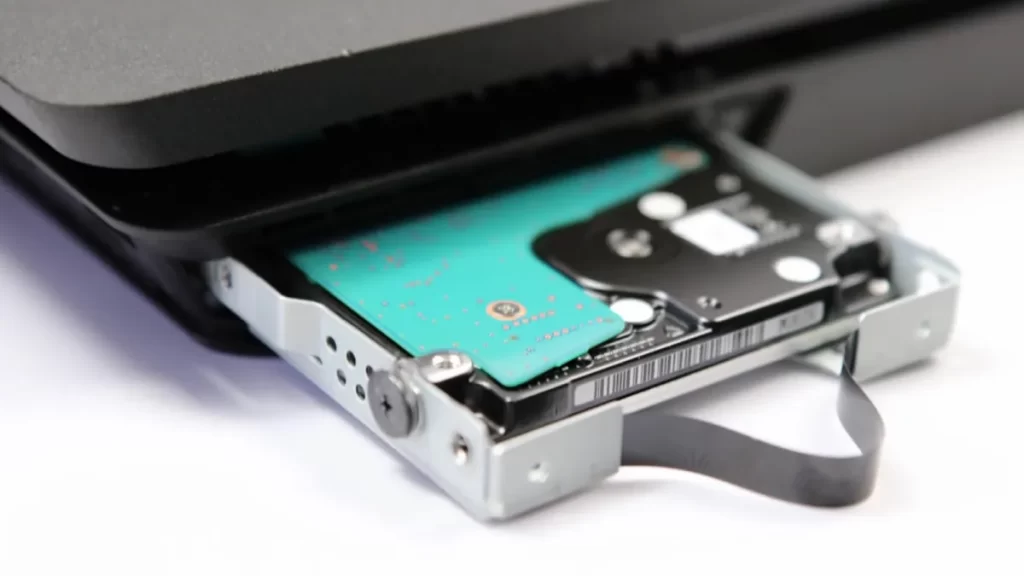
1. An arrow is used to indicate its position on the console. Before removing the hard drive, unscrew the bolts to remove the cover.
2. Now, we can replace the hard drive with a new one. The faulty hard drive might affect the performance or contain corrupted files.
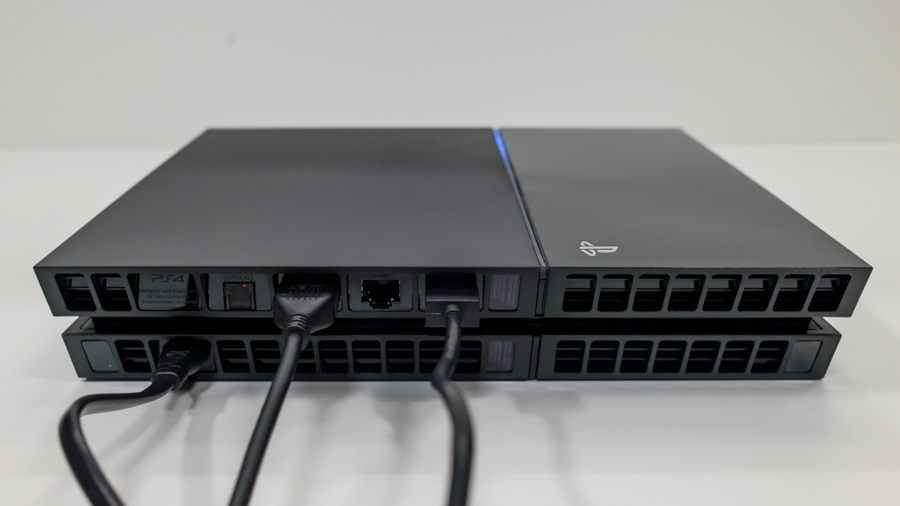
Replace the Connecting Cables of PS4
Improper connection of cables can also lead to this issue. So always ensure that the AC power cord, HDMI cable, and HDMI port are in good working condition. And also, regular maintenance of the port is mandatory to clean the dust with air blowers or microfiber cloths. If there is an issue or you see any damage, try replacing new cables to check if the issue is resolved.
Replace the CMOS Battery
Replacing the CMOS battery on the console can be tried as the final method if none of the above troubleshooting works. Replacing the battery resets the CMOS chip by default, which automatically causes a firmware reset. Here is how to replace the CMOS battery.
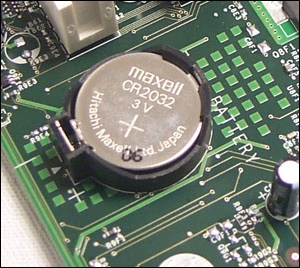
- Turn off the PS4 console and disconnect all the connecting cables.
- Now, open the case of the PS4 and locate where the CMOS battery is present.
- Remove the battery with a suitable screwdriver and let the device rest for 5 minutes to discharge completely.
- Replace it with the new CMOS battery and close the PS4 device.
- Finally, connect the console back and wait for the battery to charge before turning ON the device.
READ NEXT
- How to check hours played on PS4
- How to fix a PS4 that won’t turn on
- How to delete a user account on PS4
Frequently Asked Questions
The PS4 BLoD is common due to software issues, faulty power, or damaged HDMI cable.
Repairing a PS4 blue light of death issue would cost $169.95 to $200. It might vary depending on the issue and the component that needs to be replaced.
The primary reason for this issue can be due to the insufficient power that the device requires. Unfortunately, this issue prevents the console from sending or receiving signals. So it would not allow users to access the safe mode as well.
The basic symptom of this issue would be the blue light indication, and also, there would be no audio or video output.
There are several platforms that sell the repair kit that would be required to fix the issue. The repair kit would contain an alloy heatsink fastener, thermal paste, T8H security screwdriver, and a few more to work on the console.