VirtualBox is used to create a virtual network and thereby access various contents virtually. It includes servers, desktops, proxies, firewall, guest mode and more. The developers rely on VirtualBox for testing their development projects in different OS environments before releasing. It supports copying, backing up and transporting files. Also, it is compatible with the different desktop OS and you can install it any desktop environment effortlessly. Among the Linux distributions, Ubuntu is the most popularly used. In this section, we will guide you on How to Install Ubuntu on VirtualBox.
Contents
How to Install Ubuntu on VirtualBox?
Follow the step-by-step guidelines to install Ubuntu on VirtualBox.
To Download VirtualBox & Ubuntu ISO,
(1). Open the web browser on your PC and visit https://www.ubuntu.com/download/desktop.
(2). Scroll down to and click on Download button next to the latest version of ISO file or Ubuntu disk image.
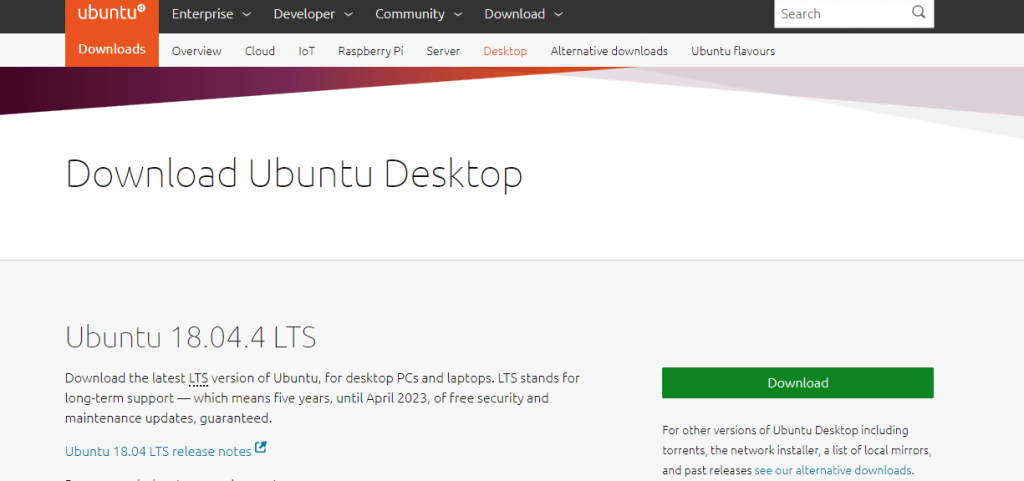
(3). When redirected to the support page, hover to the bottom and click on the Download Now button. On the pop-up, click on OK button.
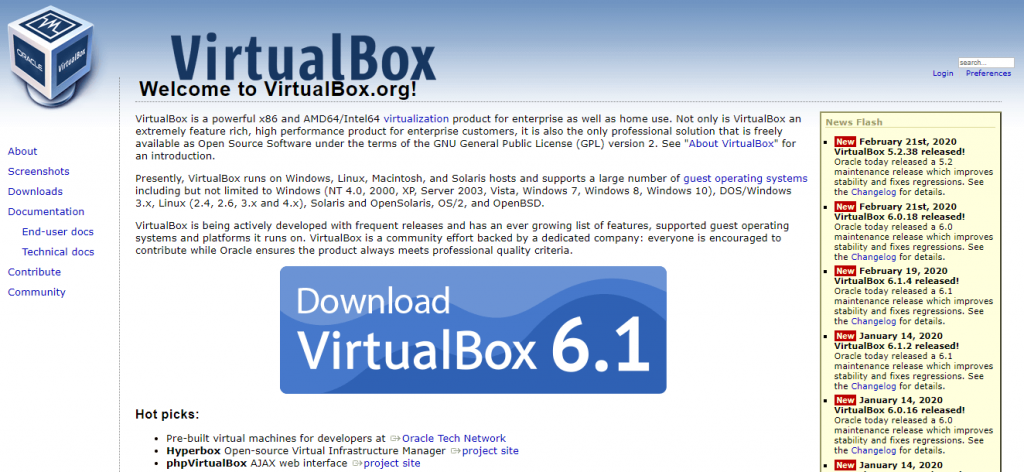
(4). Navigate to https://www.virtualbox.org/ on your browser.
(5). Click on the Download VirtualBox button to get the latest version of Oracle VirtualBox.exe.
To Create a Virutal Machine,
(1). Locate VirtualBox.exe file on your PC and double click on it to install on a Windows PC or Mac PC.
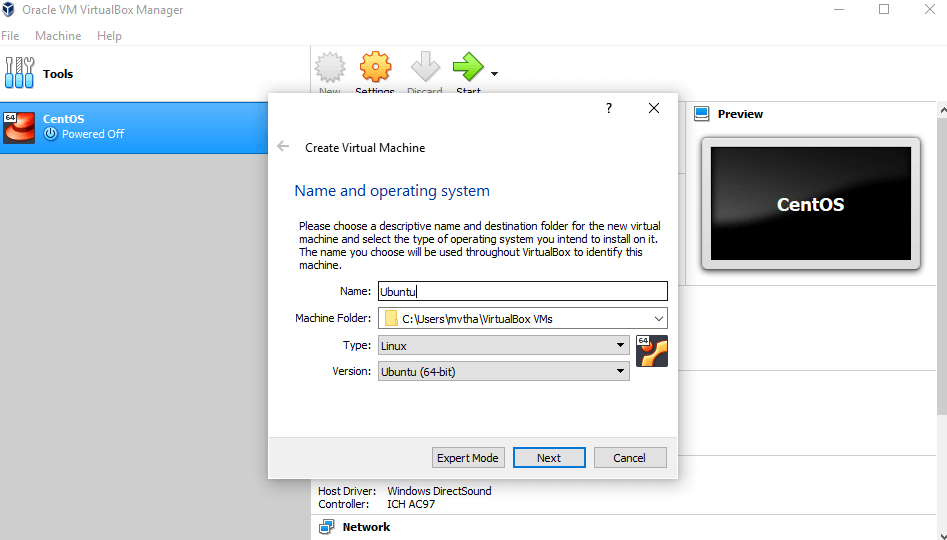
(2). To create a virtual machine, click on New option on the right pane.
(3). In the name field, type as Ubuntu, under Type as Linux and in Version as Ubuntu(64/32-bit). Click on Next button.
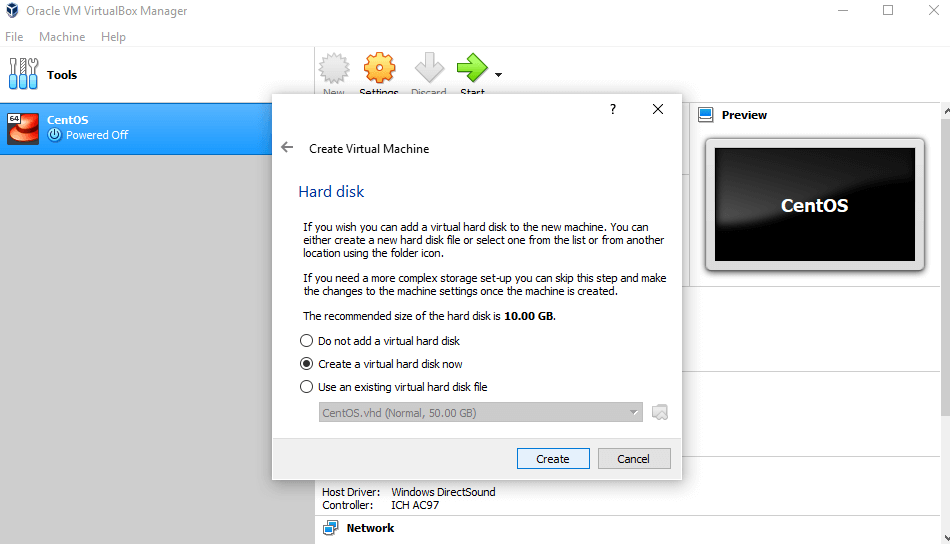
(4). On the next screen, select Create a virtual hard disk now option. Tap on Create.
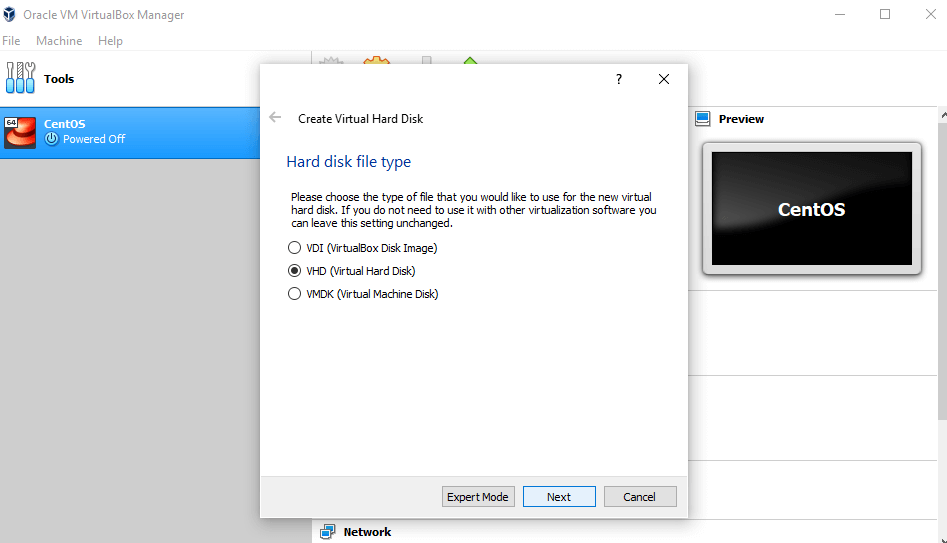
(5). Next, choose VHD (Virtual Hard Disk) and click on Next button.
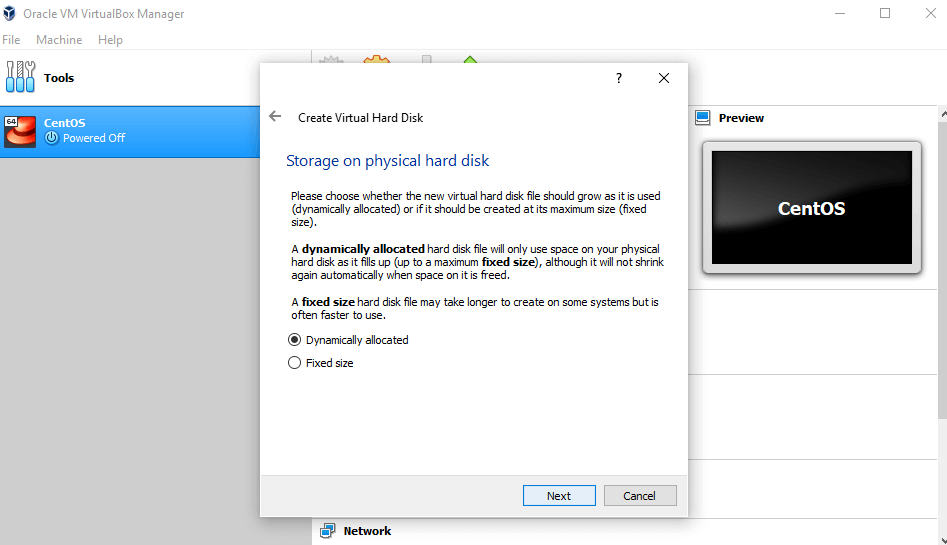
(6). Select Dynamically allocated as the storage location on physical hard disk.
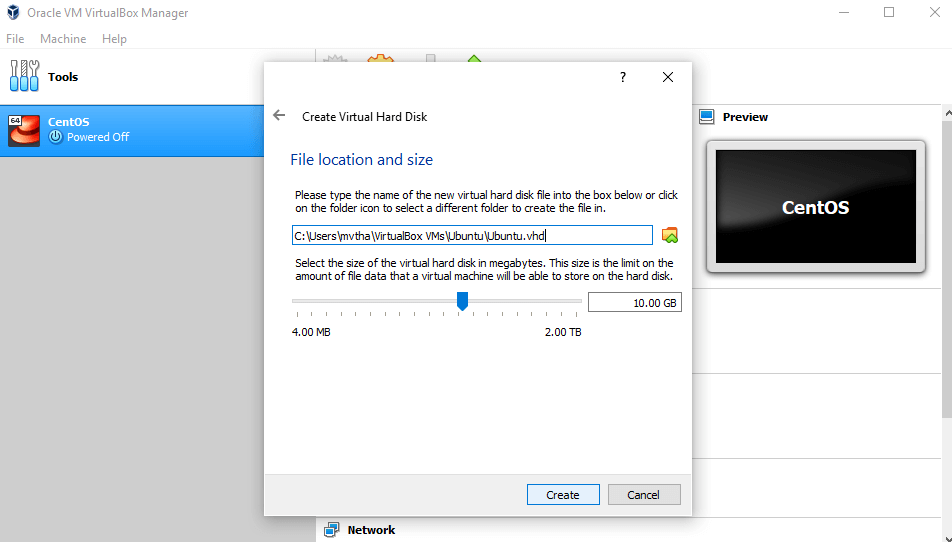
(7). Select the RAM storage in terms of MB by clicking on the memory size slider. Tap Create.
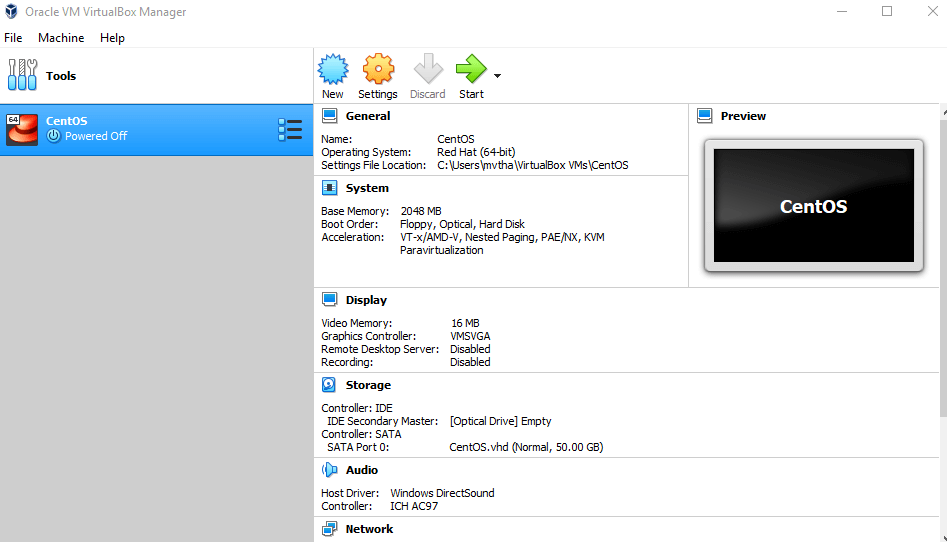
(8). When the virtual hard disk is created, you will find Ubuntu in the dashboard.
To Setup Ubuntu disk image file,
(1). On the VirtualBox window, select Settings and choose Storage option from the left pane.
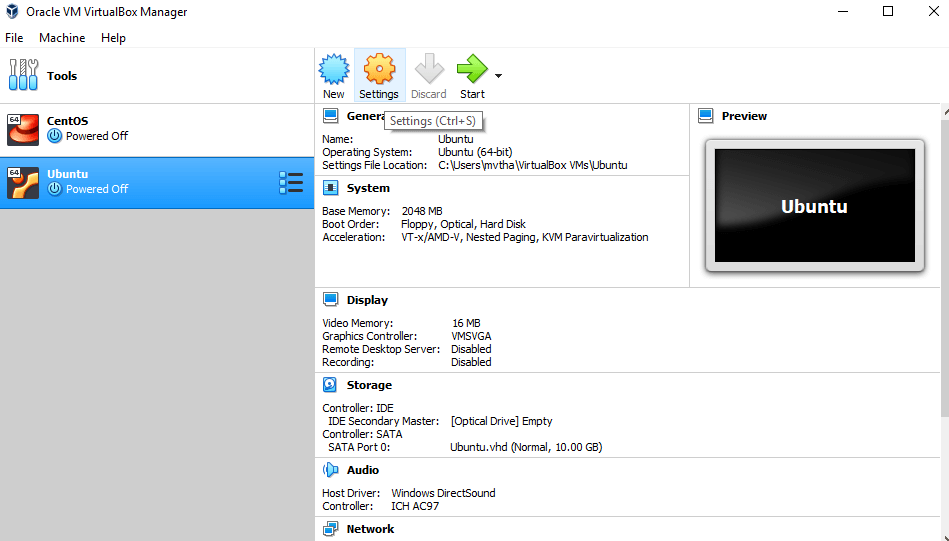
(2). Then select Controller:IDE and click on green + icon to add an optical drive to the IDE controller.
(3). On the pop-up, select Choose disk option to browse the ISO image location.
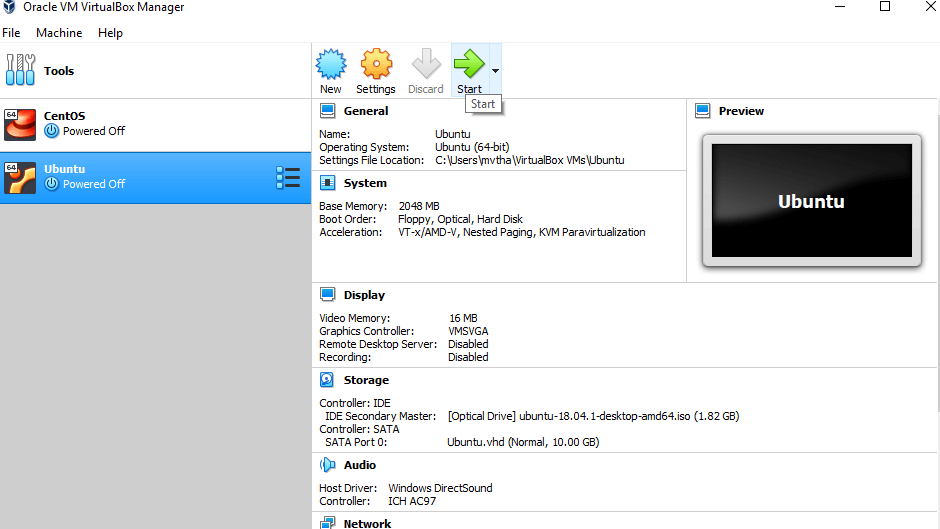
(4). Navigate to the main screen of VirtualBox and select the Start button to run a virtual machine on Ubuntu.
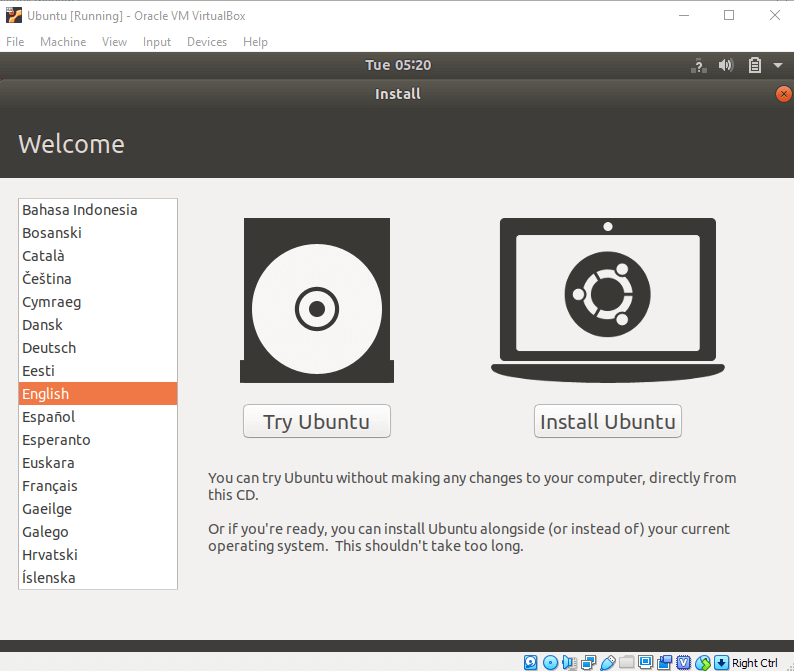
(5). A dialog box will appear asking you to Try Ubuntu or Install Ubuntu.
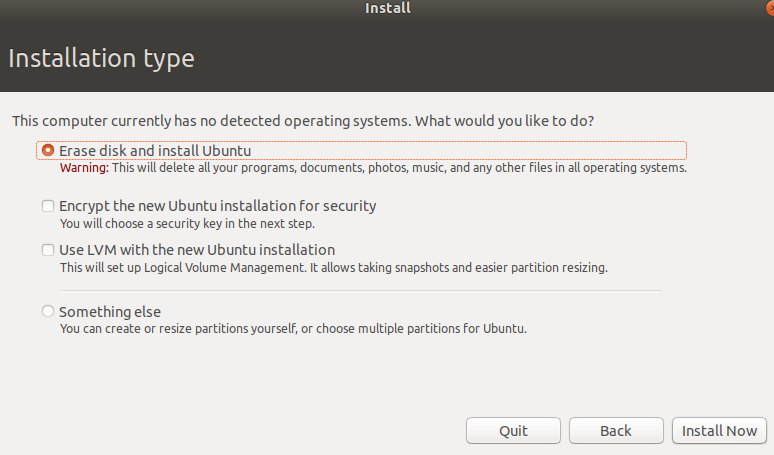
(6). On the Installation type box, select Erase disk and Install Ubuntu. Click on the Install Now button.
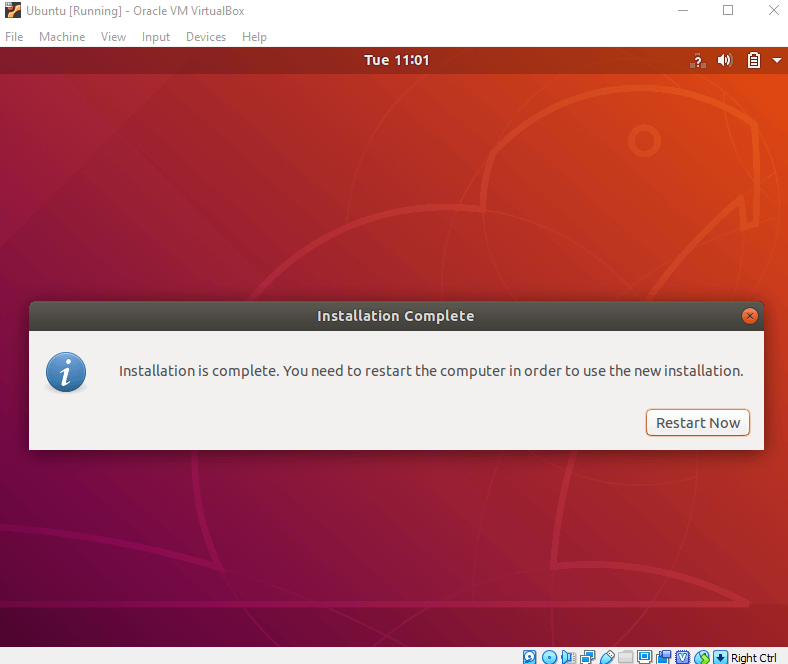
(7). You can choose the location and language on the following screen. When the installation gets completed, choose the Restart Now button.
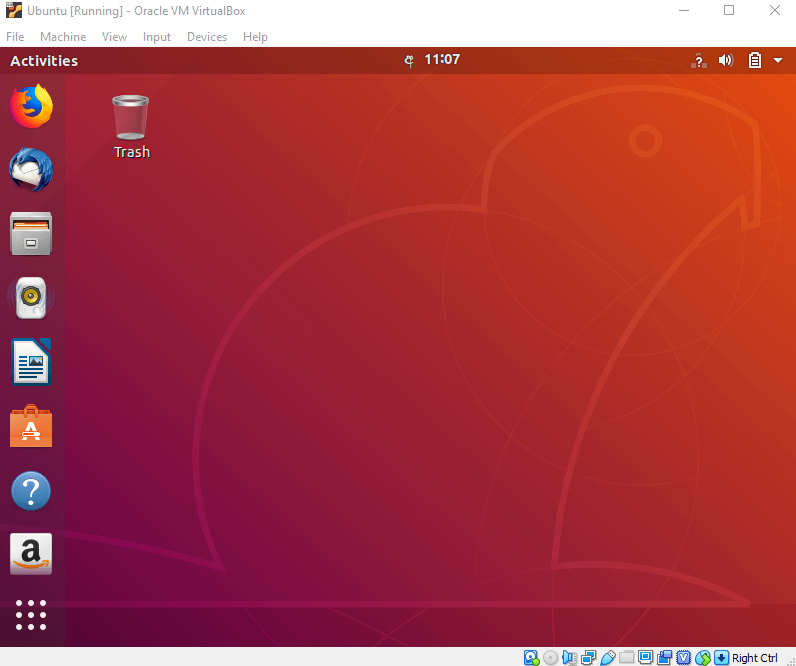
Tip! To verify the installation of Ubuntu on VirtualBox, press Ctrl+Alt+T to open the terminal and enter $ pwd followed by $ ls. With this, you will find all the current working directory and the items in it.
To conclude
Here comes the end of the article installation of Ubuntu on VirtualBox. You can now start using it on the development projects.
Do you face issues while installing Ubuntu on VirtualBox? If so, bring it to our knowledge through comments. Visit us on Facebook and Twitter for more tech-related articles.