Many iOS users won’t be aware of Andriod built-in applications. Apps like YouTube, Gmail, Google Maps, Hangouts are essential to all. In iOS devices or iPhones, you have to install these apps manually from the Apple App Store. Even though iOS users have pre-installed Photos apps to view and save photos, you may need the Google Photos app in some situations. If your iOS memory gets fulled, instead of deleting the photos, you can install Google Photos on iPhone or iPad and move your photos to your Google drive.
With Google Photos, you can easily sync the photos to your Google drive. In the iOS Photos app, all the files will be saved on iCloud. But what if the iCloud went out of storage? You need to look for other options. Buying extra storage from Apple costs you money. Using Google Photos is the wisest and economical choice you have. By default, you’ll get 15GB of storage for free. The sync and backup process on Google Photos is not that difficult.
Contents
How to install Google Photos on iPhone or iPad devices?
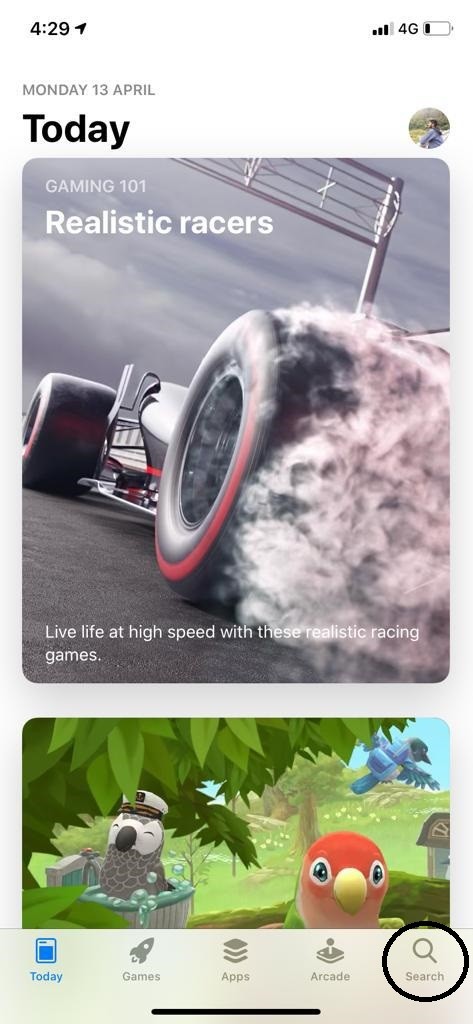
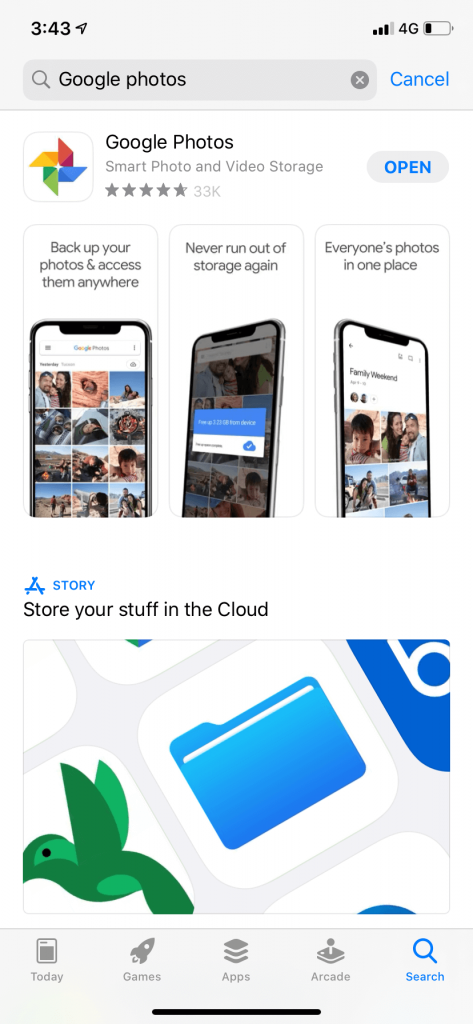
(1) Open the App Store application on your iPhone or any iOS devices.
(2) Tap on the Search icon on the bottom left corner to open the Search bar.
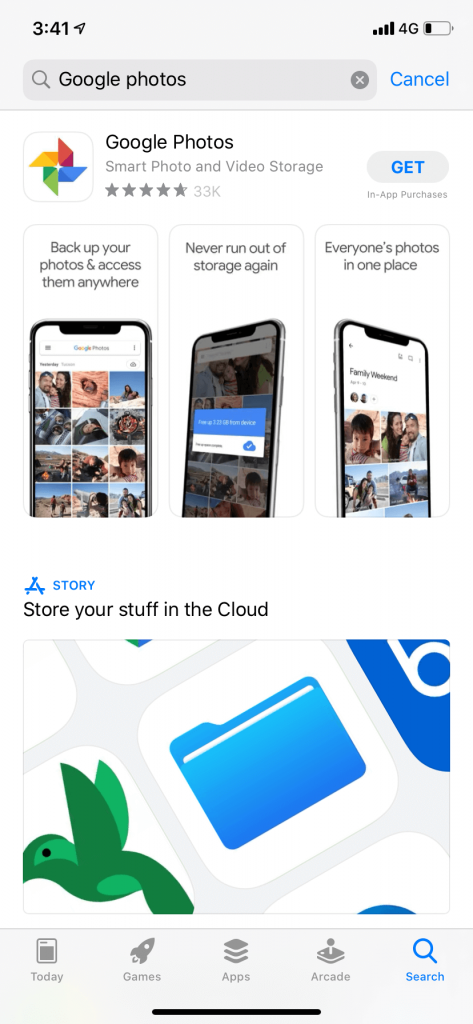
(3) In the Search bar, type Google Photos and search for it.

(4) Click the Get icon corresponds to the Google Photos app. Check the logo to make sure that the app is the correct one.
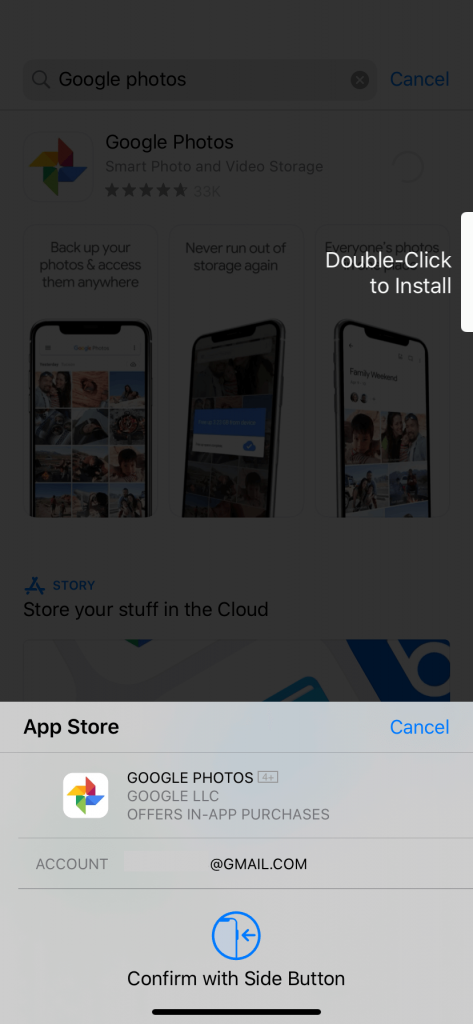
(5) Go through the App Store verification process.
(6) Within a while, the app will be downloaded. Then, click the Open icon to launch the app.
How to Use Google Photos on iPhone or iPad?
At this point, you have installed the Google Photos app on your iOS device.
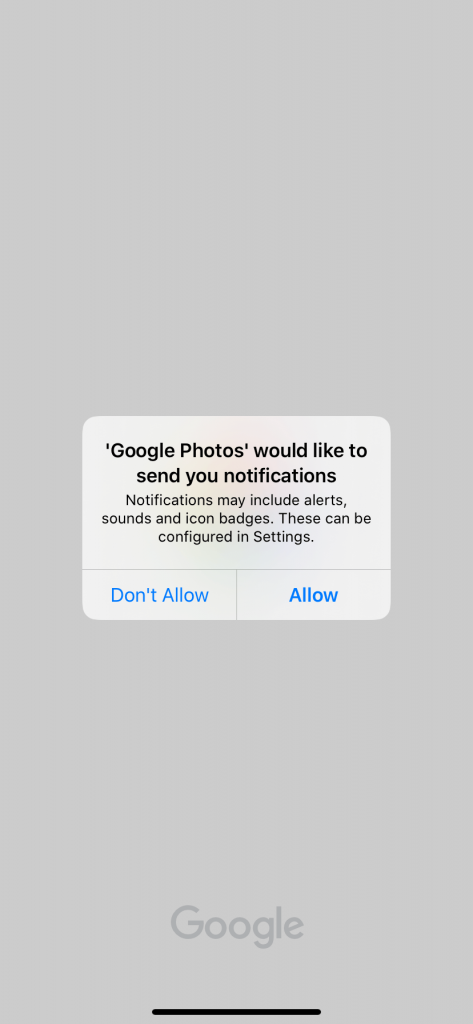
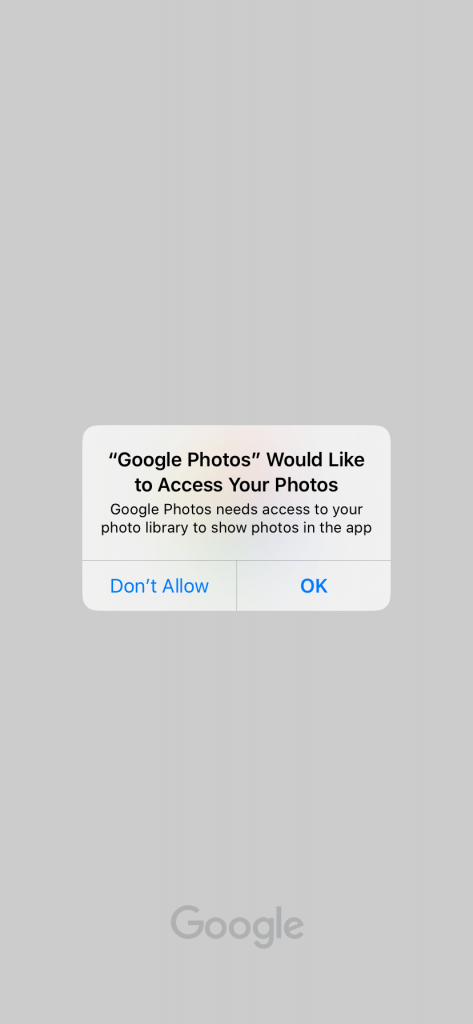
(1) When you open the app, it will ask for permission for accessing photos and send notifications. Click Allow.
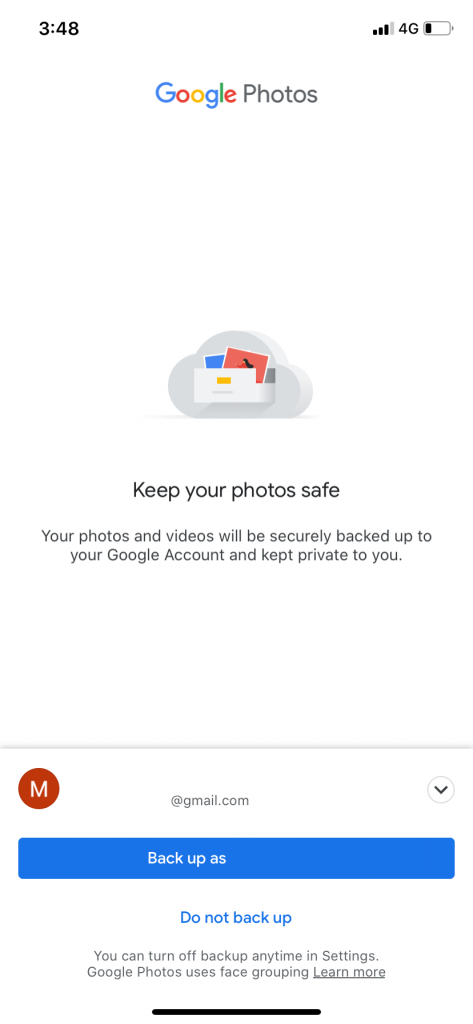
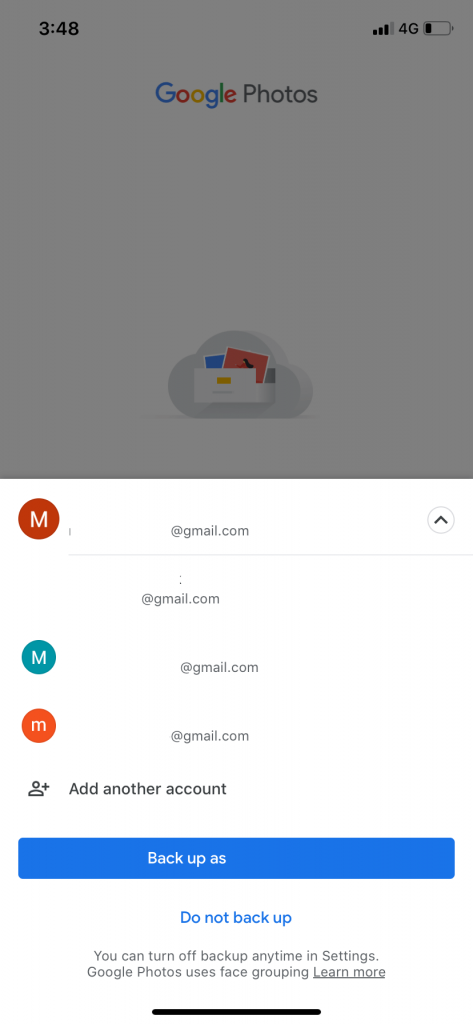
(2) On the next screen, if the correct Gmail account, click Back up as an option. If not press the down arrow and choose the correct Gmail account. If you don’t want to backup, click Do not back up.
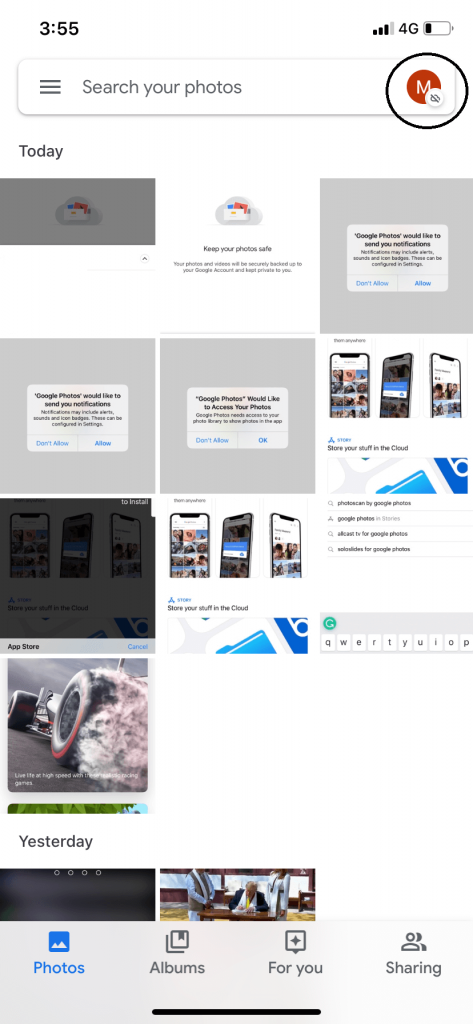
(3) After choosing it, it will show all the photos.
(4) If you choose to back up your photos on the previous step, all your Photos will be saved on your Google Drive. If you choose Do not back up and wish to backup now, click on the Profile icon on the top.
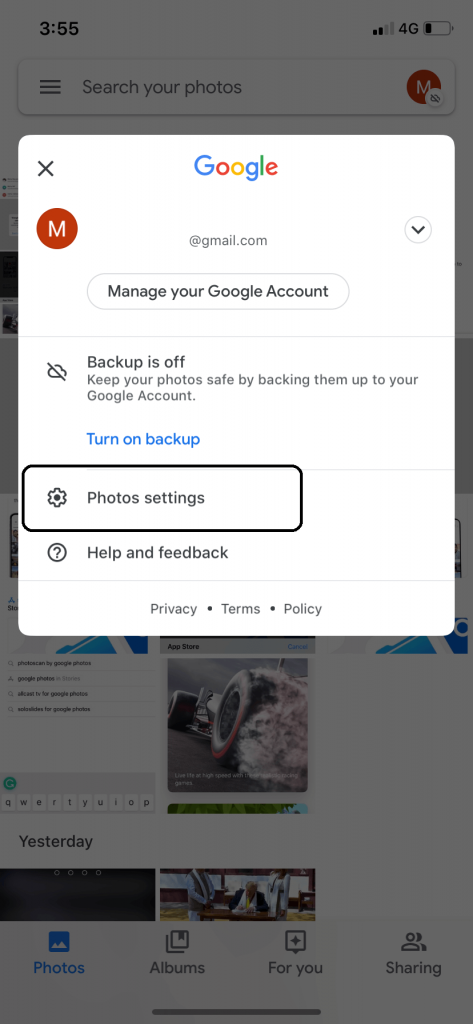
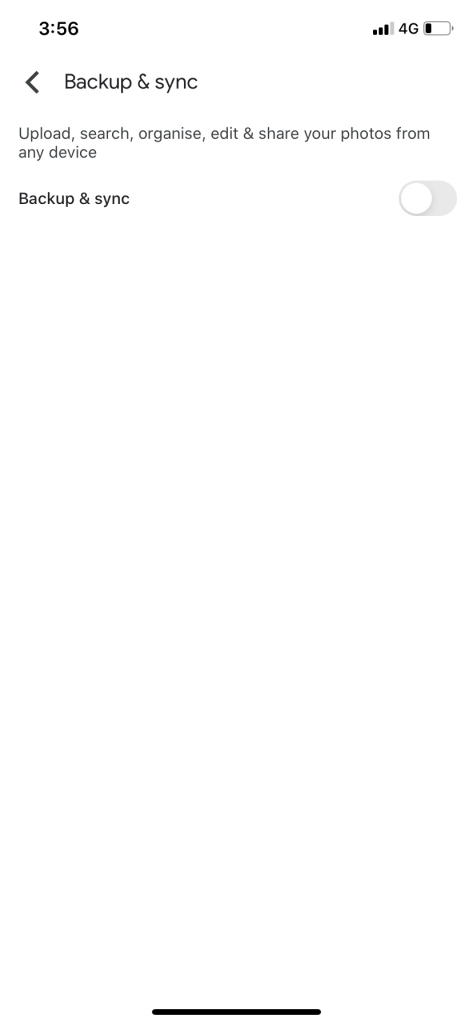
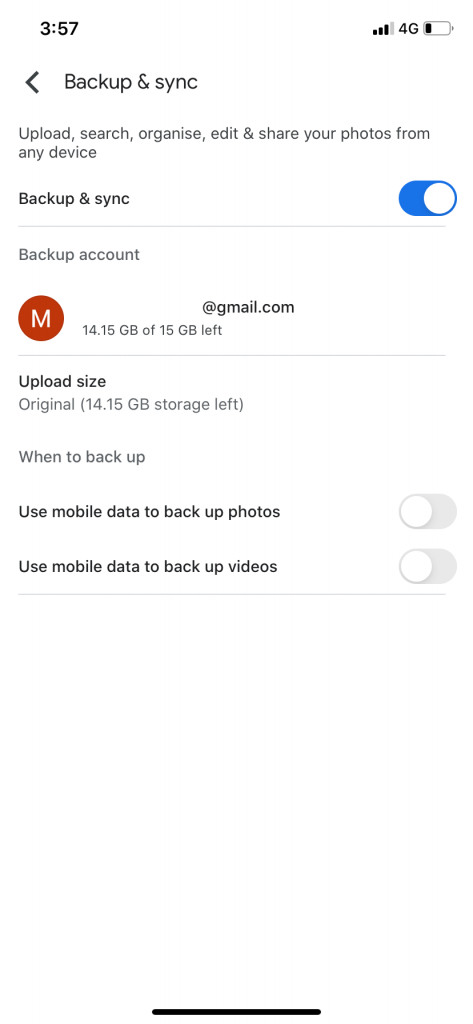
(5) Choose the Photos Settings and choose Backup & Sync and turn on the toggle.
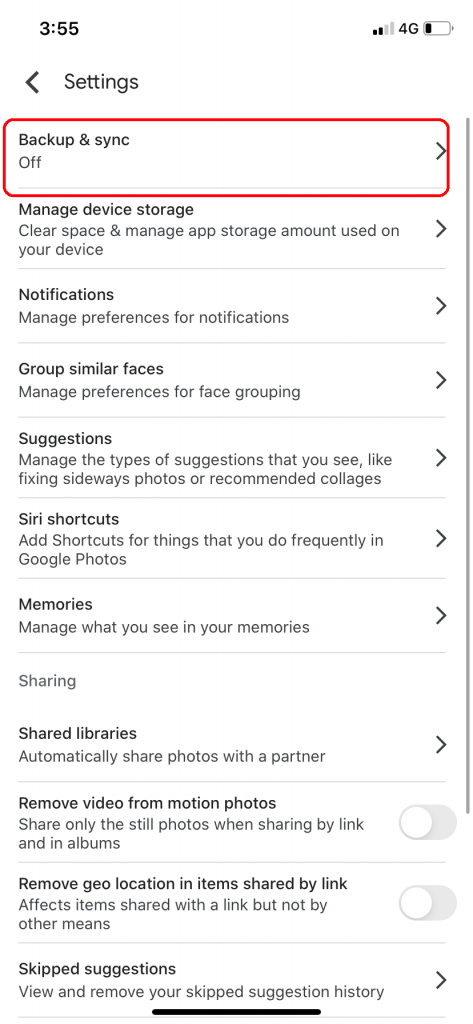
(6) Now, it will display the memory details on your Google Drive. Customize the backup settings as you want.
(7) Now, all your photos will be backed-up to your Google Drive. You can delete the backed-up photos and videos from your iPhone or any iOS devices.
When the next time your iPhone memory or iCloud memory doesn’t have any space, use the Google Photos and free up your iOS device’s memory. With the Google Photos app, you can easily share the photos with others. If you have any doubts in the above steps, tell us in the comments section. Follow us on Facebook and Twitter for more videos.