There are times you may need to transfer photos from your Android device to computer or laptop. Whether you want to free up some space on your phone, to view your camera roll on the larger screens, to watch your favourite photos with your family members, to backup your images for future use or whatever the reason may be, transferring pictures from Android to PC is very simple and it doesn’t need rocket science. You can transfer photos from Android to PC both online and offline.
Contents
How to Transfer Photos from Android to PC Laptop or Computer?
There are various methods available to transfer pictures from Android to PC. You can transfer photos using,
- USB Cable
- Google Photos
- Google Drive
- Apps
Note: The above method works on all computer including Macbook, Windows Laptops, Linux PC, Desktops, Chromebook, and other devices as well.
Method 1: Transfer Photos from Android to PC using USB
Perhaps, the easiest method to transfer photos or pictures from your Android phone or tablet is by using the USB cable. To transfer images:
(1) Connect the micro end of the USB cable to your phone and USB end to the PC or laptop.
(2) Swipe down the notification screen on your device and select the notification which labelled as Charging this device via USB.
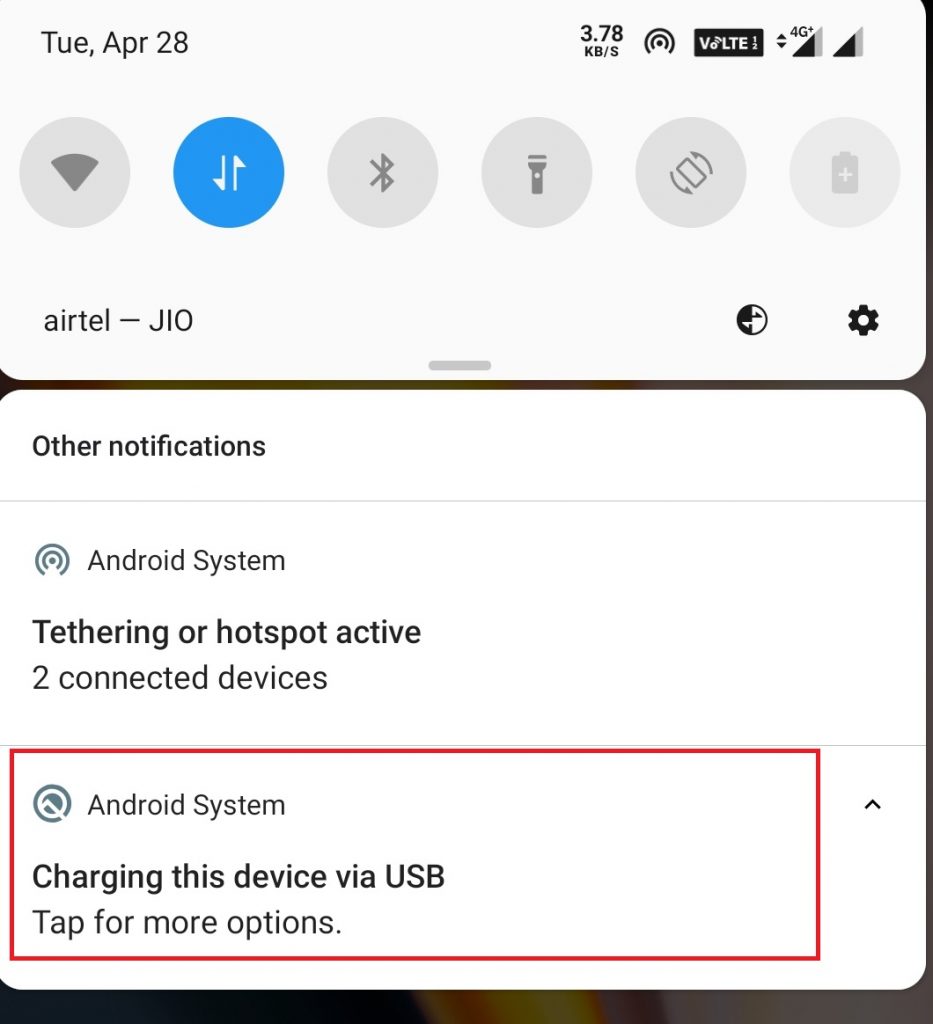
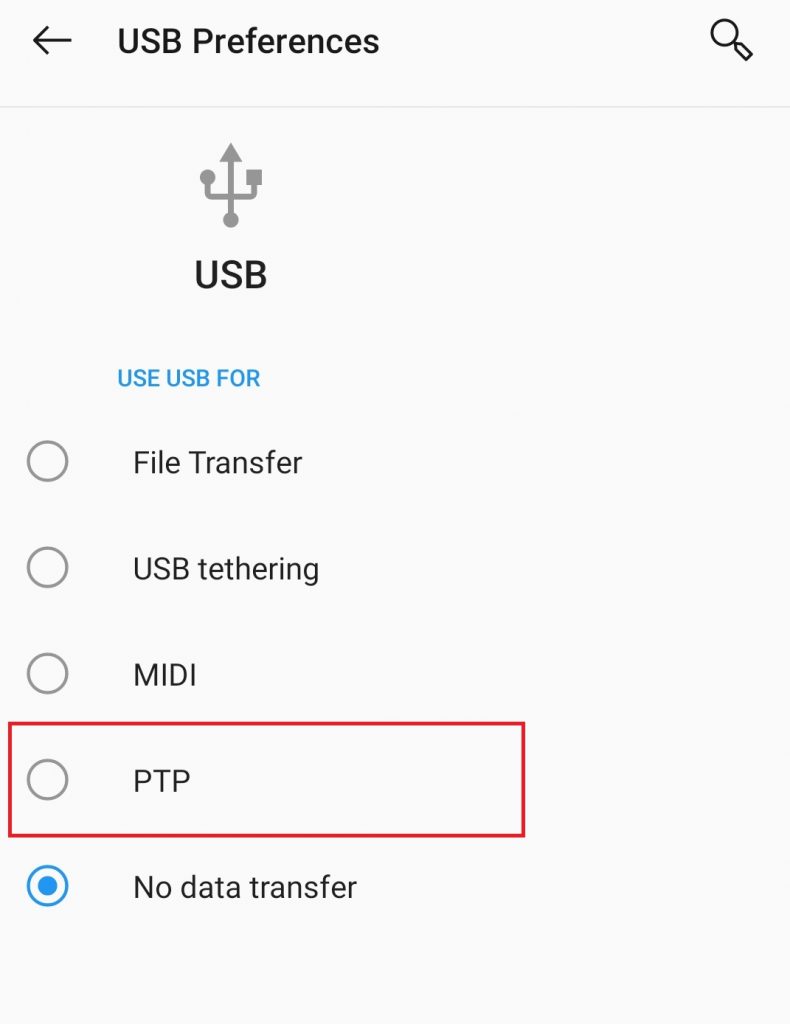
(3) Select MTP option. If MTP option is unavailable, click PTP option.
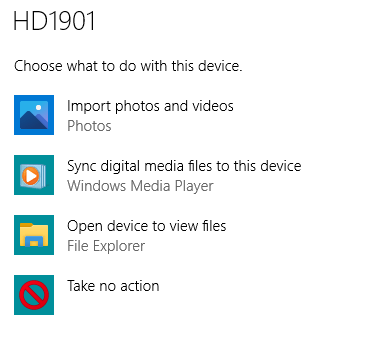
(4) A pop-up stating Select to choose what happens with this disc.

(5) On the next popup, select Import photos and videos.
(6) Wait for a few second as the photos will take some time to load.
(7) Select the images and click Import to save the photos on your device. You can find the stored images on the Pictures folder.
Alternative Way using USB
- Select File Transfer on Step 3.
- Click Open Folders to View Files.
- Select your phone storage or microSD where you have stored the images.
- Navigate to the location where you have stored the pictures. By default, the camera pictures will be stored on the DCIM folder.
- Copy the image files and paste it on your computer storage.
Method 2: Transfer Photos from Android to PC using Google Photos
In this method, you don’t need to connect your Android device to the PC. However, you will need an active internet connection.
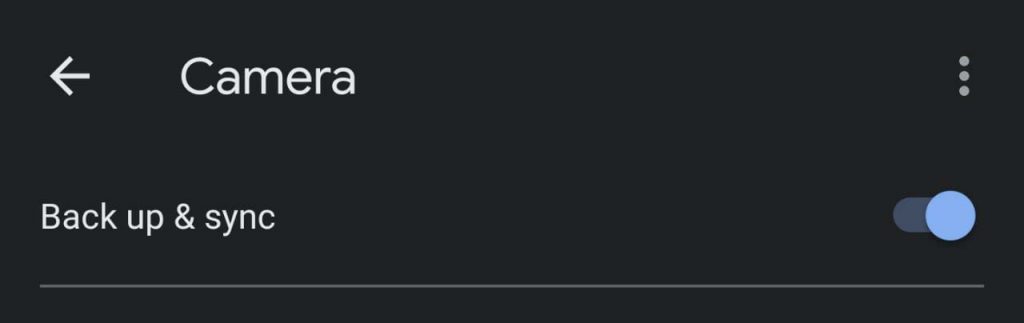
(1) Open Google Photos app on your Android device and ensure that you’re logged in to your Google account.
(2) Go to Albums and select the album which you need to sync.
(3) Enable Back up & sync and wait for few minutes. Depending on the speed of your internet connection and the number of photos, the syncing process will appropriate time to complete.
(4) Now, open a web browser on your computer and visit photos.google.com.
(5) Sign-in with the google account that you used to sync photos on Google Photos app.
(6) All the albums which you enabled the syncing feature will appear on the computer screen.
(7) Select the images that you need and press CTRL + D keys simultaneously to download those images.
Method 3: Transfer Photos from Android to PC using Google Drive
Google Drive is a popular cloud storage service which lets you store your files securely and open or edit them from a supported device.
(1) Open Google Drive app on your Android device and sign in with your Google account.
(2) Tap the + icon on the bottom right corner of the app and select Upload.
(3) Select the images that you want to transfer.
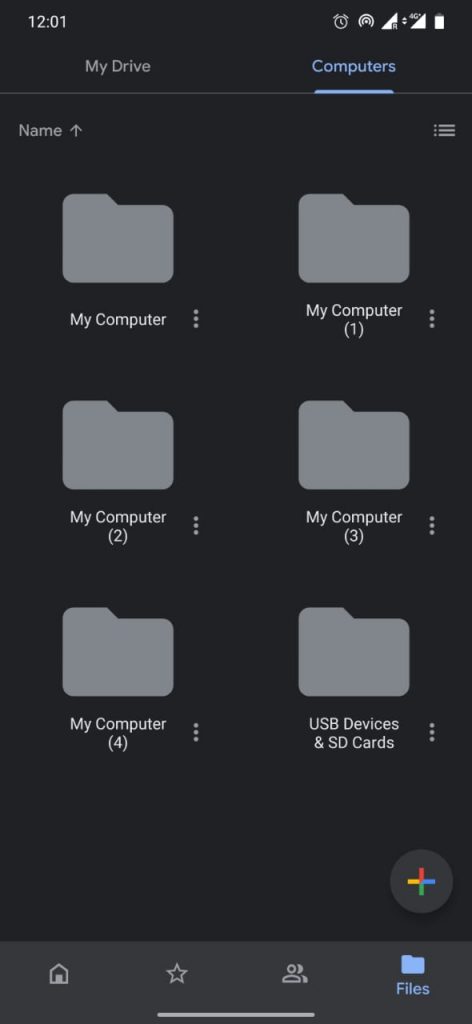
(4) After uploading your image, visit drive.google.com on your computer browser.
(5) Sign in with the google account that you used on Google Drive Android app.
(6) Select the uploaded image and click the Download icon (top right corner) or press CTRL + S keys to download it.
Google Drive is not the only cloud storage available for Android devices. Instead of it, you can also use OneDrive, DropBox, Amazon Drive, Box and more.
Note: If you are also using an iPhone, then you can use iCloud or iTunes to transfer photos from iPhone to PC.
Method 4: Using Apps
You can use apps to share photos from your phone to the computer. There are plenty of apps available. One of the best file transfer app is Shareit. You can install Shareit on your computer and Android and start transferring photos easily through WiFi.
Our Opinion
You can either transfer photos with or without USB cable. If you have strong internet connectivity, then you can go for uploading photos to Drive or Google Photos. Else you can USB method or apps like ShareIt to transfer photos to your PC. All the above methods are effective and hence, you can use whichever is convenient for you.
If you had any difficulty while following this guide, mention it in the comments section. To get more tutorials related to Android, follow our Facebook and Twitter pages.