Among email services, Gmail has been very popular and become an integral part of everyone’s business. By default, the mails will be categorized into three sections: Primary, Social, and Promotions. Apart from these inbox categories, you can create folders in Gmail to organize your messages. In Gmail, the folders are called labels. The main advantage of using labels is that you can keep your inbox organized. Gmail also supports using more than one label for a single message.
Contents
How to Create Folders in Gmail
You can create labels on Gmail only from the web version. The Gmail app on Android and iOS devices doesn’t support creating new folders. It only supports moving the emails to labels.
Step 1: Visit gmail.com on a PC web browser and sign in to your Google account.
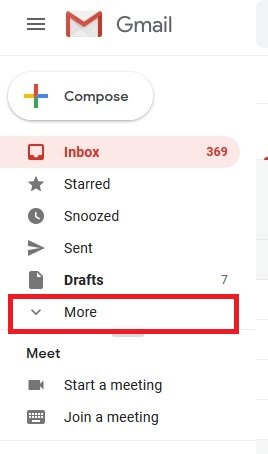
Step 2: On the left side menu panel, click the More option located below the Drafts menu.
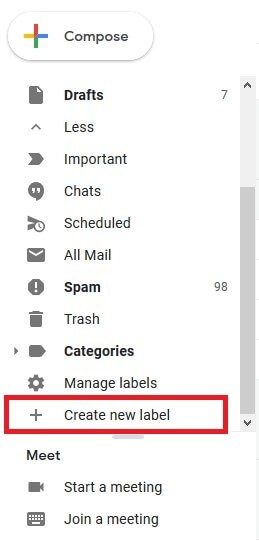
Step 3: Scroll down and select Create New Label.
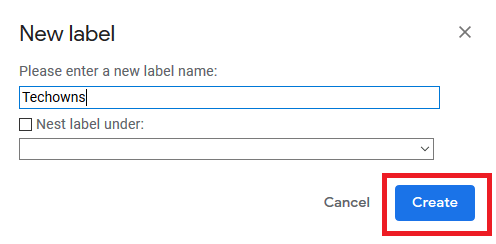
Step 4: Enter a name for your label.
Note: If you want to place your new label inside the existing label like sub-folder, check the Nest label under box and select your parent label.
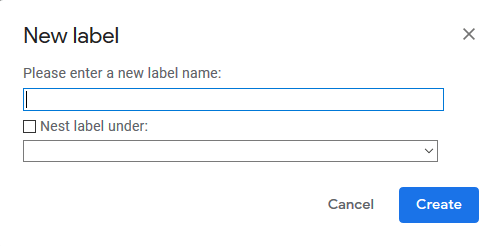
Step 5: Click Create.
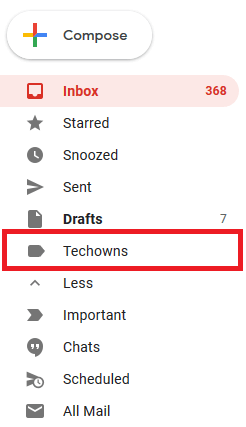
Step 6: That’s it. The newly created label is on the left-side menu panel.
How to Create Labels in Gmail from Settings
You can also create labels from your Gmail settings.
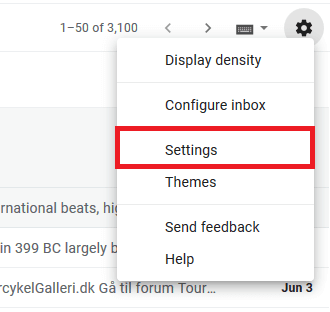
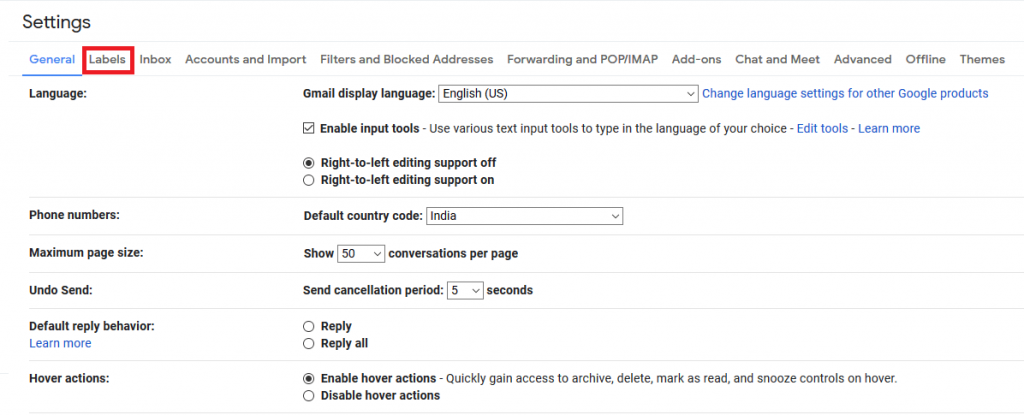
Step 1: Open Gmail and click the Settings icon located below your Google account logo.
Step 2: Select Settings.
Step 3: Tap the Labels section.
Step 4: Scroll down on the Labels section and click Create new label.

Step 5: Enter a name and create the label.
How to Label Emails in Gmail [Desktop]
Method 1
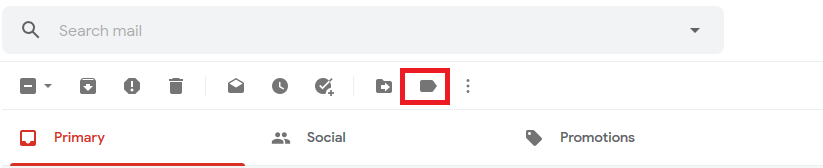
Step 1: Open Gmail and select the mail that you want to label.
Step 2: Click the Labels icon.
Step 3: Select the newly created label.
Method 2
Step 1: Select the mails and right-click on them.
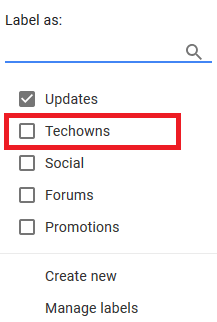
Step 2: Hover the mouse to the “Labels as” section.
Step 3: Select the label that you want.

How to Label Emails in Gmail [Mobile]
As we said earlier, you can’t create labels on the mobile version of Gmail. You need to sign in to your Gmail on the PC browser to create the labels. Once you create the label, it will be synced to the mobile version automatically.
Step 1: Open the Gmail app on your Android or iOS device.
Step 2: Ensure that you’re logged in to your Google account.
Step 3: Select the emails that you want to move to the new folder.
Step 4: Click the three-dot menu icon on the top right corner.
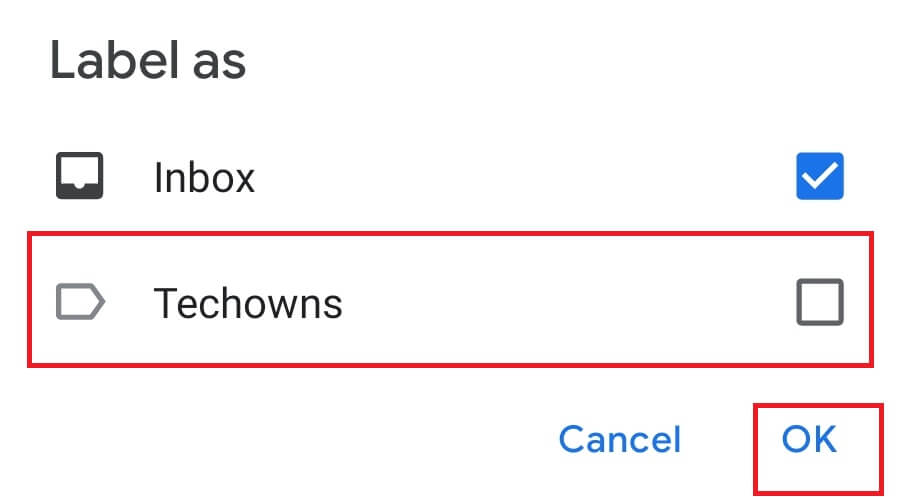
Step 5: Select Change Labels.
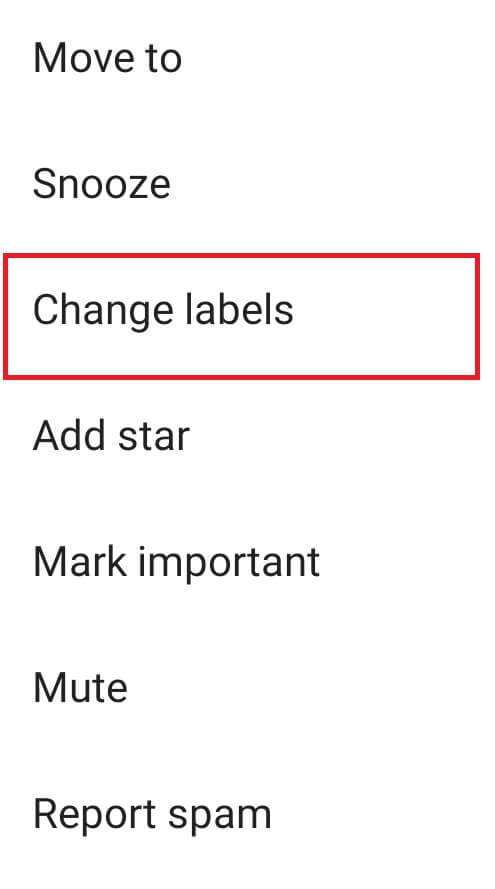
Step 6: Select the label and click OK.
Techowns Tip: How to Find and Retrieve Archived Emails in Gmail
To Conclude
If you run a business, the labels are significant to organize your important messages. We hope this article will help you to do the same with ease. Even after adding the label, the email will still appear in your inbox.
Finding difficulty in creating a label or folder in Gmail, use the comments section. Meanwhile, follow our Facebook and Twitter profiles for more useful guides.