Key Highlights
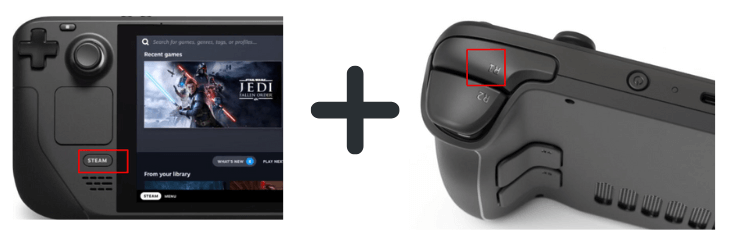
- Hold the Steam and R1 keys on the device to take a screenshot on Steam Deck.
- You can also use the Spectacle app to take screenshots on Steam Deck in Desktop Mode.
Screenshots or snapshots play a major role in gaming. While gaming, some note-worthy moments need to be recorded or captured. Citing to this, all gaming consoles and gaming devices have a built-in Screenshot option. In the Steam Deck, you can use certain combination keys to take a screenshot. In the Steam Deck, you can manage all the screenshots in a separate folder.
We all know Steam Deck can play games in both Gaming and Desktop Modes. In both modes, you can take screenshots on Steam Deck with ease.
Contents
How to Take a Screenshot on Steam Deck [Gaming Mode]
#1. While you’re playing a game on the Steam Deck, press and hold the Steam and R1 keys at the same time. This will take a screenshot of your gameplay.
#2. You will see a notification in the bottom right corner of the screen, confirming that the screenshot was taken.
#3. The screenshot will be saved to your Steam Deck’s internal storage.
If you’re in gaming mode, follow the below steps to find and share your screenshots.
#1. Press the Steam button to open the menu.
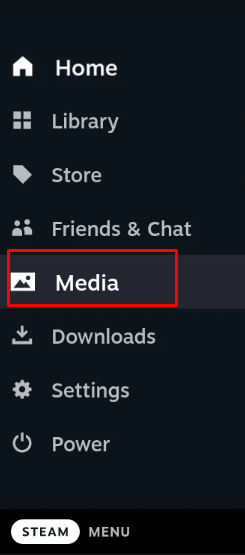
#2. Select Media in the menu option and press the A button to open it.
#3. The recent screenshot that you have taken will appear. Click the All option to see all the screenshots.
#4. Select the screenshot that you want to share and click the Upload option.
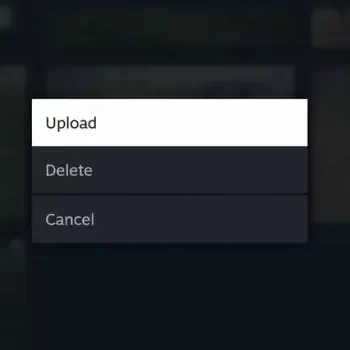
#5. This will add the screenshot to your Private Steam library.

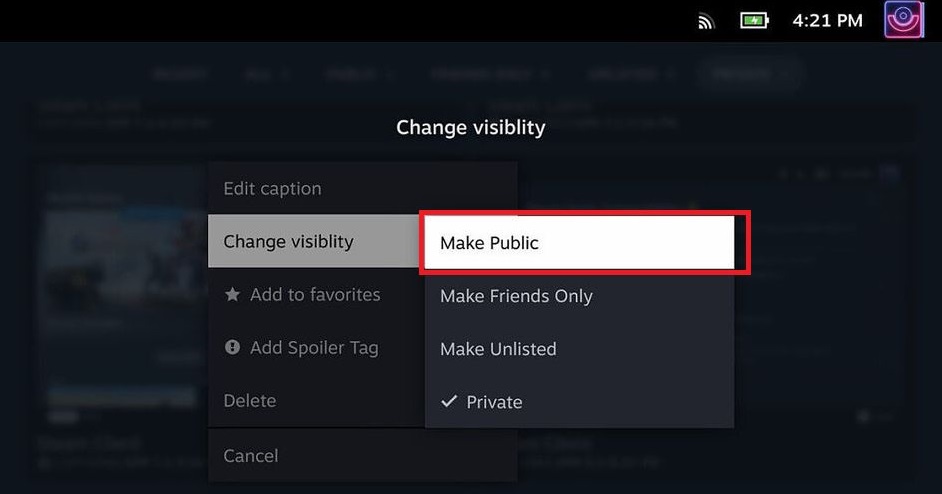
#6. To share the screenshot with your friends, you need to make it public. Go to the Private folder and choose the screenshot. Select the Make Public option. Now, the screenshot will appear in the Public library.
#7. Click the Settings icon on the screenshot and choose the Share option. You will get social media options to share screenshots.
As of now, you can manage screenshots individually. You can’t add multiple screenshots to the Public or Private library in the Game Mode.
How to Take a Screenshot on Steam Deck [Desktop Mode]
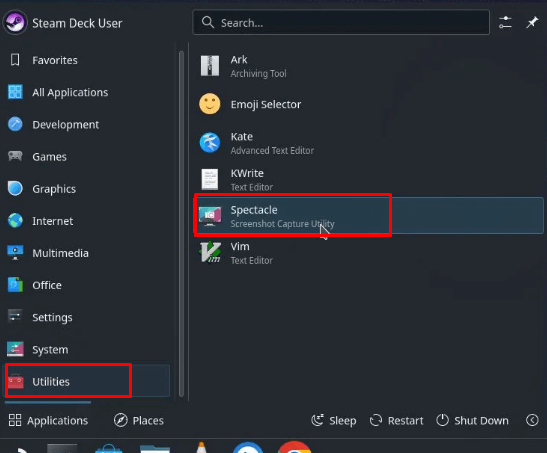
Unfortunately, Steam Deck doesn’t have an official way to take screenshots in Desktop Mode. You need a third-party app to take screenshots in Desktop Mode. Download and install the Spectacle app on your Steam Deck to take screenshots.
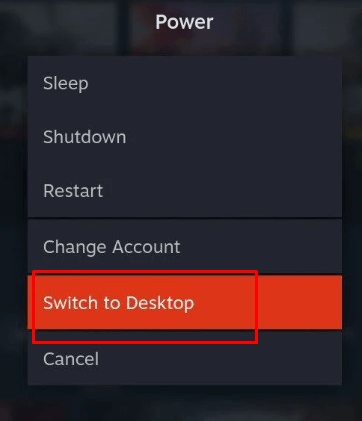
#1. Turn on your Steam Deck and enable the Desktop Mode (Go to Menu and choose Switch to Desktop option)
#2. Once you’re in desktop mode, Select the Steam Deck logo at the bottom left corner of the screen and open the Application Launcher.
#3. Select Utilities and click on the Spectacle application.
#4. Once the app is opened, tap on the Take a Screenshot button located on the right of the screen.
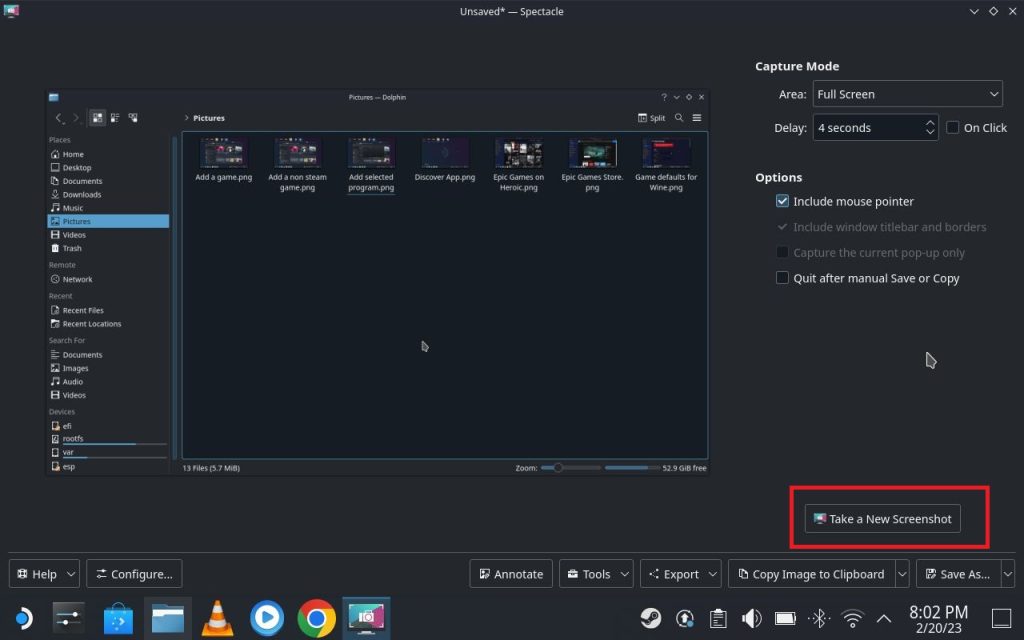
#5. This will take a screenshot on your Steam Deck.
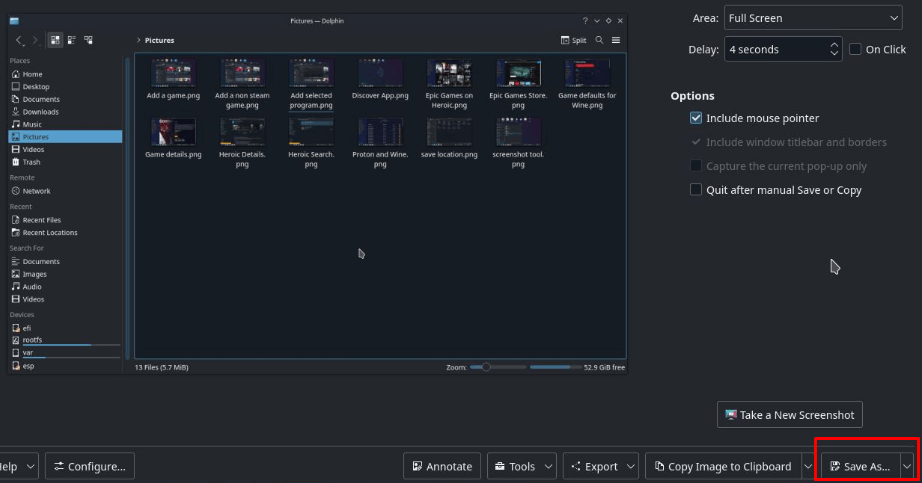
#6. Then, click the Save As button at the bottom right of the screen to save your screenshot.
If your Steam Deck device is connected to the keyboard, you can take screenshots by pressing the Print Screen button, the method we have used to take screenshots on PC.
How to Manage Screenshots in Steam Deck [Desktop Mode]
#1. Go to Dolphin File Explorer on the taskbar.
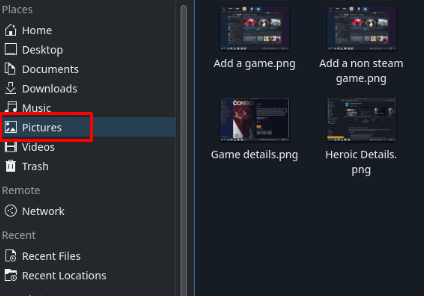
#2. Now, select Pictures from the left pane. There you’ll find all your saved screenshots.
#3. You can select any screenshot and share it directly using a web browser.
FAQs
Yes, your screenshots will be automatically uploaded to the Steam Cloud.
Yes, by installing the Steam app on your PC, you can access all your Steam library on your PC.