Windows Defender is pre-installed antivirus software that is available on every Windows PC. It is not the best antivirus software but it gives you low-level protection for your PC. The people who their PC a lot will have either free or paid third-party antivirus software. In such cases, it is better to turn off or disable the Windows Defender. Running on two antivirus software may harm your PC and decrease your PC’s performance.
Windows Defender will detect other antivirus software and it will automatically turn off. When you uninstall the anti-virus, it will turn on without any manual commands. But it is safer to check by yourself.
Contents
- How to Turn Off Windows Defender?
- How to Turn Off Windows Defender in Windows 10 using Settings?
- How to Turn Off in Windows 10 using Registry Editor?
- How to Turn off Windows Defender in Windows 10 using Local Group Policy?
- How to Turn off Windows Defender Temporarily in Windows 8?
- How to Turn off Windows Defender in Windows 7?
How to Turn Off Windows Defender?
There are three ways to turn off the Defender application:
- In Settings
- Using Registry Editor
- Using Local Group Policy
How to Turn Off Windows Defender in Windows 10 using Settings?
This method can be used to disable or Turn off Defender temporarily.
(1) Click the Start button and select Settings.
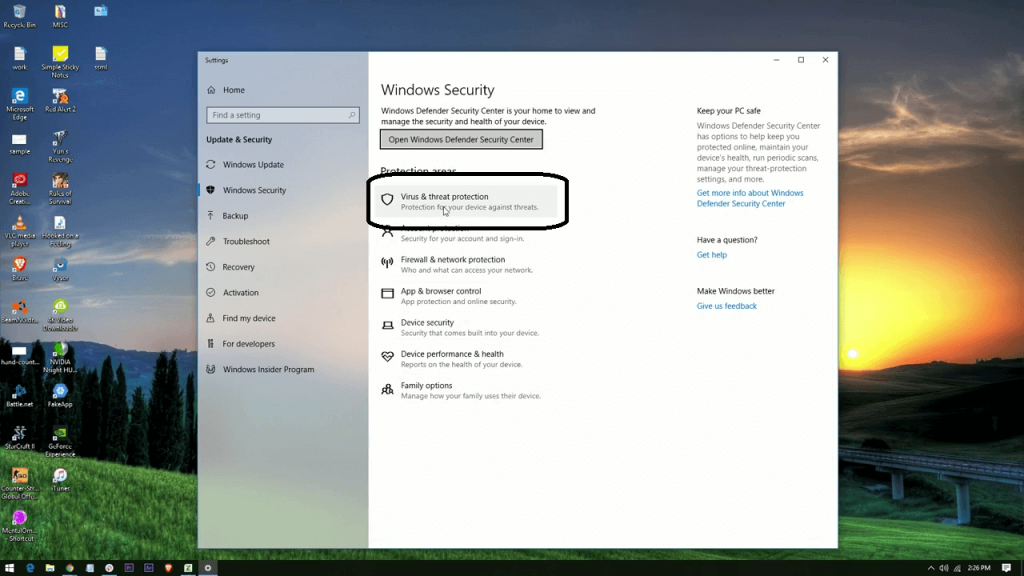
(2) On the Settings menu, click the Update & Security.
(3) On the next screen, click Windows Security.
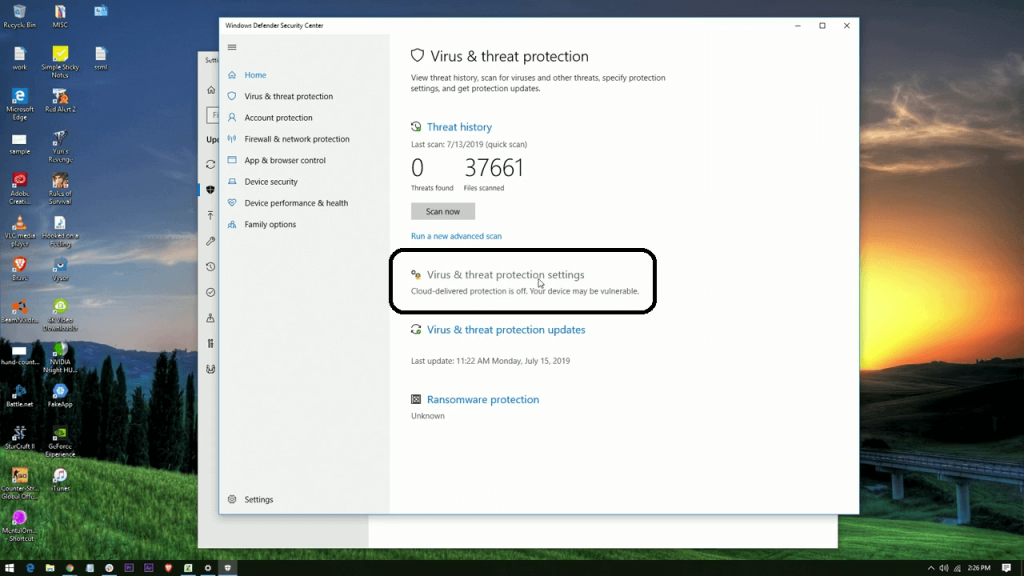
(4) Windows Security tab will open. Tap on the Virus & threat protection.
(5) Click Virus & threat protection settings or Manage settings.
(6) Now, click the Real-time protection toggle to turn off Windows Defender.
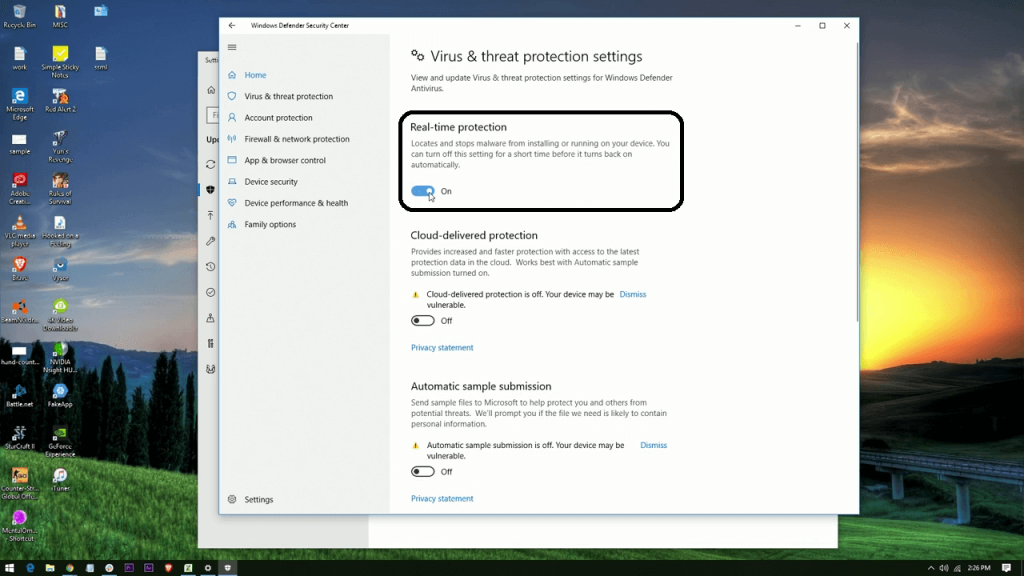
(7) On the confirmation popup, click the Yes button.

Note: Turning off Defender in this method will disable the application for the current session. If you restart your PC, it will automatically be turned on.
How to Turn Off in Windows 10 using Registry Editor?
In this method, you are going to permanently disable Defender.
(1) Click Windows Key + R to open the Run command and search for regedit. Open the Registry Editor.
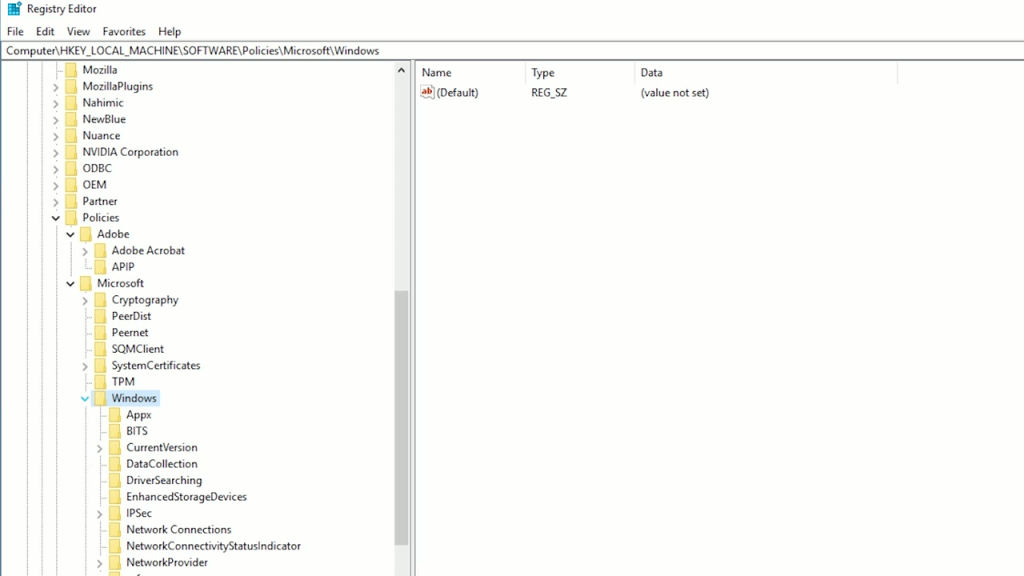
(2) On the Registry Editor, click the Drop-down arrow corresponds to open the HKEY_LOCAL_MACHINE.

(3) Now, open the Software option.

(4) Under Software, open Policies folder.
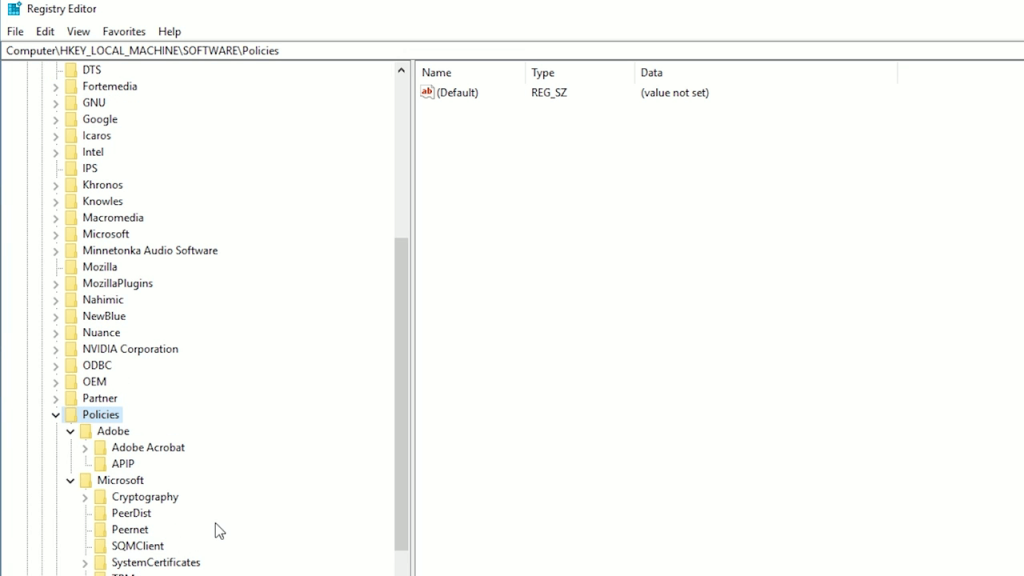
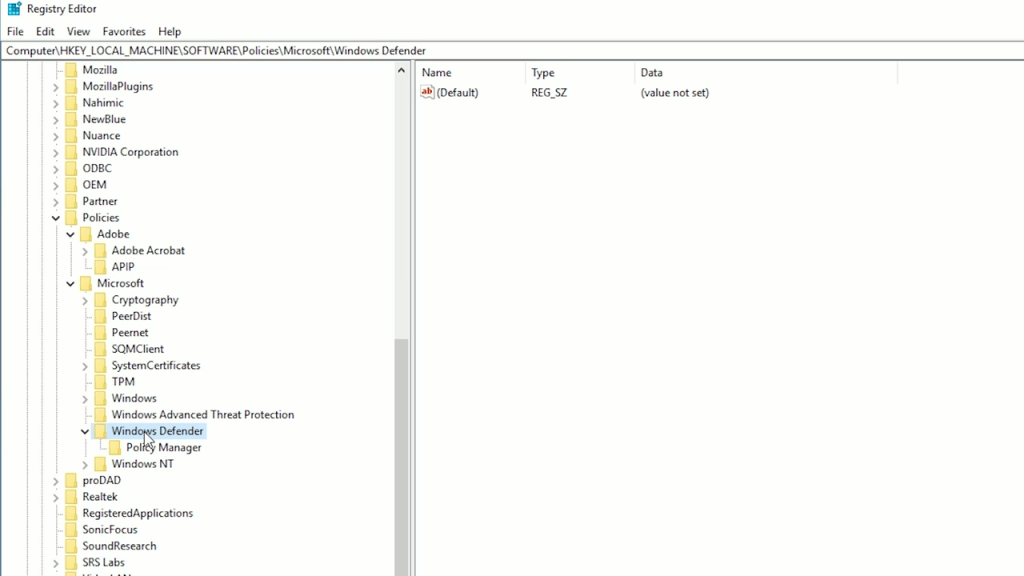
(5) On the Policies folder, click the Microsoft folder and choose Windows folder.
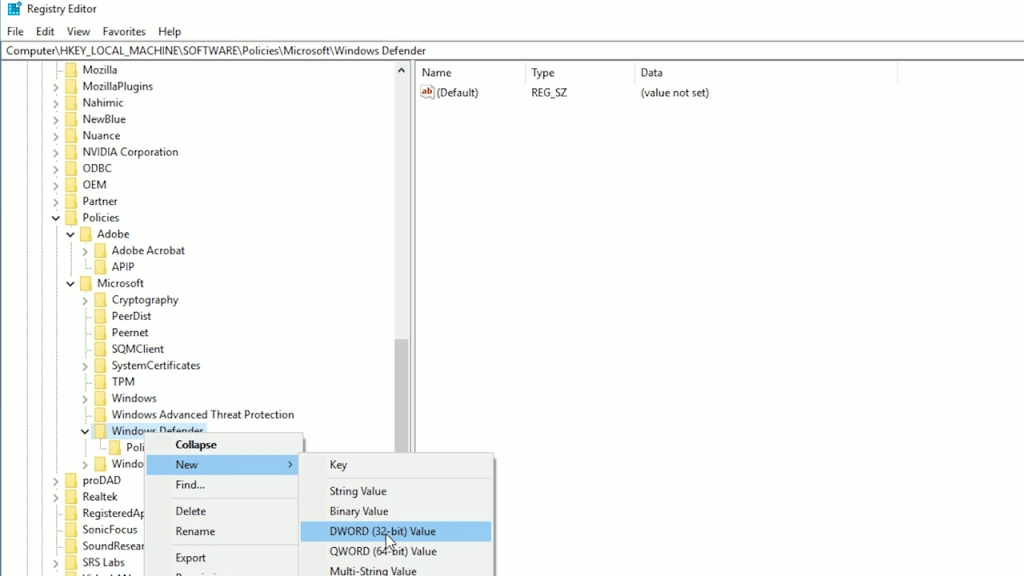
(6) Then, right-click on the Windows Defender folder.
(7) Follow the command, New –> DWORD (32-bit) Value.
(8) A New Value file will be created on the right side. Rename the file to DisableAntiSpyware (without spaces).
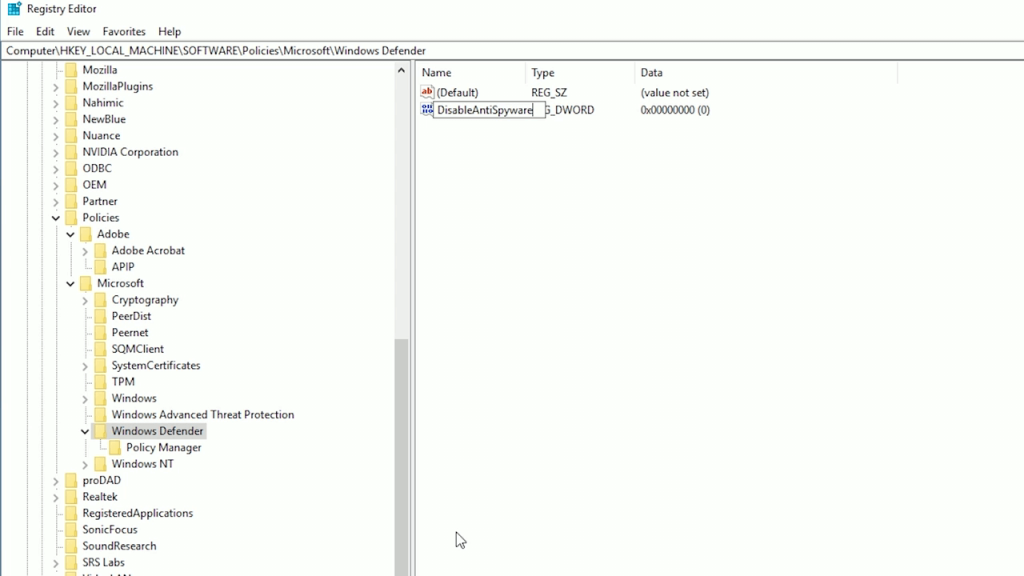
(9) Now, double click the file and change the value 0 to 1.
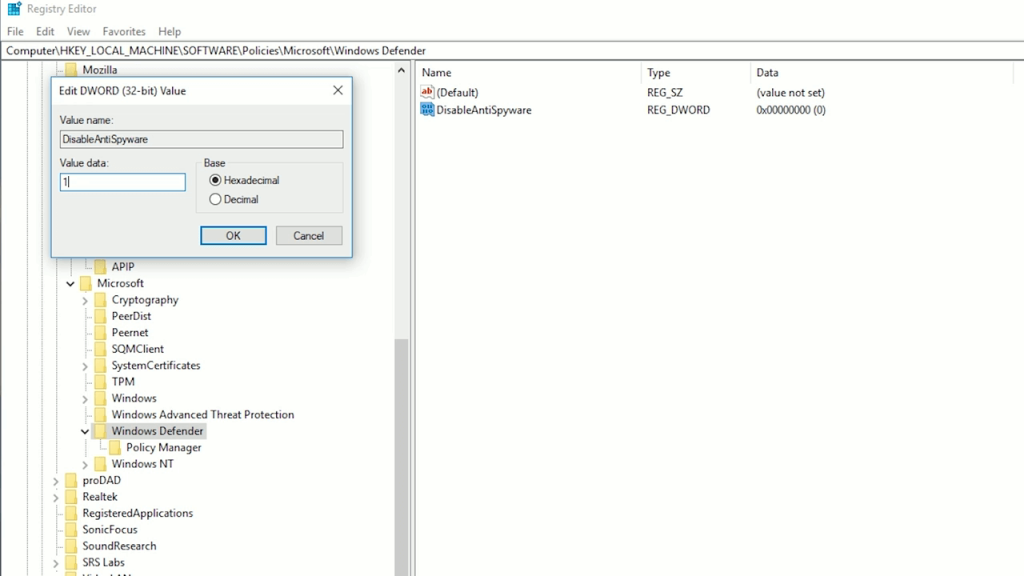
(10) Click the OK button. Now, restart your PC.
At this point, you have permanently disabled this application on your Windows 10 PC. It will no longer be activated on your PC. It won’t turn on until you do it manually.
After this, if you want to turn on or enable Windows Defender on Windows 10, delete the DisableAntiSpyware file and restart your PC.
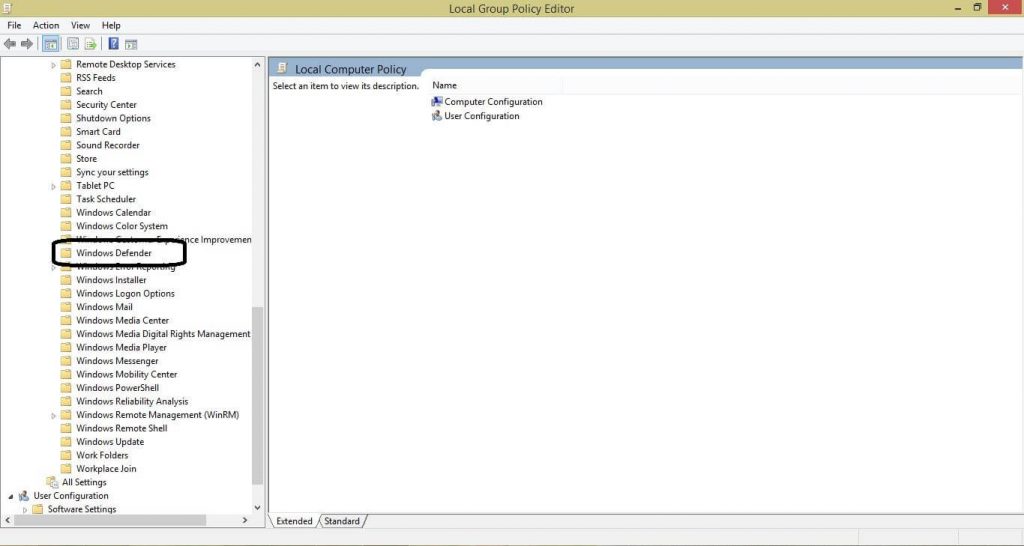
How to Turn off Windows Defender in Windows 10 using Local Group Policy?
This is another method to remove Defender permanently.
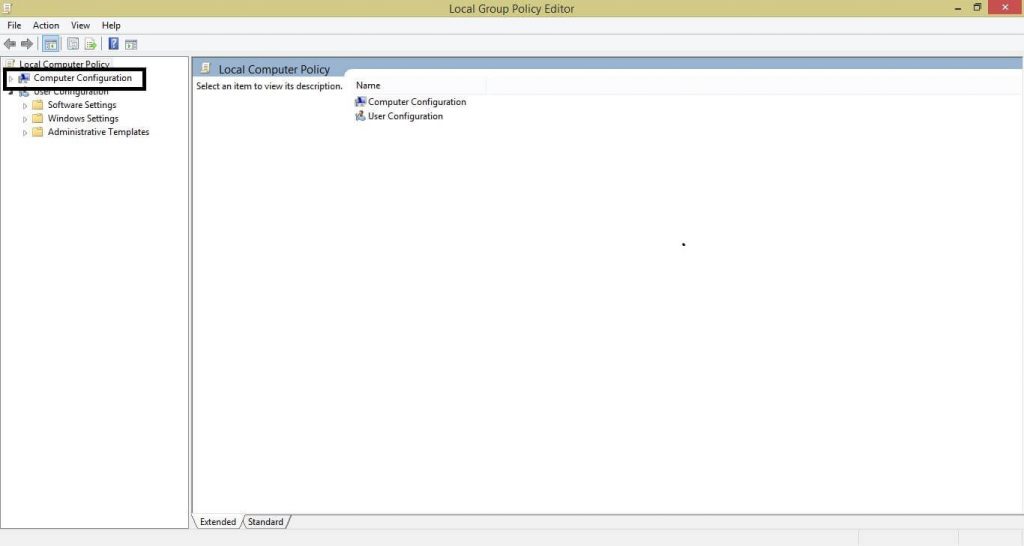
(1) Open the Run command and search for gpedit.msc.
(2) On the Local Group Policy Editor, open the Computer Configuration folder.
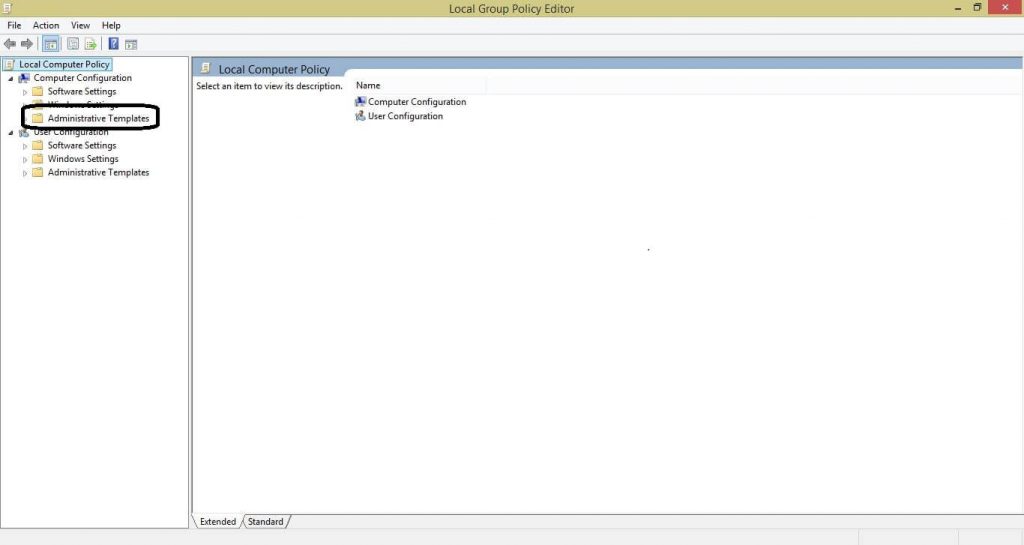
(3) Under Computer Configuration, click the Administrative Templates.
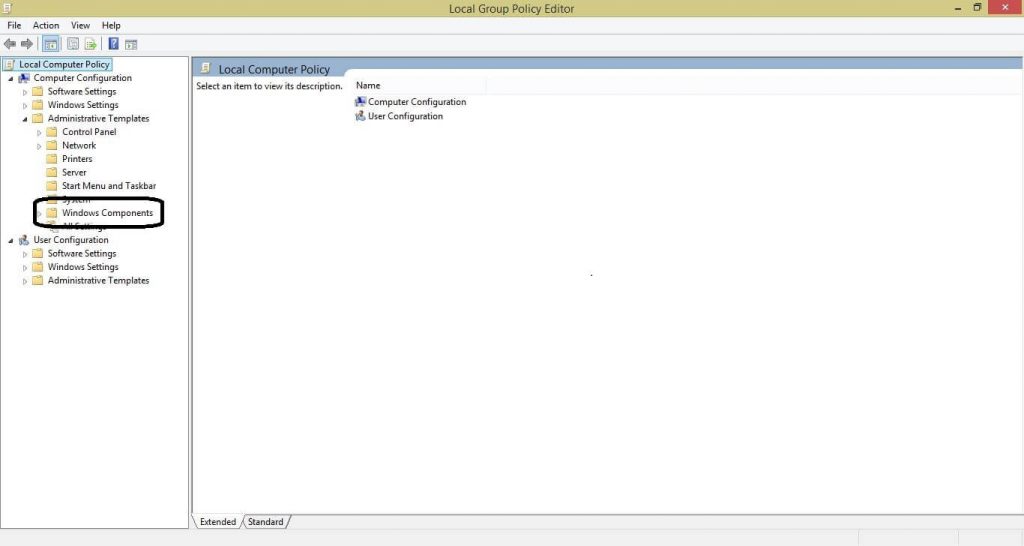
(4) On Administrative Templates, open the Windows Components.
(5) Now, search for Windows Defender and click on it.
(6) On the right side of the screen, double click on the Turn off Defender option.
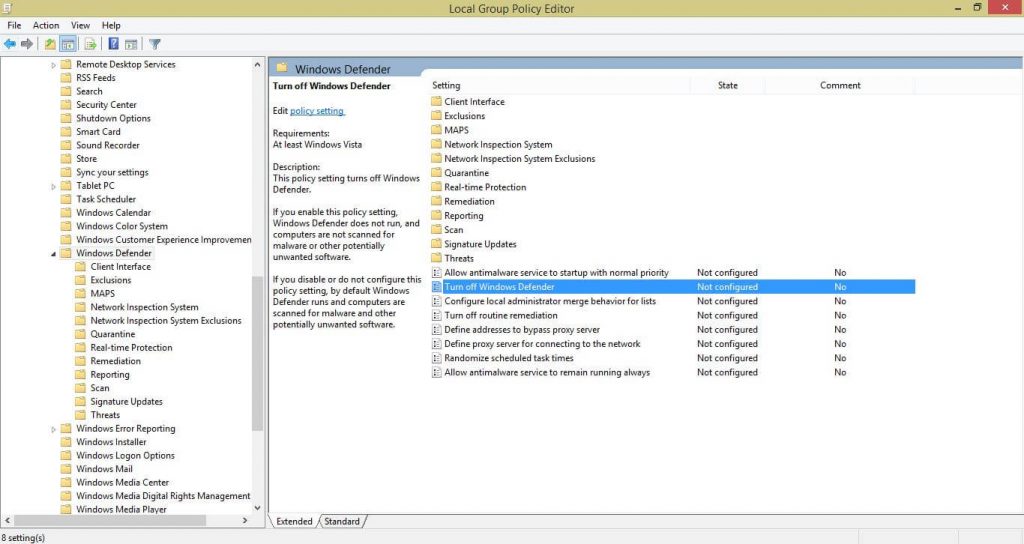
(7) Turn off Windows Defender dialog box will open. Choose the Enabled option.
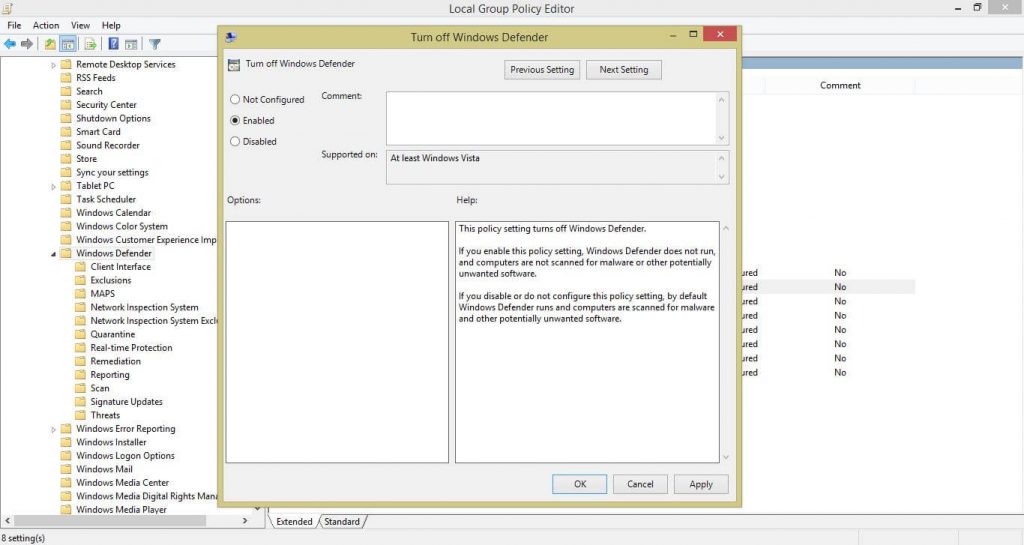
(8) Now, click on Apply and then OK to save the changes.
(9) Restart your Windows 10 PC to complete the saved changes.
Now, you uninstalled the Windows Defender on your PC. To turn Windows Defender on, choose the Not Configured option instead of Enabled option in step 7 and restart your system.
You can also use this method on Windows 8 and 8.1 PCs. Using this method on Windows 8 and 8.1 PCs, you can permanently disable the Windows Defender application.
How to Turn off Windows Defender Temporarily in Windows 8?
(1) Open this application on your Windows 8 PC.
(2) Click the Settings option on the top of the screen.
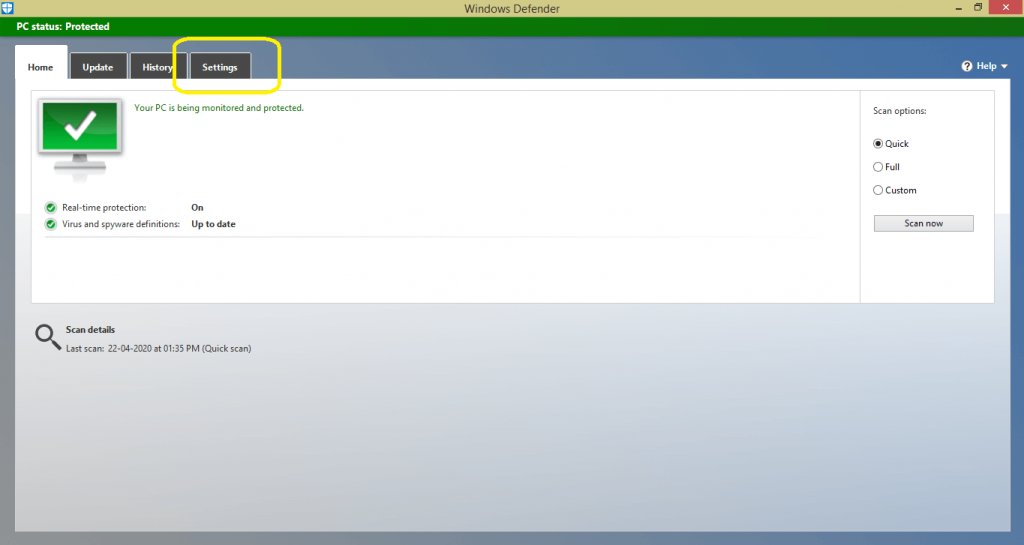
(3) Untick the Turn on real-time protection and click Save Changes.
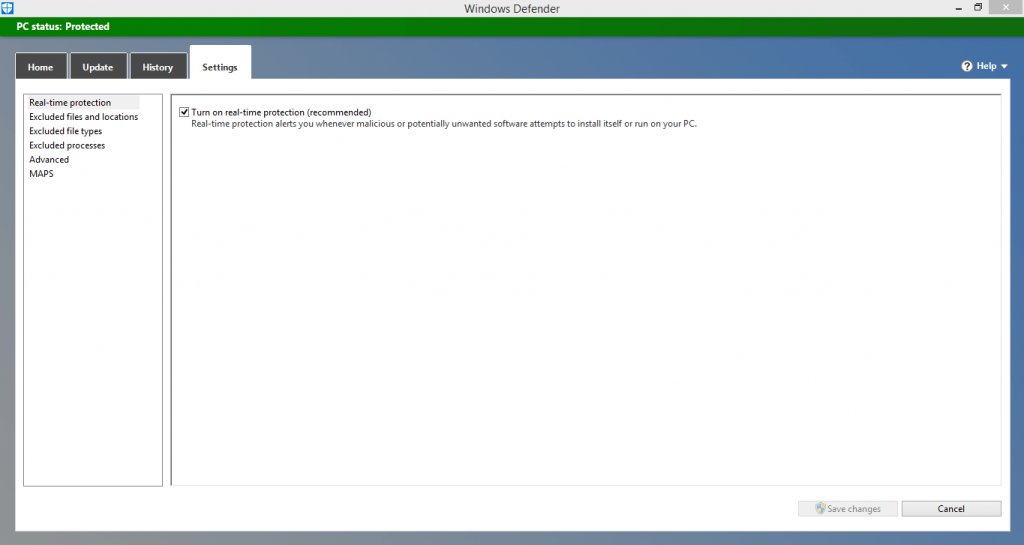
To turn on Windows Defender in Windows 8, restart your PC or tick the Turn on real-time protection.
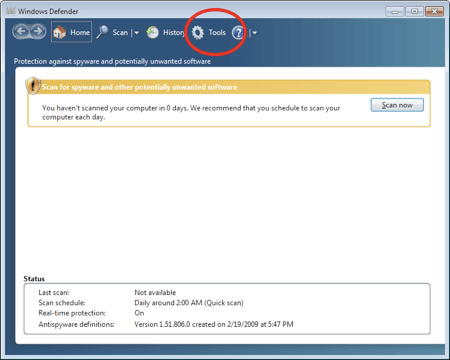
How to Turn off Windows Defender in Windows 7?
(1) Open the Defender application by using the Search function or Run command.
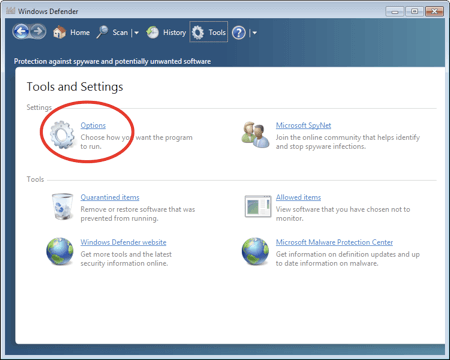
(2) Click the Tools option on the top of the screen.
(3) Now, click the Options icon.
(4) Tap on the Administrator on the left side of the screen.
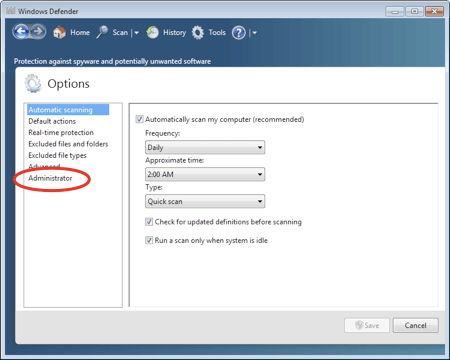
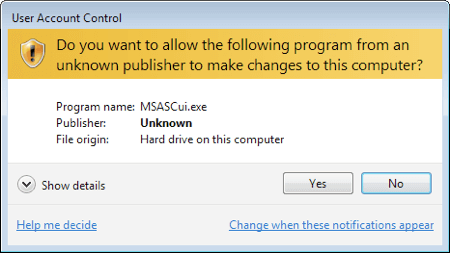
(5) Untick the Use this program option and click Save.
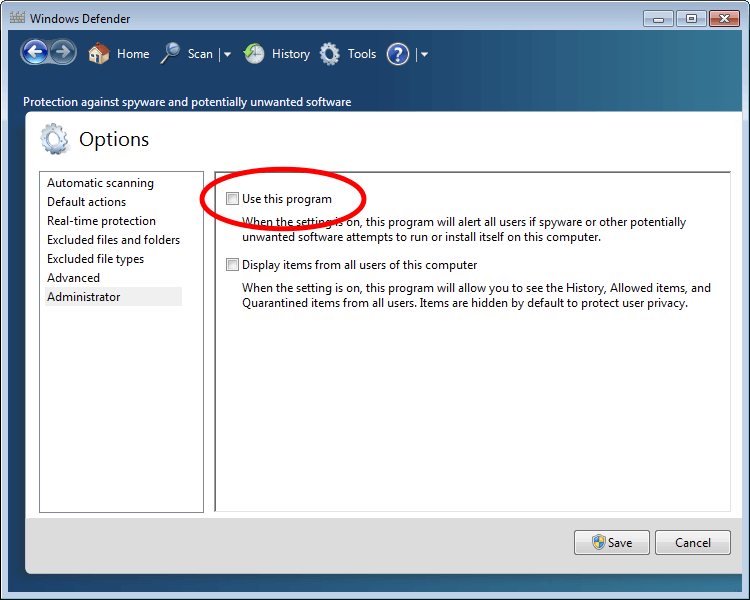
(6) On the confirmation pop-up, click the Yes button.
Now, you have turned off this application. You can also use the same steps to turn it on.
That’s all about the disabling Defender application. Turn off or Turn on the Windows Defender application whenever you want on your Windows 10, 8, 8.1, and 7 PCs. If you need any help in managing the Defender application, tell us in the comments section below.
We are available on Facebook and Twitter. Stay connected with us for more tech updates.