Apple Watch can be customized according to our desire. Apps layout is nothing but the format that the apps are arranged in your Smartwatch. Apple Watch gives you two basic layout options: List and Grid. You can make innovative organizations only in the Grid view. The well-organized view will enhance the look of this impressive gadget. You can change app layout on Apple Watch easily from Grid to List and vice versa.
The grid view is popularly known as the “Honey Comb” view with a clock application on the center and other apps surrounding it. At the same time, the list view will sort the applications in the alphabet order so that you can scroll through the screen to find your application.
Contents
How to Change App Layout on Apple Watch [Switch Between Grid and List View]
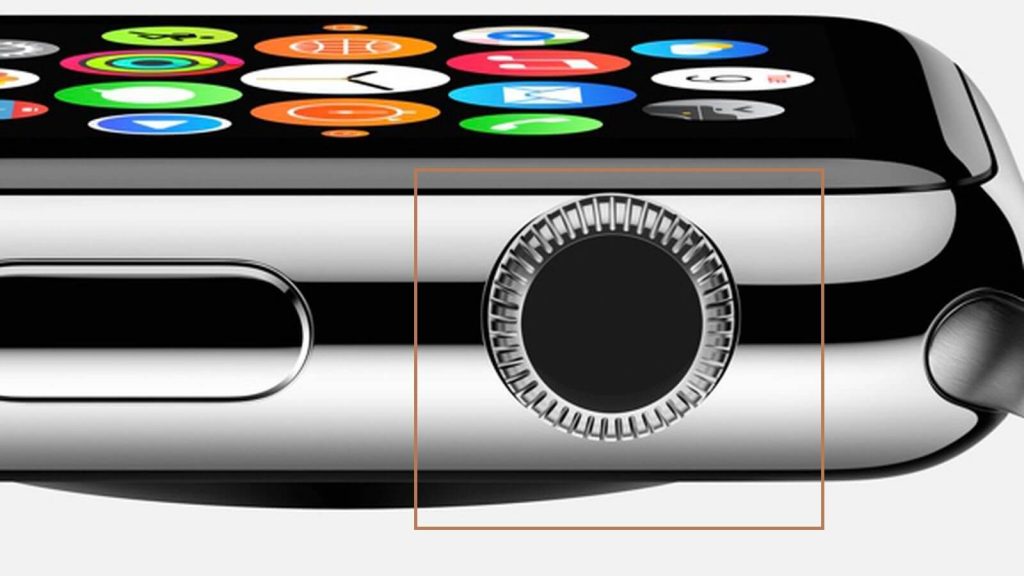
Step 1: Pres the “Digital Crown” to wake your Apple watch.
Step 2: Press and hold the screen for a few seconds.
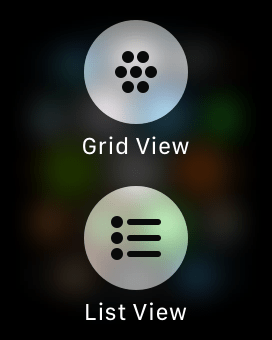
Step 3: Select List View to change the layout. If you’re already using List View, select Grid View.
Rearrange Apps on Grid View
- Launch the home screen by pressing the Digital Crown. Touch and hold an application until all the applications jiggle. Press and drag the application to a new location.

- Repeat the steps to relocate the applications that you want.

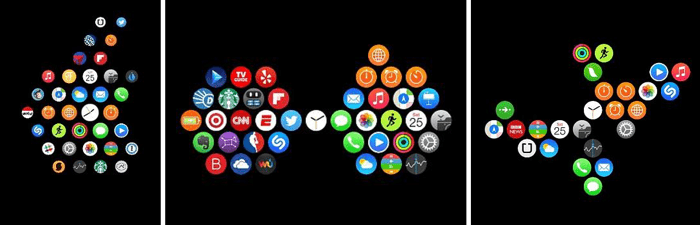
You can also make some innovations in the arrangement by using the paired iPhone. For example, you can choose to arrange apps in Tree form, hourglass, circular layout, and more.
- Open My watch >> choose App layout. Touch and drag an icon to a new location.
NOTE – While using the list view, you cannot swap and switch the app’s location according to your convenience.
Still finding difficulties in changing the app layout on Apple Watch or having any other suggestions, write to us in the comment section. Hit the Follow icon on our Facebook and Twitter profiles for the latest tutorials.