Linux is heaven for programmers and developers. Ubuntu, one of the best Linux distributions and is also the most preferred distro for beginners and developers. The working and the UI of the Ubuntu is very simple and the procedure to install apps manually is next to nothing. If you want to run Java applications or to develop your own programs on Java, you need to install Java on Ubuntu.
Contents
Ways to Install Java on Ubuntu
- JRE on Ubuntu
- JDK on Ubuntu
- Oracle JDK on Ubuntu
The difference between JRE and JDK depends on your purpose. JRE (Java Runtime Environment) allows your PC to run programs written in Java. JDK (Java Development Kit) will allow you to develop programs using Java language.
Oracle JDK method is installing Java from the website. It is the combined version of both JRE and JDK.
How to Install Java (JRE) on Ubuntu
(1) Open the Terminal window on your Ubuntu PC. (Ctrl + Alt + T).
(2) If you want to install the default version of JRE, type and execute the command,
sudo apt install default-jre
This command will install the latest JRE available from Ubuntu.
(3) If you want to install a specific version of JRE, you need to go to the Ubuntu Packages website.
(4) Scroll down to the Search bar and search for openjdk.
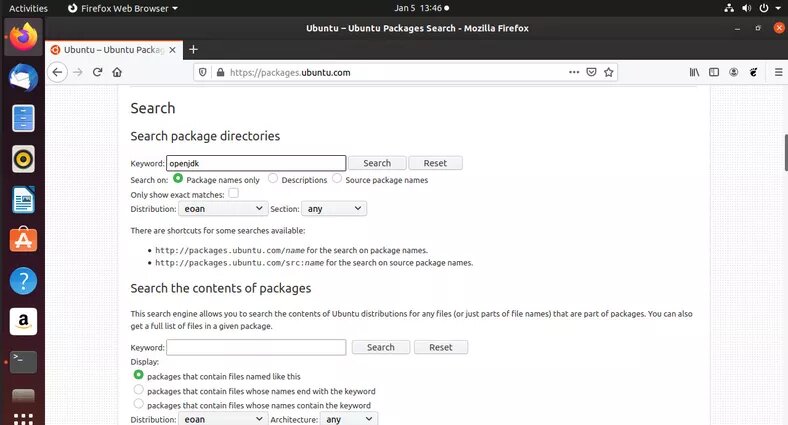
(5) Find the version you are looking for and note down the version name and number.
(6) Now, rewrite the above code as,
sudo apt install openjdk-14-jre
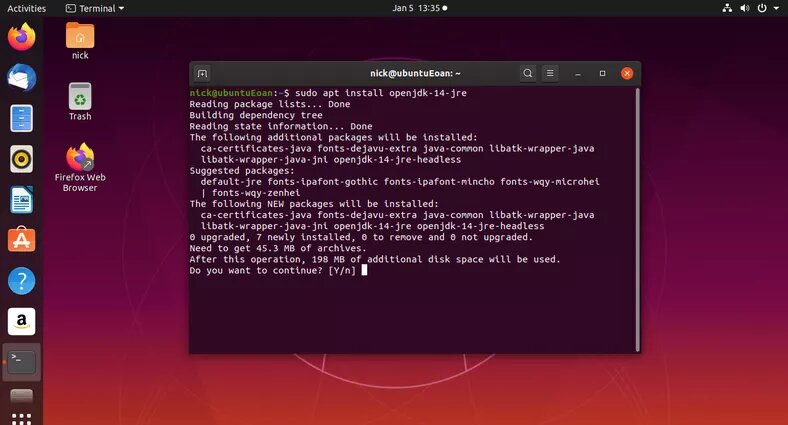
(7) If asked, press y to install the JRE on your Ubuntu.
Note: The number 11 indicates the version of JRE
How to Install Java (JDK) on Ubuntu
To install JDK (Java Development Kit) on Ubuntu, you have to follow the same process but with small changes in the execution code.
(1) On the Terminal window, type and execute the command,
sudo apt install default-jdk
(2) If you want to install the specific version of JDK, search for the version as mentioned in the previous method.
(3) When you find the desired version, type, and execute the command with the version number.
sudo apt install openjdk-14-jdk
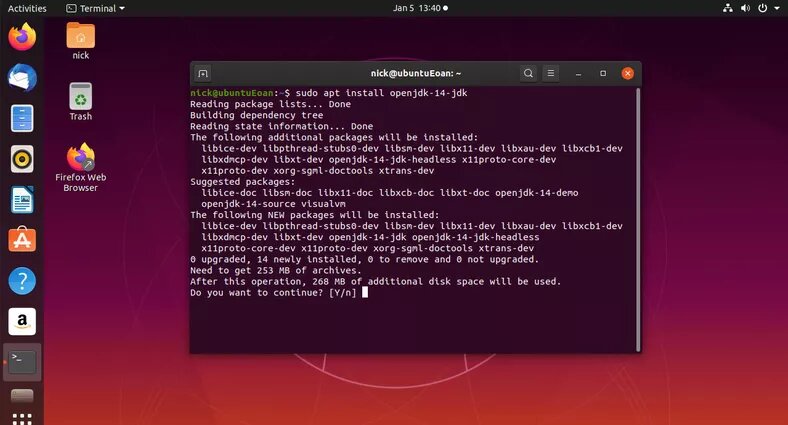
(4) When asked for confirmation, press y.
How to Install Oracle JDK on Ubuntu
Sometimes, you need to install the Java application from Oracle. If you want to maintain a company server or to meet business requirements, you need to install Java in this way.
(1) On the Terminal window and execute the command,
sudo add-apt-repository ppa:linuxuprising/java
sudo apt-get update
Note: The above command will create a PPA (Personal Package Archives) on your Ubuntu. This will download a lot of files, so make sure that you have enough data and sufficient speed.
(2) Now, execute the installation command,
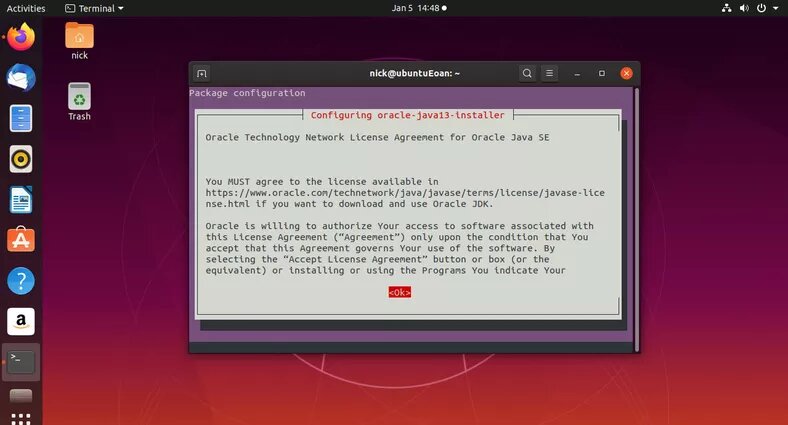
sudo apt install oracle-java13-installer
Note: 13 is the version number. Check for the latest version on the Oracle website.
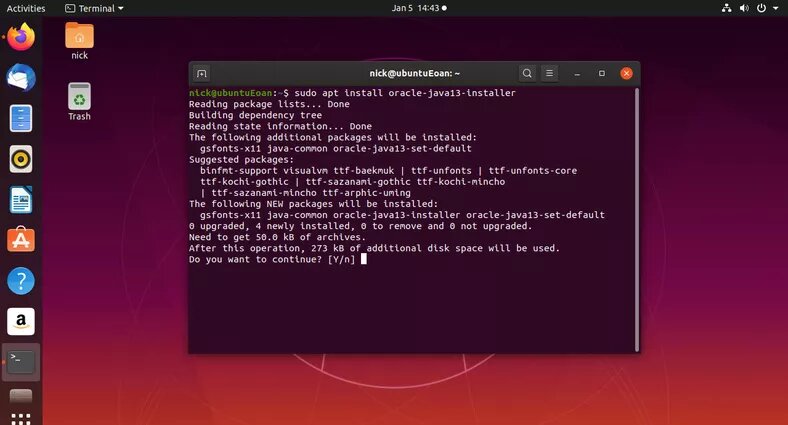
(3) Agree to the Oracle License Agreement, if asked.
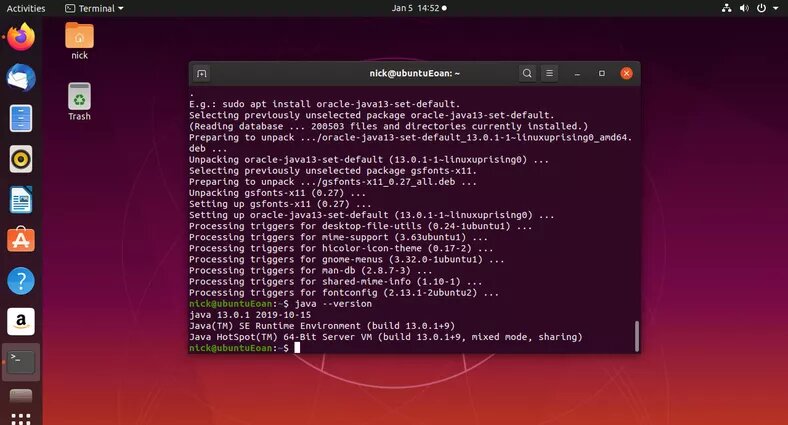
(4) When the installation is complete, execute the below command to make sure that the installation is successful.
java --version
To conclude
These are different ways to install Java on Ubuntu platforms. Install the Java on your Ubuntu that suits your purpose and start working on Java. If you have any doubts, tell us in the comments section.
Stay connected on our social media platforms, Facebook and Twitter to get more updates.