Kali Linux plays a major role in ethical hacking, security audit, penetration testing, and more. It is one of the industry-leading Linux distribution used mostly for digital forensics and penetration testing. Kali Linux is a Debian derived Linux distribution and comes pre-loaded with 600+ popular security tools. Further, it is a completely customizable tool that supports a multitude of languages. Although it is free and open-source software, it is developed in a secure environment. With all these advantages, Kali Linux is most famous among cybersecurity experts from across the world. If you aren’t familiar with installing Kali Linux, then we are here to help you out.
How to Install Kali Linux?
Get down the section below to install Kali Linux by following the step-by-step guidelines.
Initial Requirements:
- Minimum of 20GB disk space
- 1 GB or more RAM
- USB Drive
(1). Visit https://www.kali.org/downloads/ using the browser.
(2). Download Kali Linux ISO image based on your computer architecture.
(3). To create a bootable USB drive on a laptop, desktop, or server, the user should create a bootable medium.
- On Linux PC, use dd command on the terminal.
sudo dd if=kali-linux-2020.1-installer-amd64.iso of=/dev/sdX bs=512k
where /dev/sdX implies your USB device.
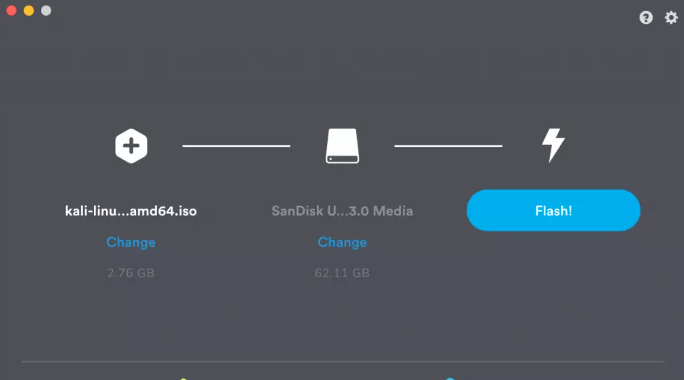
- On Mac or Windows PC, use Etcher.
Just select the image, USB device, and tap on the Flash button.
(4). Now, connect the bootable USB drive into your PC and open the boot menu. Instruct the system to start the installation from the USB drive.
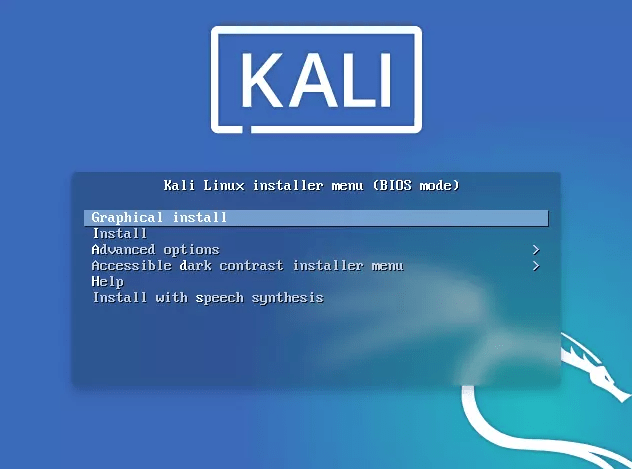
(5). After the boot, select the Graphical install option.
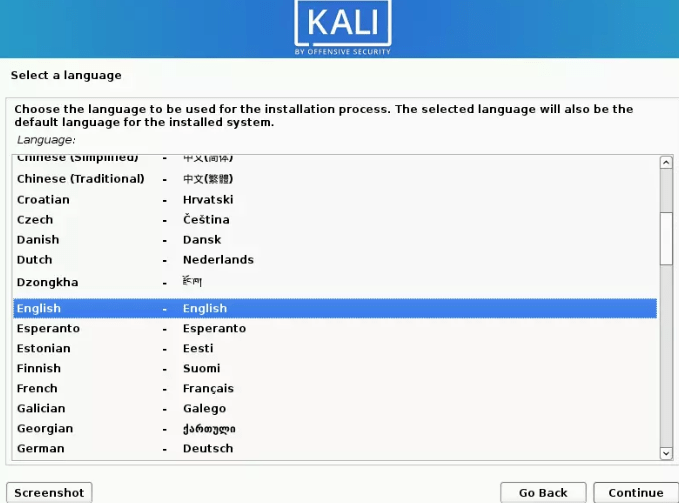
(6). Choose the language of your choice on the next screen and click Continue.
(7). Select the location and press Continue.

(8). Choose keyboard configuration and select Continue.

(9). Wait for Kali to detect and configure the network interface automatically.
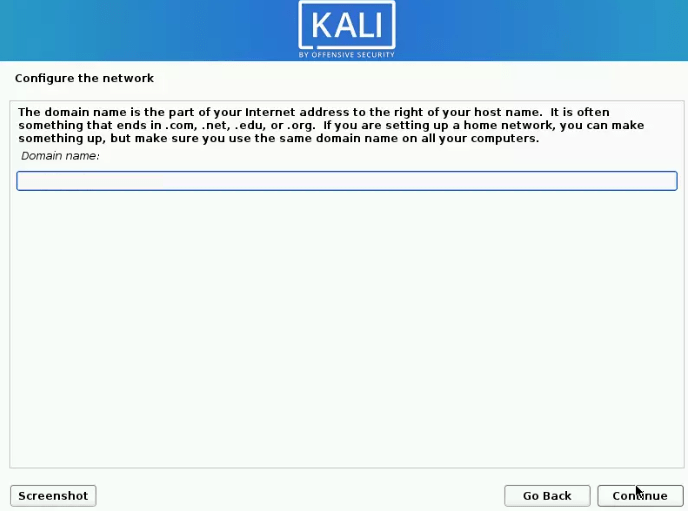
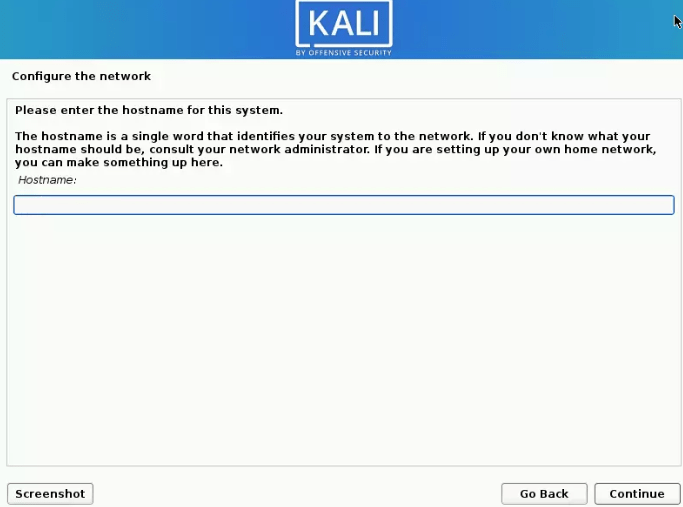
(10). Leave the domain name section blank and click Continue. Optionally, type personal network name as the hostname.
(11). Create a user by providing the full name for the non-administrative activities.

(12). Provide Root password to verify that you are a root user and click Continue.
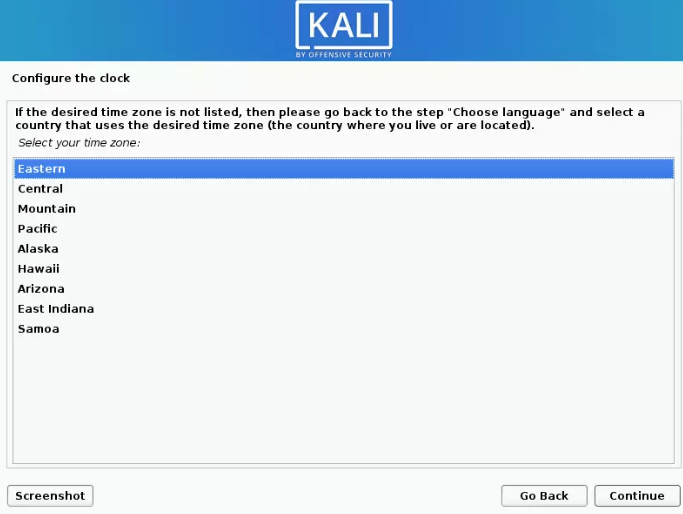
(13). Choose the time zone under Configure the clock. Tap on the Continue button.
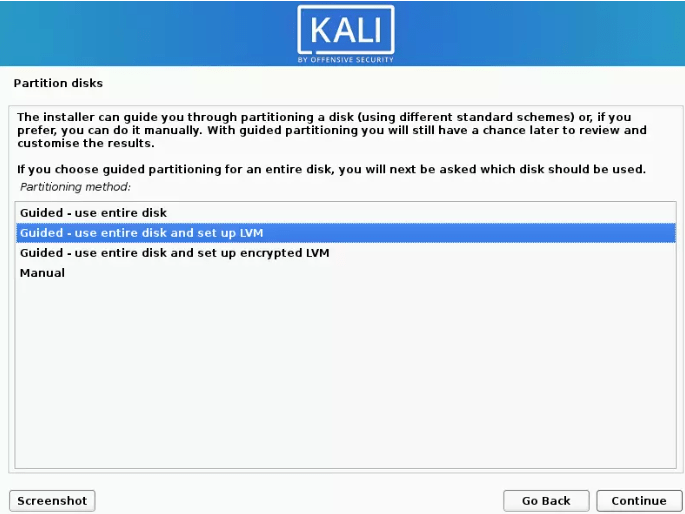
(14). On the next screen, choose Guided-use entire disk and click Continue.
(15). Now, select the disk to be used and click on Continue.
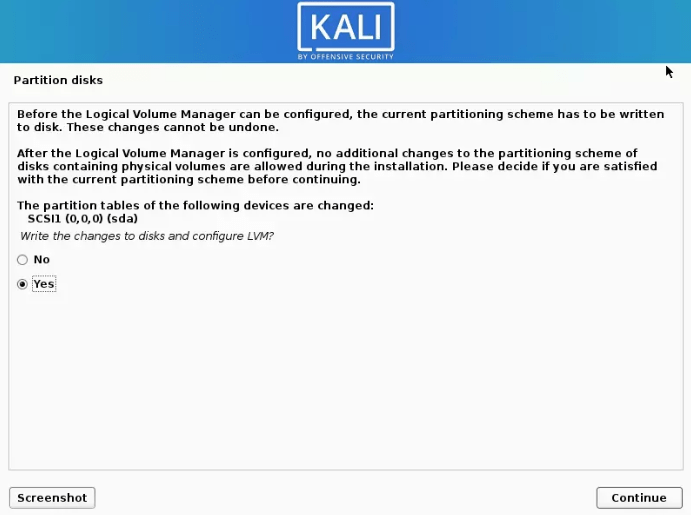
(16). Under Partition disks, highlight All files in one partition option to proceed.

(17). Click on Yes radio button and then Continue button.
(18). Wait for the installation to complete. Click Continue to choose a network mirror.
(19). Press Yes if you want to install a proxy. Then, press Yes to install the GRUB boot loader and click Continue.
(20). Select the drive that house bootloader. It will be mostly /dev/sda and then select Continue.
(21). When the installation gets over, you will get information. Click Continue.
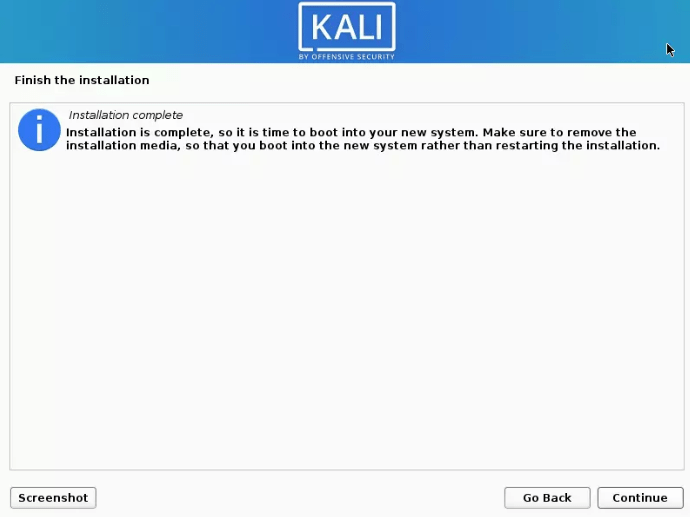
(22). Remove the USB drive and let the computer boot. When landed on the login screen, type as root for username and enter the password you have given in (12).
Techowns Tip: Best RDP for Linux
That’s all. Installation of Kali Linux is completed, and you can start using it to test the network or PC for its vulnerabilities.
Learn How to install Linux on Chromebook.
Have you found this article informative? Let’s hear it from your comments below. Find more related articles by following us on Facebook and Twitter.