Windows 10 devices with NVIDIA Graphics GPU will commonly use the NVIDIA Graphics driver. It is that driver software that establishes a communication with the device hardware. Without the graphics driver, you will encounter various issues while playing games. So, it is vital to have the latest version of graphics driver software installed on a desktop. At times, the Windows PC users may find issues after you update NVIDIA Driver to the latest version. The problem may get even worse when your games run extremely slow. For a few, the driver may crash and end up in an incomplete installation. These errors might be due to the incompatibility issues and hence requires a rollback. If you aren’t aware of the procedure, then get into the section to know how to rollback Nvidia Drivers.
Contents
How to Rollback NVIDIA Drivers?
The steps to get back to the last working version of NVIDIA Graphics Drivers falls into two methods.
Using Device Management Console
To roll back to the previous working versions of the NVIDIA driver, you can make use of the Windows built-in tool.
(1). Open Run command by pressing Windows +R keys.
(2). Type in as devmgmt.msc and press OK to open Device Manager.
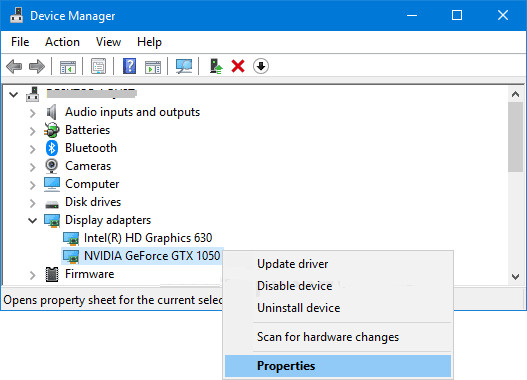
(3). Click on the Display adapters option in the Device Manager window.
(4). Then right-click on NVIDIA GeForce GTX adapter to select Properties.
(5). When the Properties window opens up, click on the Driver tab and select Roll Back Driver.
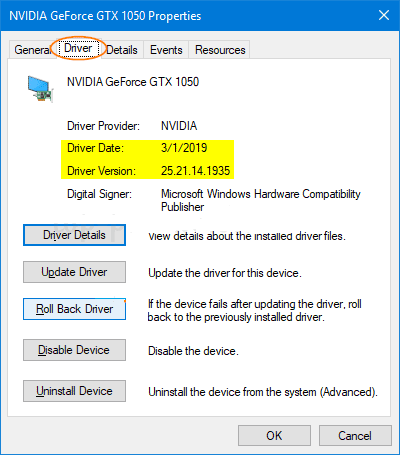
Note: When the rollback button is greyed out, then it means you cannot roll back to the previous version. So, you should manually download the old driver from NVIDIA official website and reinstall it on Windows.
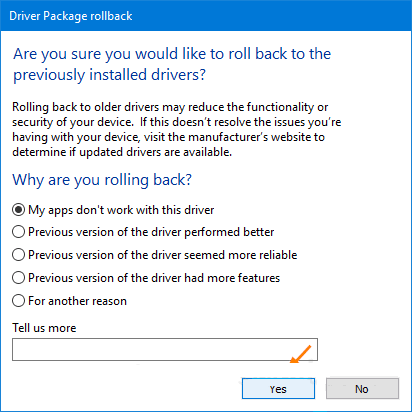
(6). Click Yes on the Confirmation dialog box after choosing a reason for rolling back.
(7). Restart your PC to apply the changes to the fullest.
Using Display Driver Utility
Make sure you have the Display Driver Utility (DDU) installed on your device before proceeding with the steps.
(1). Go to https://www.nvidia.com/Download/index.aspx using your web browser.
(2). Enter product type, series, product, OS, and language on the respective field under Manually find drivers for my NVIDIA products.
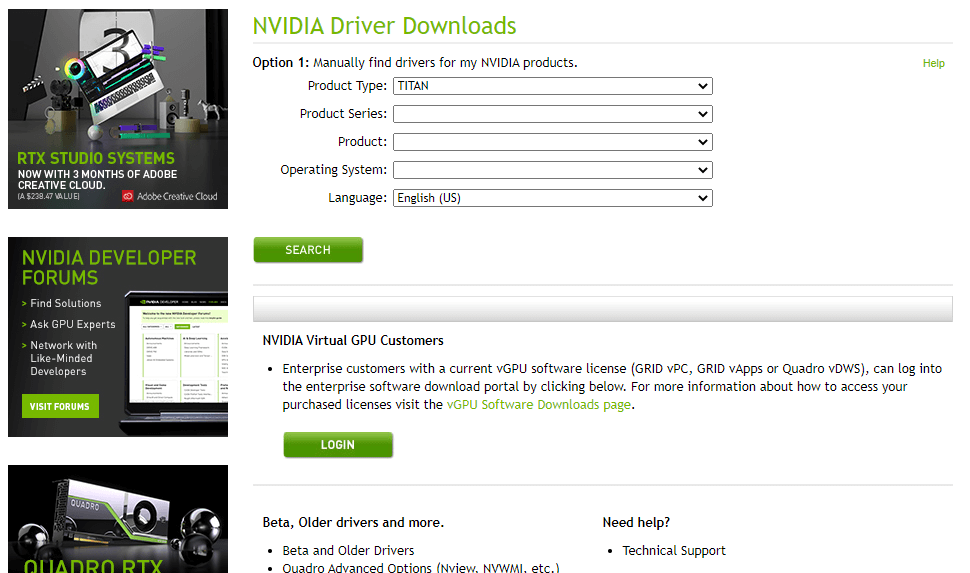
(3). Click on the Search button and you will get the list of drivers, versions, and suitable version.
(4). Use Display Driver Utility to remove all the existing as well as the previous NVIDIA Graphics drivers and its related software.
Note: Perform this procedure under safe mode.
(5). Now, install the Driver you have downloaded on step (2).
(6). Select Custom (Advanced) and choose Perform a clean installation to remove the previous installations.
(7). Restart your device to complete the installation to check if the issues has resolved.
To Conclude
I hope this section has helped you out with reverting back to the previous version of the NVIDIA Graphics Driver. Hence when you face any issue, it is not necessary that you need to uninstall NVIDIA drivers. Upon doing this, you will be able to get back your device performance or resolve the issues with the latest version.
Let’s hear your thoughts about this section as comments below. For more informative articles, you may follow our Facebook and Twitter pages.