There are plenty of display settings available on your Windows PC. You can change the resolution, color settings, and orientation on your Windows using the display settings. Like a tablet or phone, you can change the orientation of your Windows PC. If you want to rotate the screen on Windows, then you can change the orientation as per your wish. Here are the different ways to rotate the screen on your Windows PC.
Contents
How to Rotate the screen on Windows?
There are three different ways to rotate the screen on your Windows PC.
- Shortcut Keys
- Display Settings
- Graphics Options
Shortcut Keys
This is one of the best ways to rotate the screen is using the shortcut key. With the help of your keyboard, you can change the orientation in just a second. Here are the shortcut keys to rotate your screen:
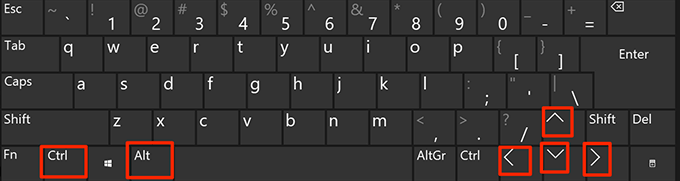
- Ctrl + Alt + Upward Arrow – Default position (Landscape).
- Ctrl + Alt + Downward Arrow – Rotate the screen in Upside-down (180 degrees). (Flips screen to the opposite direction)
- Ctrl + Alt + Left Arrow – Rotate the screen 90 degrees (Right).
- Ctrl + Alt + Right Arrow – Rotate the screen 90 degrees (Left).
On some Windows PCs, these shortcut keys might not work. These command depend on the graphics card you are using. If these shortcuts doesn’t work, then use the other ways to rotate the screen.
Display Settings
This method will work on all Windows desktops and laptops:
1. Go to the Desktop on your PC and right click on the screen. Choose the Display Settings option from the right-click menu.
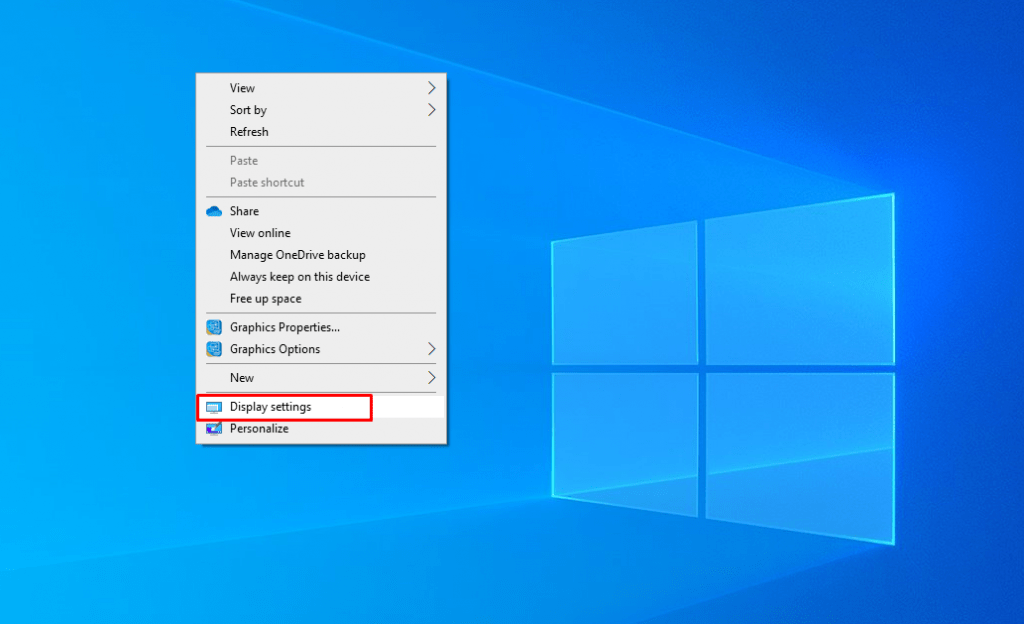
(You can also open Settings -> System -> Display Settings)

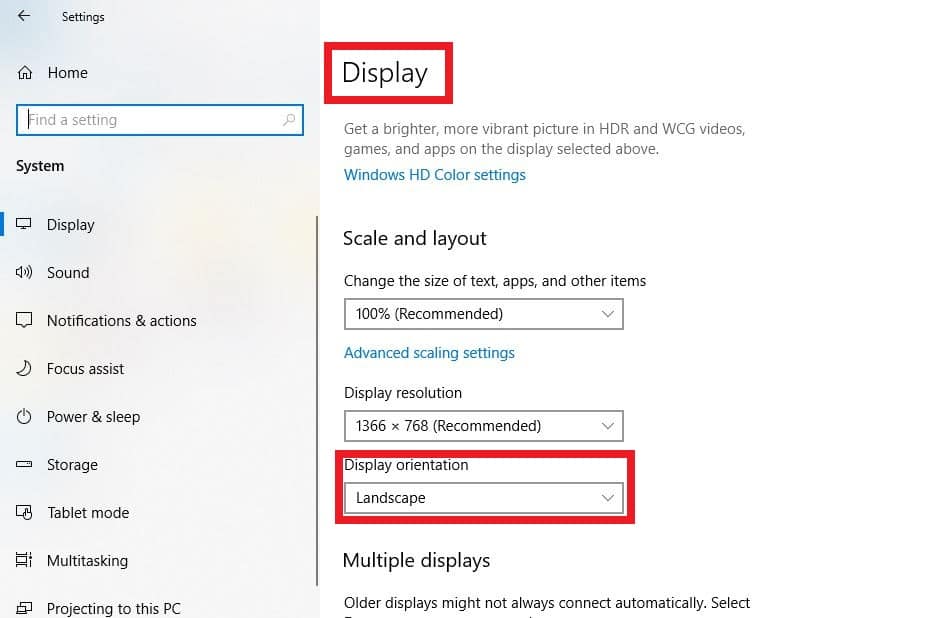
2. In the Display Settings, you will find an option Display Orientation. By default, it will be selected as Landscape. Click on the drop down arrow.
You will get four options:
- Landscape
- Portrait
- Landscape (Flipped)
- Portrait (Flipped)
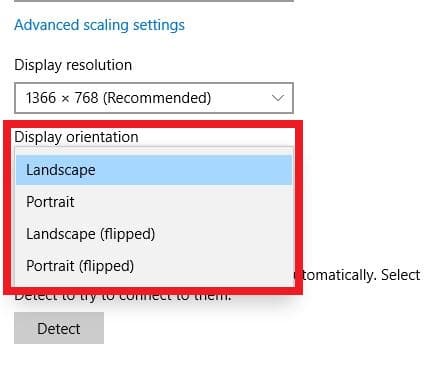
3. Choose the orientation you want and click on it.
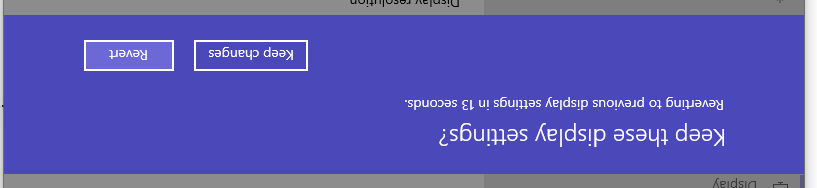
4. The screen will now change its orientation. It will ask the user whether to Keep Changes or Revert. If you are fine with this orientation, then click on the Keep Changes button. Else choose the Revert option to set to the default position.
Graphics Option
Another method to change the orientation is by using the Graphics option. This process might vary depending on your Graphics card manufacturer.
If you are using Intel Integrated Graphics, then you can easily rotate screen from your desktop screen.
1. Right-click on your desktop.
2. Hover over the Graphics Options button and then hover over to the Rotation option.
3. You will get four options. Choose the option which you want and rotate the screen to that direction.
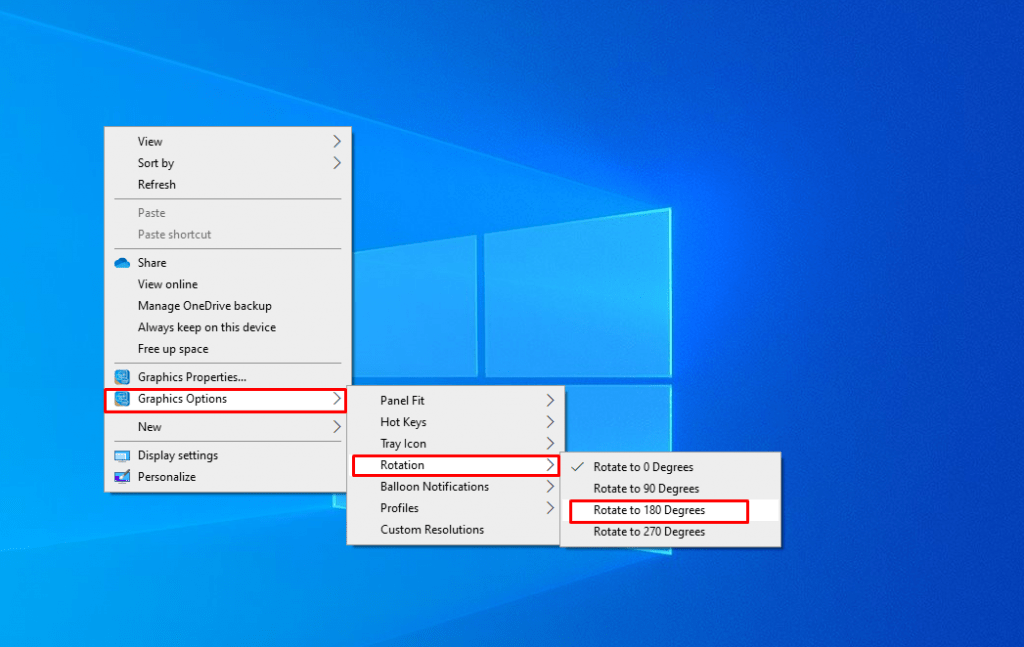
4. You will get a pop-up whether to keep the changes or revert it. Choose Keep Changes to continue using the desktop in that orientation.
This method works on Integrated Graphics card. If you are using Nvidia or other graphics card, then follow the steps below:
1. Right-click on the desktop and click on your Graphics card manufacturer name to open the control panel.

2. The Graphics control panel will open. Go to the Display Option and choose the Rotate Display option.
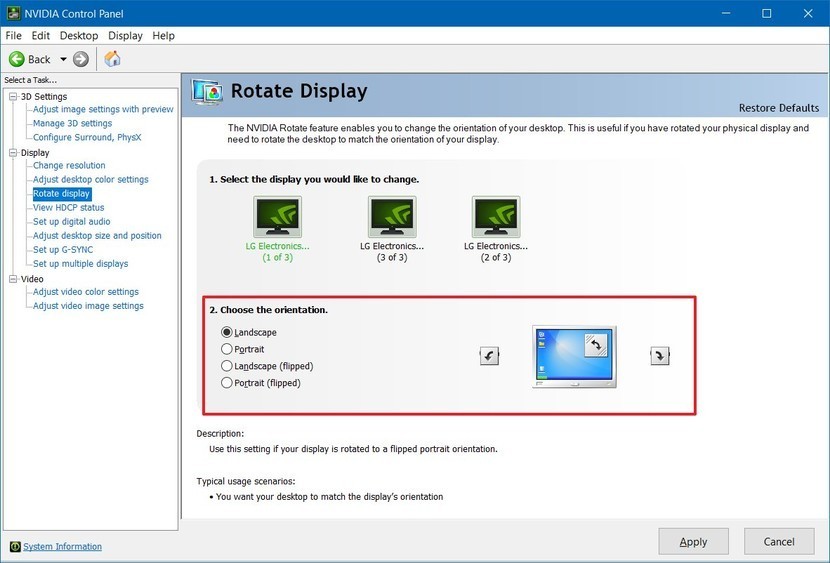
3. Choose the orientation and set the screen to that orientation.
The above screen might vary for other Graphics card manufacturers. But you will find this option in the control panel.
Related: How to Split Screen on Windows?
Wrapping Up
The above are different methods to rotate the screen on Windows. You can use any one of the above methods and change the orientation as you wish. After setting the screen to a particular direction, you can revert it back to the same position with the above steps.
If you have any queries, share with us using the comment section.