Having Windows PC is all the way advantageous and is particularly true when it comes to multi-tasking. It supports accessing two or more windows side-by-side. Working on multiple windows will likely save time while getting your work done faster. Split Screen is a feature available on iPad, Android, Windows, Mac and much more devices. If you are a multi-tasker, then split screen on Windows 10 is all the way useful. Upon enabling it, you can copy-paste contents easily, keep an eye on email, surf the internet, and do more. In other words, managing multiple actions is easy and handy. You need not switch between windows by minimizing the screen.
With split-screen, Windows users can keep an eye on multiple tasks on one single window. Just by sparing your two minutes of time to learn about how to do split-screen windows will save your effort and hundreds of hours. Here is the easy way to set up split-screen on Windows 10 PC.
Contents
How to Split Screen on Windows 10?
There are multiple ways in which Windows 10 users can get split screen to multi-task. Get to know them all from this section below.
How to do Split Screen on Windows 10 using Task Bar?
With the help of taskbar, you can stack all the windows side by side. This method is the easiest way to split Windows screen.
(1) Keep more than one programs open on your Windows 10 PC.
(2) Use the mouse or track pad to right-click on the task bar.
(3) Select Show windows side by side option.
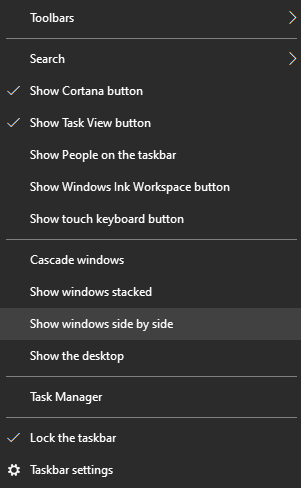
(4) Use Windows key + left arrow or Windows key + right arrow to change the programs to left or right on the split-screen.
Note: When both the programs take half of the screen, place the cursor on the dividing section at the middle. A grey line will appear and just drag it on either side to adjust its screen size.
How to Do Split Screen on Windows 10 using Snap Assist?
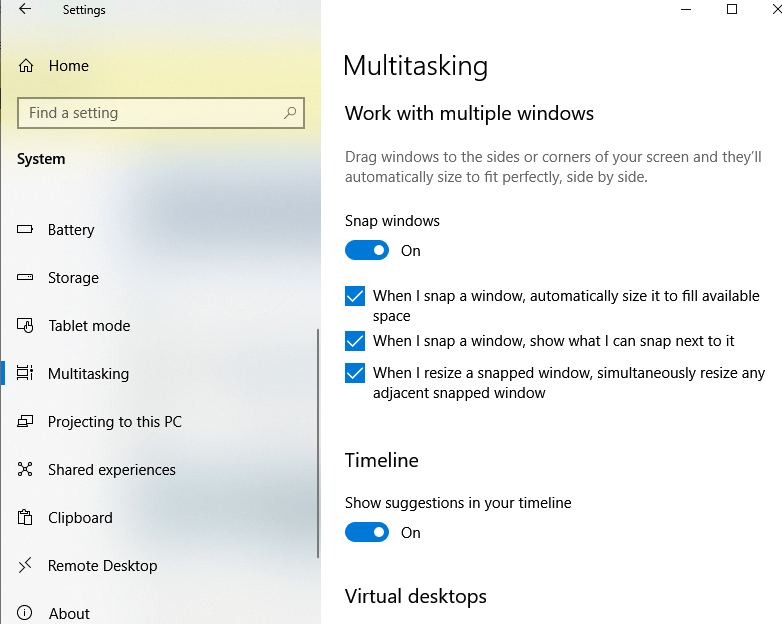
Windows 10 users can use Snap Assist to work on split screen mode. It supports dragging the window to one side of the screen to snap on it and lets you snap other apps in the remaining space. Make sure to open the programs that you want to use on split screen and follow the steps.
FYI! To enable Snap Assist, go to Start > select Settings > tap on System > press Multitasking and check if Snap slider is turned on. Note that this will be enabled by default.
(1) Open a program that you want to snap to one side of the screen.
(2) Tap on its title bar and drag it to the one side of Windows 10 until the mouse pointer touches the edge.
Note: Release the mouse button when you could see the screen flash and shows a light outline of where the window will appear on Windows 10.
(3) All other open programs will appear on the opposite side of the Windows 10 screen.
(4) Just tap any other program windows and it will snap to the other side of the screen. With this, both the programs will take half of the screen.
(5) Optionally, you can adjust the screen resolution for both the Windows by placing the pointer between both the window. Now the pointer will turn into a two-headed arrow. Click and drag on either side to adjust the screen width.
FYI!
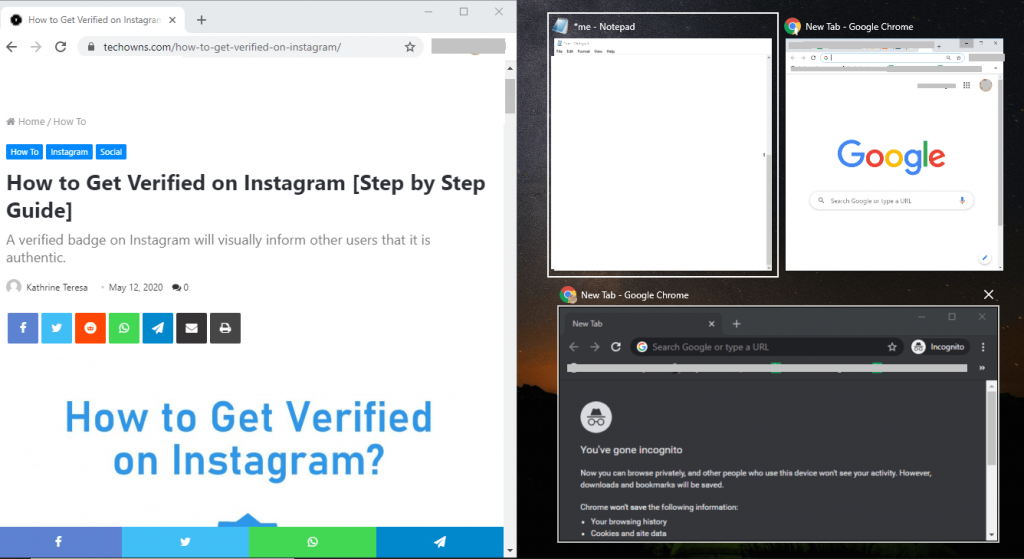
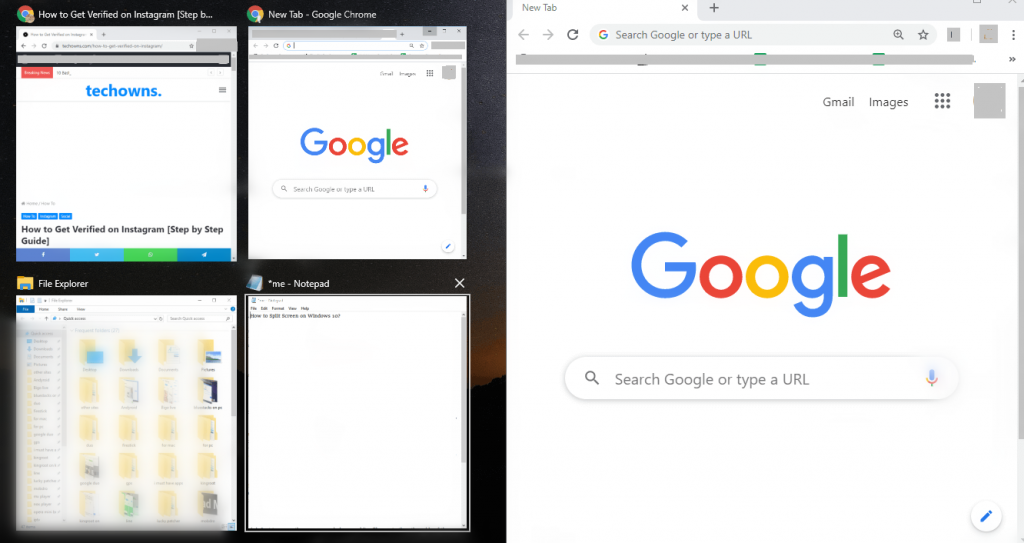
You can have up to four programs available as split screen on Windows 10. Click on the title bar of the first window to place it on the upper right corner of the screen. Now, drag the next window to place it on the lower right corner. The left side of the screen will show all other open windows. Drag one to snap it on the top left and drag another to place it on the bottom left.
Our Opinion
Accessing multiple programs on Windows 10 is possible with split screen mode. The users can work on different apps or programs at the same time on split screen and all it requires is a mouse click.
We value your feedback and suggestions as comments below. For more useful article updates, follow us on Facebook and Twitter page.