Microsoft has launched the new update for the Windows OS, Windows 11. It is readily available to install on the PC/ Laptop, and it is completely free for installation. The Windows 11 update has brought many new features to the OS, and the stunning interface catches everyone’s eyes. It also made significant changes in the Widgets and planned to bring Android apps to the Microsoft Store. The major issue faced by the users while installing Windows 11 is the TPM is disabled. You have to enable the TPM on the device for updating the OS since TPM 2.0 is the prime requirement to Update Windows 10 to Windows 11. In the below section, we will check out the ways to enable TPM 2.0 on the PC.
Contents
How to Enable TPM 2.0 on the PC
TPM refers to Trusted Platform Module, and it is one of the primary hardware components of the PC. You can check the status of the TPM before enabling it on the PC.
Check for TPM 2.0
There are two ways to check whether your device has TPM or not: Using the PC Settings and Management Console.
PC Settings
(1). Start the PC and click the Start Menu.
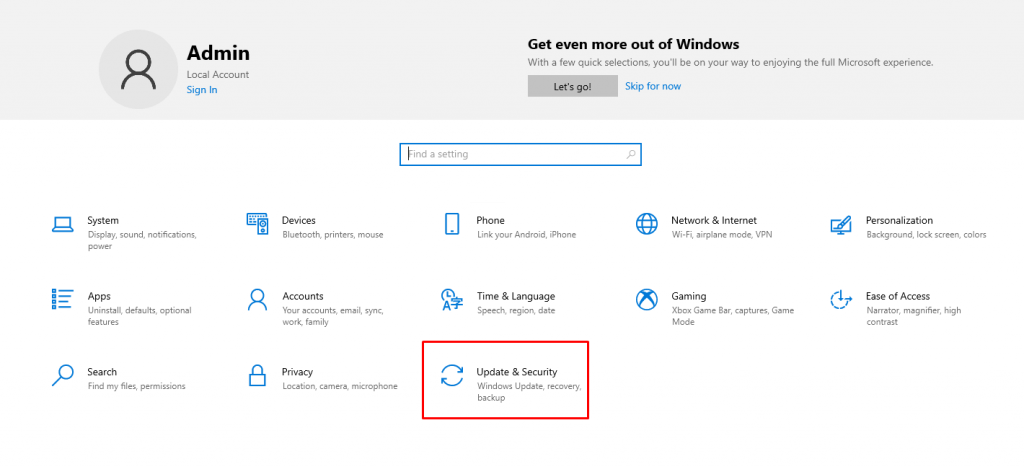
(2). Select the Settings and choose Update & Security.
(3). Click Windows Security and select Device Security.
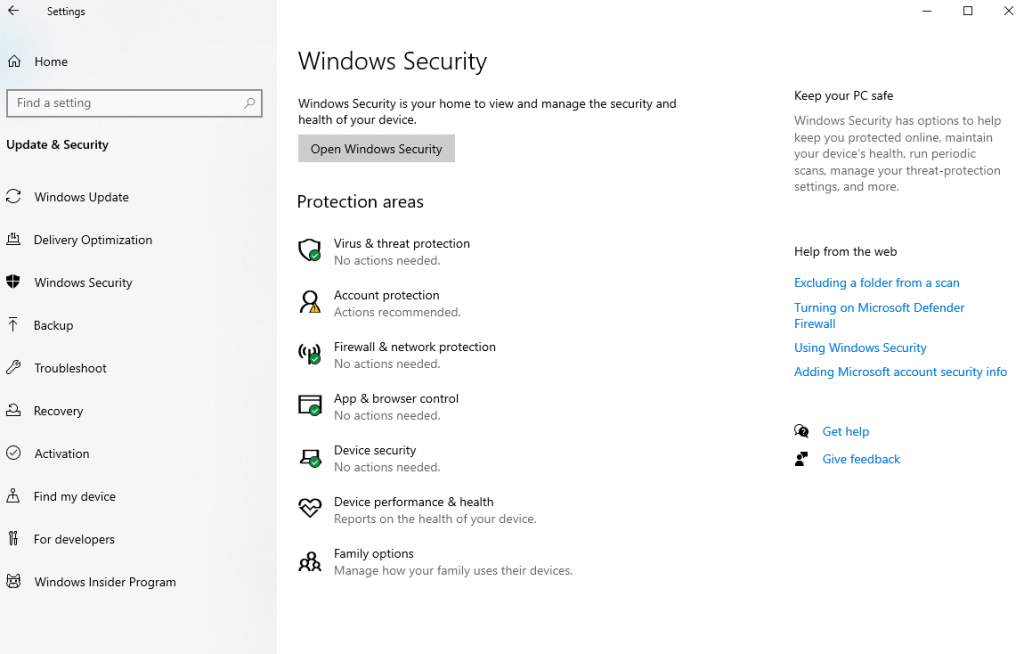
(4). Check for Security Processor and move to Security Processor Details.
If there is no security processor in the Device Security, the TPM is disabled on the device.
Management Console
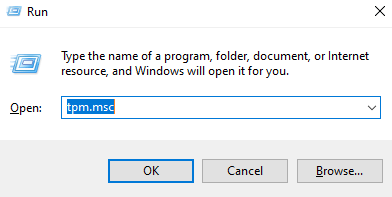
It is an easier method to check the TPM status than the previous one. Press Windows and R Key on the keyboard or click Start and select Run to open the Management Console. Enter tpm.msc in the box and click OK.
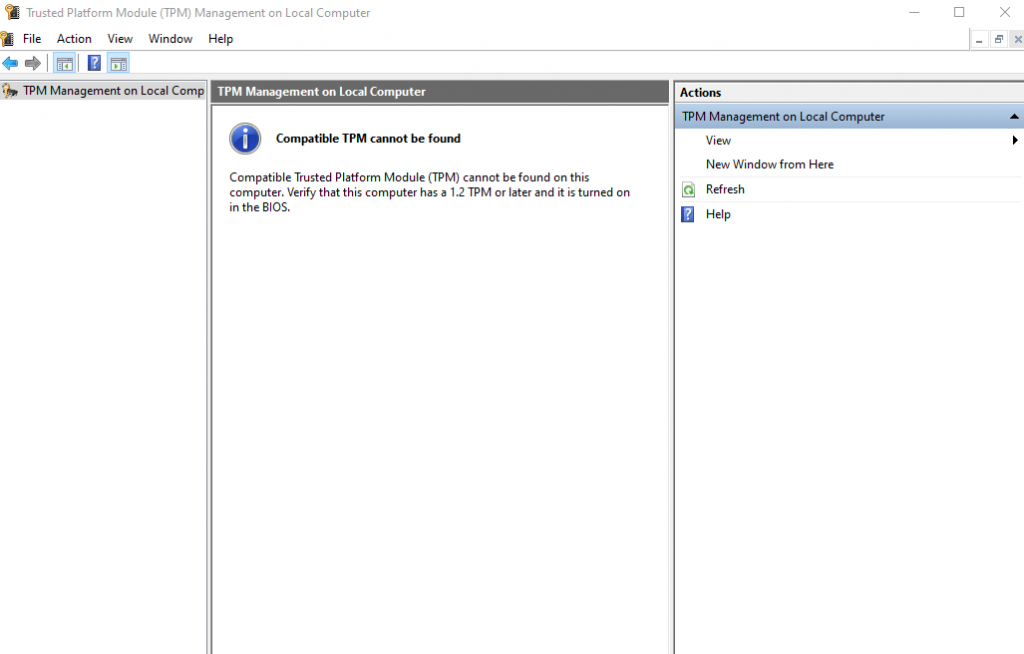
If the message “Compatible TPM cannot be Fount” appears, you must enable the TPM. If the TPM is there on the PC and you have to look for the specification version.
Procedure to Enable TPM 2.0
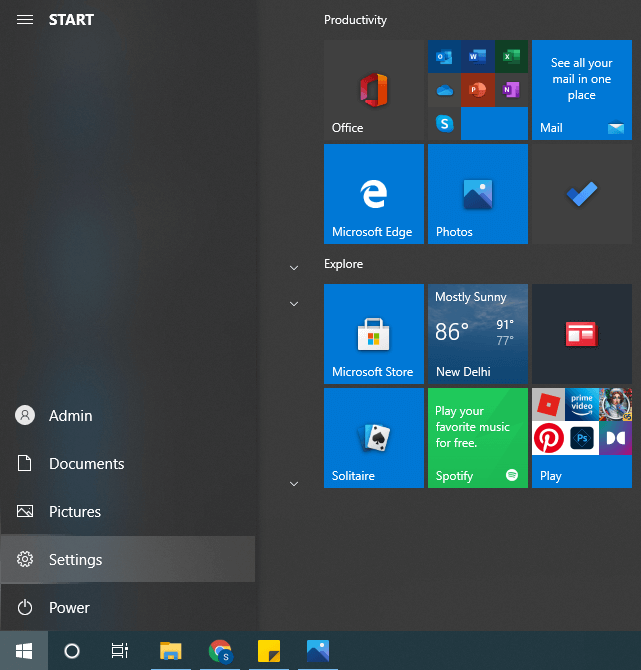
(1). Launch the Start Menu on the PC/ Laptop and select the Settings.
(2). Choose Update & Security on the Settings.
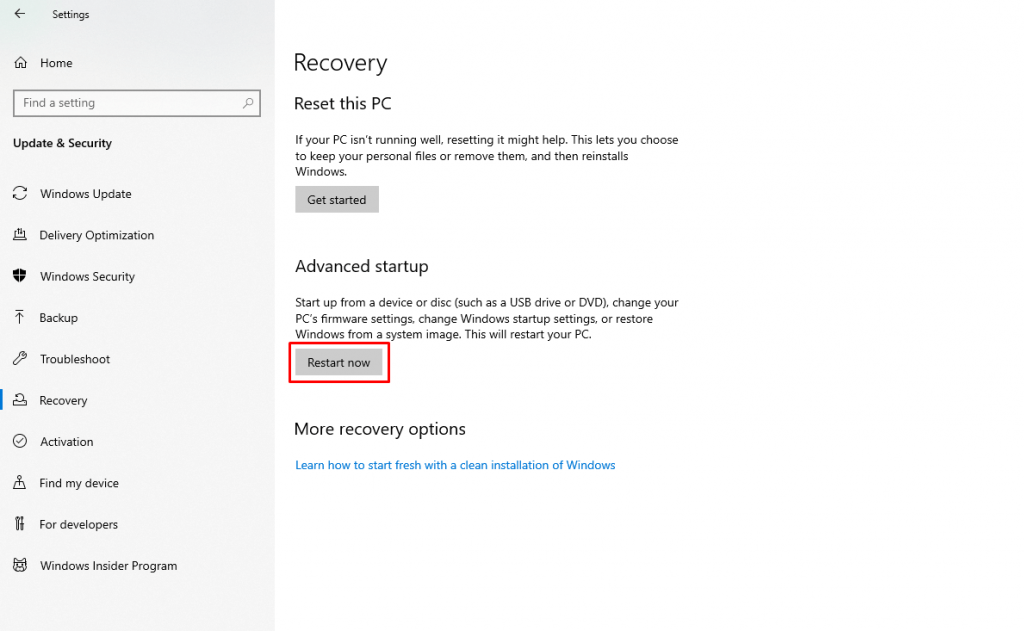
(3). Scroll down and click the Recovery tab on the left side.
(4). Move to the Advanced Startup and select Restart Now.
(5). Choose the Troubleshoot option in the menu.
(6). Select Advanced Option in Troubleshoot.
(7). Click UEFI Firmware Settings and select Restart.
(8). Look for Security Settings and open the Security Settings.
(9). Click the TPM Settings Configuration and enable the TPM on the PC.
(10). Save the Changes in the Settings and leave the Settings.
(11). Restart your PC/ Laptop to install the new Windows 11.
Alternative Way – Enable TPM 2.0 from BIOS Settings
There is an alternative way to enable TPM via BIOS settings. You must know the specific key to open the settings while the PC is starting up.
(1). Turn off your PC and power on the PC or else Restart the PC.
(2). Press the Special Key to go to the UEFI settings (this key varies from manufacturer).
(3). Go to the Security in the Settings.
(4). Move to the TPM Configuration and check the TPM Status.
(5). Enable TPM in case it is disabled on the PC.
You can follow the above steps to check for the TPM condition once again for the enabled status. After ensuring the TPM status, you can continue updating the Windows OS to Windows 11. If you aren’t impressed with the features of Windows 11, you can roll back to Windows 10 at any time.
If you have any issues with the above steps, please mention them in the comments section. Also, follow Techowns’ Facebook and Twitter pages to get the chance to read our future articles.