Key Highlights
- Desktop: Launch the app → Right click (on the left panel) → Channel Type → Text Channel → Create Channel → Settings → Permission → Advanced Permissions → Enable View Channel and Read Message History→ Disable Send messages → Save Changes.
- Mobile: Launch the app → Tap Hamburger → Server → Add rules → Create Channel → Enter the channel name → Channel Type → Text Channel → Done.
Discord is one of the unique messaging platforms where you can chat, make calls (video & voice), and stream. In addition, Discord allows you to make a rules channel for your community to keep your followers organized and maintain ethics. By making rules, you can keep your channel secure and safe. You can quickly create a rules channel on your Discord, both PC and smartphone.
Contents
How to Make a Rules Channel in Discord via Desktop
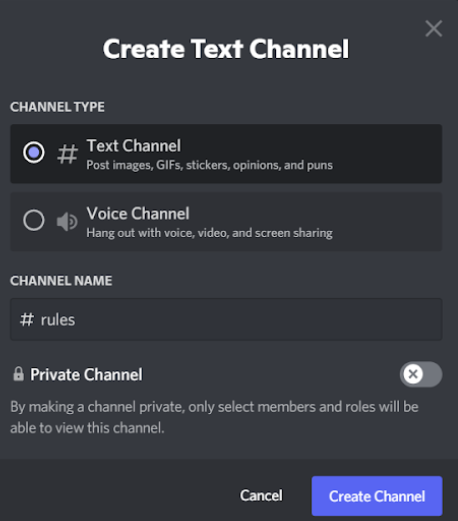
1. Launch the Discord app on your PC, right-click on the left and click Create Channel.
2. In the Create Text Channel box, choose the desired the Channel Type.
3. Type a new name for the channel and click Create Channel. The rules channel will be created.
4. Click Settings of the rules channel → Click Permissions → Advanced Permissions.
- Before setting the permission, ensure that the @everyone is enabled under Roles/Members.
5. Next, enable View Channel and Read Message History under General Channel permissions. Also, disable Send Messages.
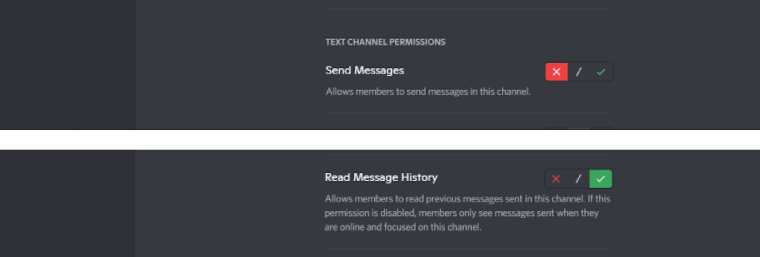
6. Finally, click Save Changes.
Tip! Enable dark mode on Discord (smartphone & PC) to get a different experience while using the platform.
How to Make Rules Channel in Discord Using Webhook
You can integrate Webhook with the rules channel on Discord.
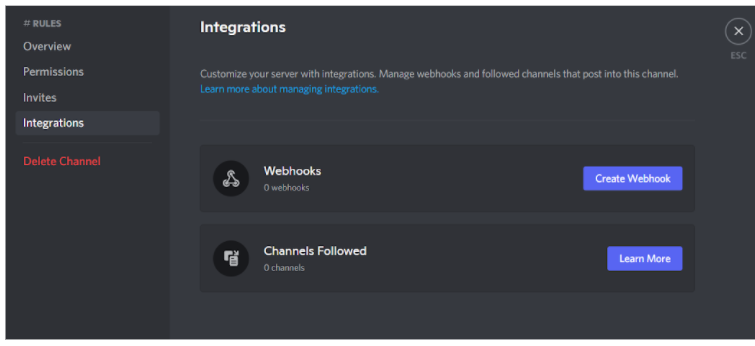
1. Under the Channel settings page, click Integrations.
2. Click Create Webhook.
Note: Enabling Webhook on Discord allows you to post messages from other applications.
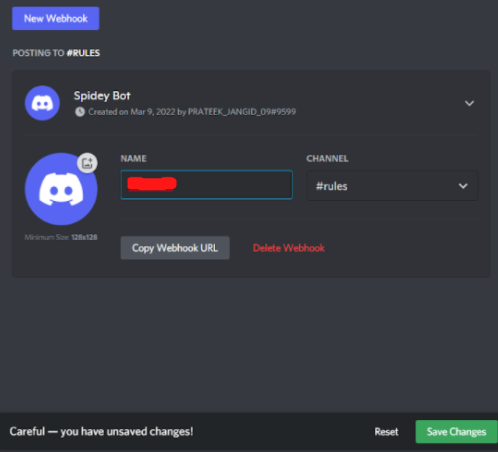
3. Set the name you wish to use on Webhook in the name field and add an image.
4. Make sure you have chosen the rules channel (Under Channel).
5. After that, click Save Changes and copy the Webhook URL.
6. Launch the browser on your PC and visit the Discohook website.
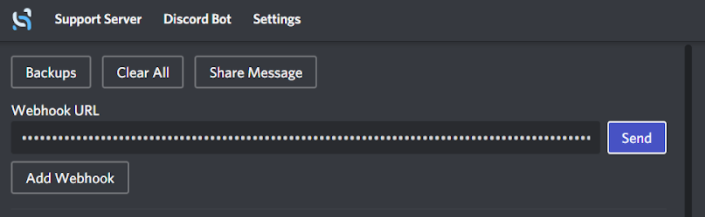
7. Click Clear All → Clear All to erase all the pre-added details.
8. Under the Webhook URL and paste the Webhook link you have copied.
9. Next, choose Profile → Add Embed → Embed 1 → Body to enter rules and their descriptions.
- You can also add different colors for the rules you made.
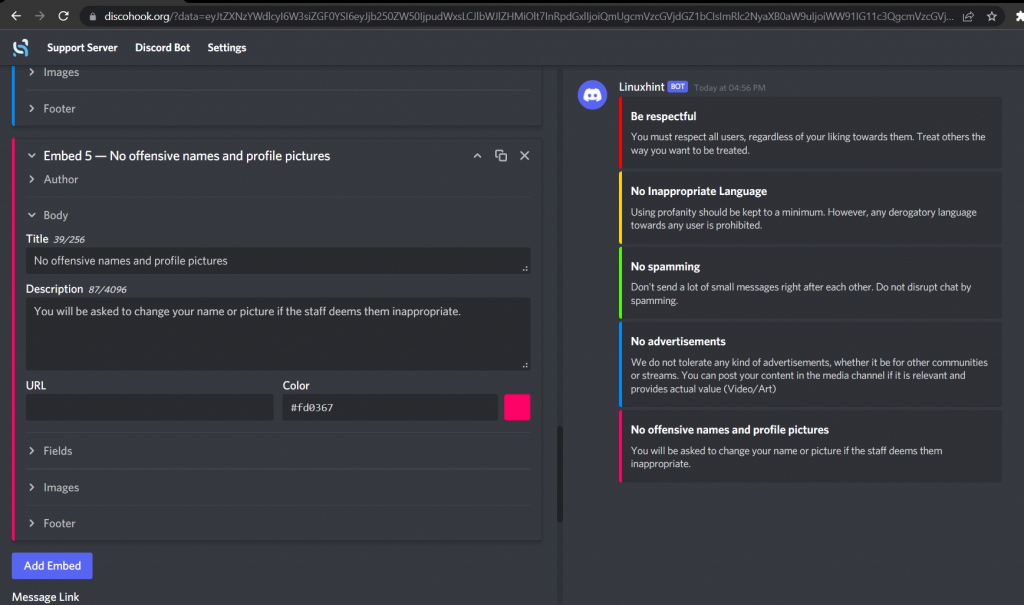
10. After entering, you can see all the rules in the right pane.
11. Click Send to implement the rules you made in the rules channel.
Tips! Clear the cache on Discord to improve the performance and use the platform smoothly without interruptions.
How to Create Rules Channel on Discord [Android & iPhone]
You create a rules channel on Discord within a few minutes.
1. Open the Discord app on your smartphone and tap the Hamburger icon.
2. Then, tap Server (on the left) if wish to add a rules channel.
3. Tap the three vertical dots → Create Channel.
4. Enter the desired name you like to include in the rules channel.
5. Choose Channel Type → Text Channel → Tap Done to save your new rules channel.
6. If you still can’t add your rules, tap Edit Channel → Go to User Management → Permissions.
7. Tap Add a Role on the channel Settings.
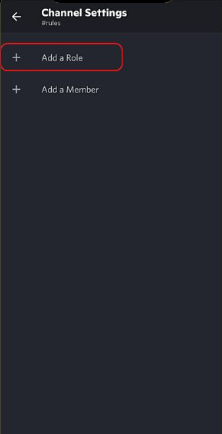
8. Under Add a Role, choose Everyone, and it will lead to the Channel Settings page.
9. Further, find View Channel and enable it.
10. Scroll down and disable Text Channels Permissions and enable Read Message History.
11. Also, disable Send Messages by tapping X. By disabling this option, members can’t send any messages in the rules channels.
12. Tap Save to save the changes made for rules in Discord.
Note: You can add emojis instead of using numbers in the rules channel.
Tips! You can easily change the language on Discord (smartphone & PC) and use the platform in your native language without