Key Highlights
- Windows & Mac: Launch Canva → click on Elements → search for Tables → insert it.
- Smartphone: Click on the Plus icon → Custom Size → Create a New Design → Plus icon → click on Elements → search for Tables → add it.
- You can also create a table in Canva using the rectangular box, drawing lines, and using the Calendar template.
Canva is one of the popular tools where you can find plenty of designs and templates to create beautiful designs. The tool has various elements to make your design more attractive. If you want to make a table on Canva, you can add it simply by tapping on the table elements. You can also customize the table by adding/removing rows and columns.
Note – You need to purchase the Canva Premium subscription to use some of the templates and elements.
Contents
- How to Make a Table in Canva on Windows and Mac
- How to Add a Table in Canva on Mobile
- How to Customize the Table in Canva
- Add Rows and Columns
- Delete Rows and Columns
- Move Rows and Columns
- Change the Background
- Change the Color of the Table
- Merge Cells in a Table
- How to Make a Table Manually
- Using Rectangle Box
- Using Line
- Using Calendar Template
- Frequently Asked Questions
How to Make a Table in Canva on Windows and Mac
We can access Canva on Windows and Mac using the Web Browser.
1. Visit canva.com on your device and log in with your mail id.
2. After that, click on Create a New Design and enter the required ratios.
3. Click on the Elements option from the side panel.
4. Scroll down or search for Tables.
5. Under the Tables section, click on your favorite table.
Note: Click on See All to view all the available
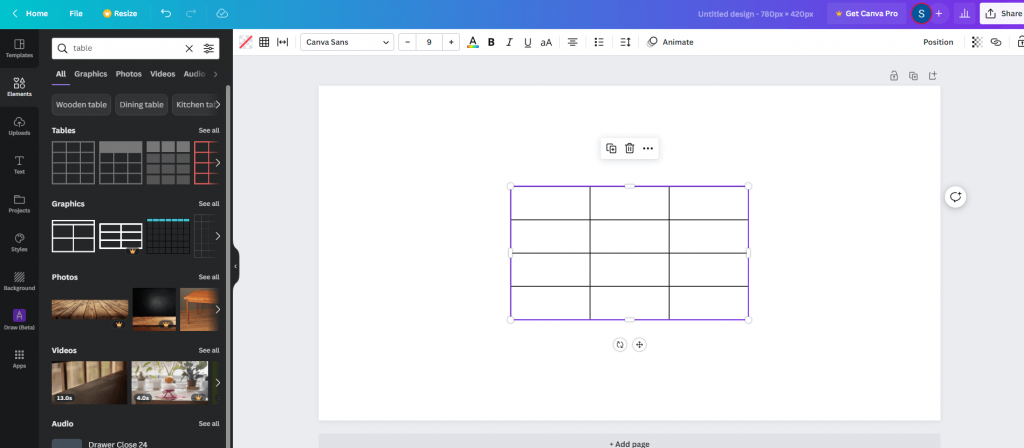
6. The selected table will be added to your Canva sheet.
How to Add a Table in Canva on Mobile
Canva App is available natively on Google Play Store and App Store to install on Android and iOS devices, respectively.
1. Open Canva on your smartphone.
2. Click on the Plus icon at the bottom right corner of the screen.

3. Select the Custom Size option and enter the required width and height.
4. Click on Create a New Design after entering the rations.

5. Now, click on the Plus icon again. It is available at the bottom left corner of the screen.

6. Select Elements and search for Table.
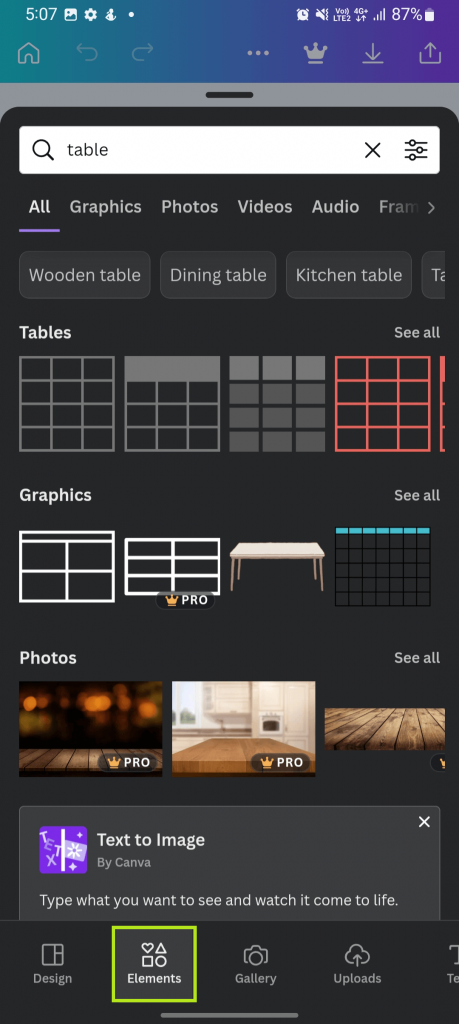
7. After that, select the table you want, and it will be added to Canva.
Tip! Enable Dark Mode on Canva and use the app without eye strain.
How to Customize the Table in Canva
After inserting the table into the Canva sheet, you can customize it by adding, deleting, or moving the rows and columns, changing the background, and changing the color of the table.
Add Rows and Columns
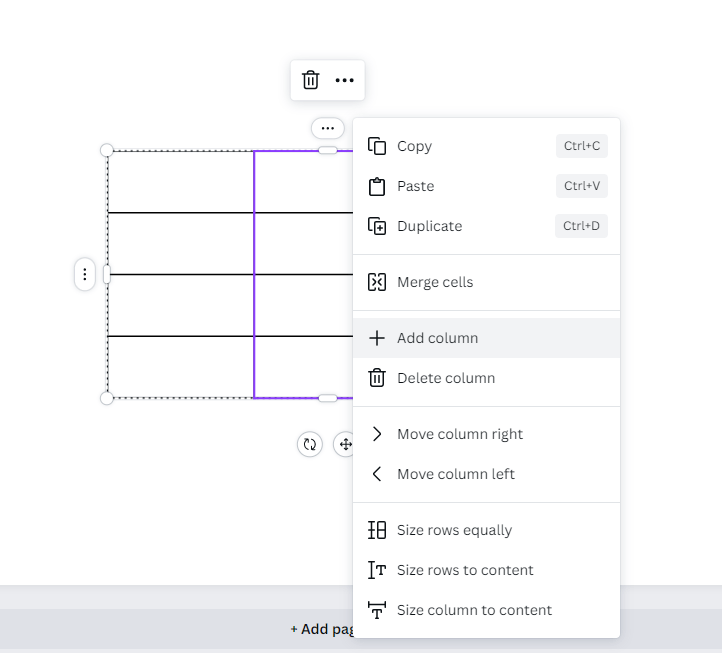
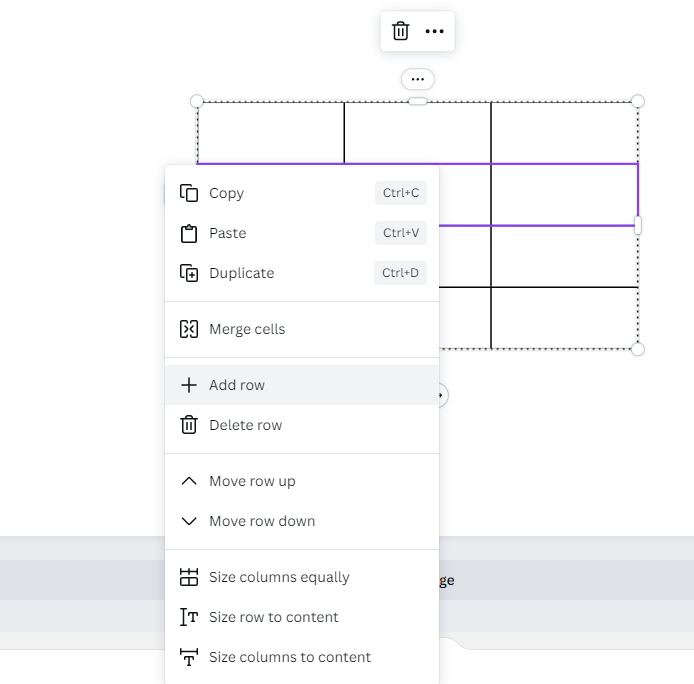
1. On your Canva sheet, left-click on the table.
2. You can see three tiny dots appearing on the side of the table.
3. Click on that three-dotted option, and a sub-menu will arise.
4. From that, click on Add Row or Add Column as per your preference.
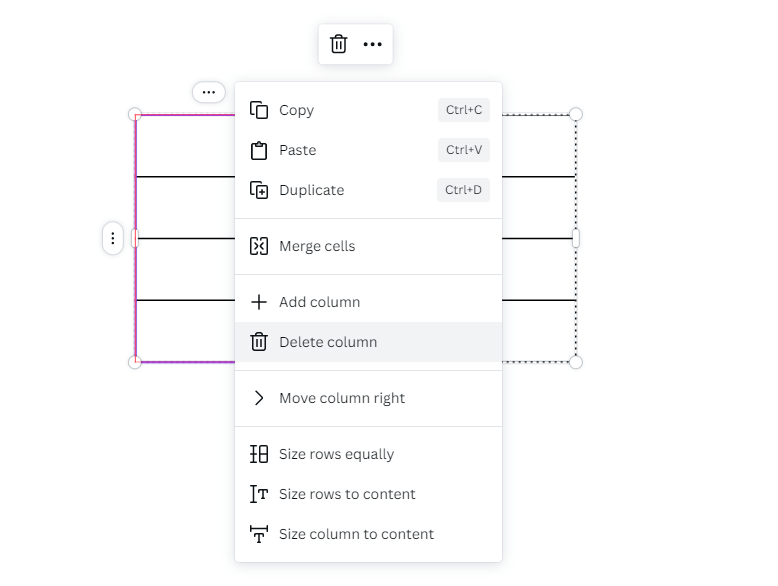
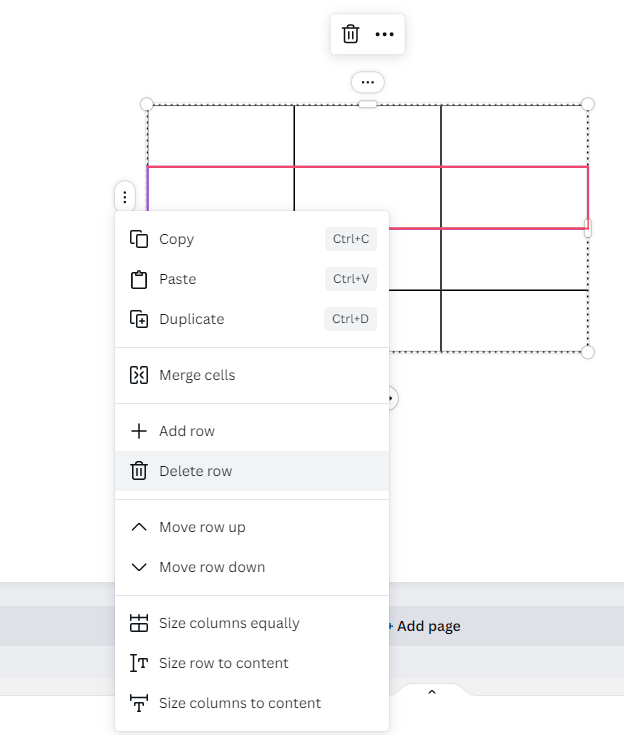
Delete Rows and Columns
1. Left-click on the table that you have inserted on your Canva sheet.
2. A sub-menu will arise to the side of the table.
3. From the sub-menu, click on Delete Row or Delete Column as needed.
Move Rows and Columns
1. After inserting a table, click on it.
2. Now, click on the three-dotted icon near the table.
3. Select Move Left or right.
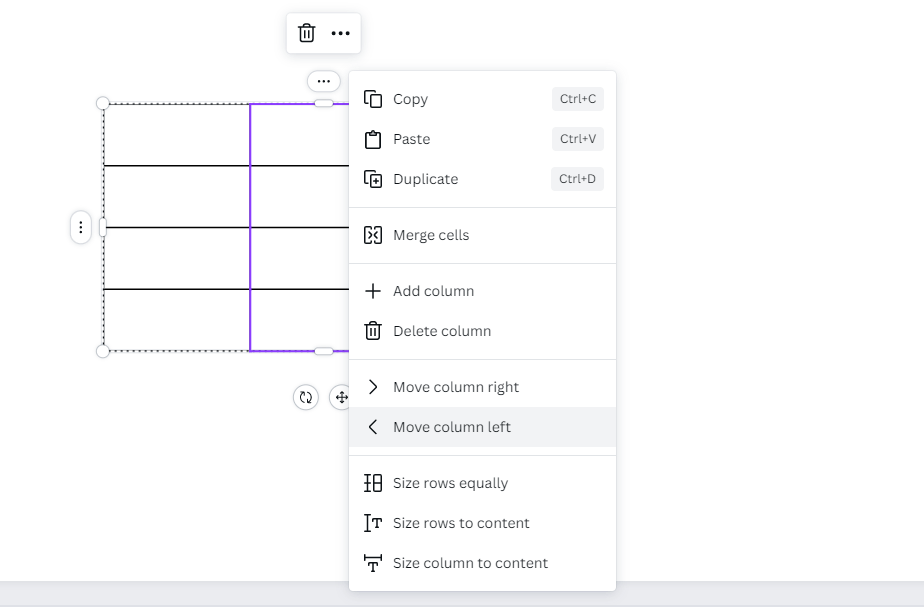
4. By doing this, you can shift the row or column inside the table.
Change the Background
1. Click on Background from the left side panel.
2. Choose your preferred background image and insert it into the canvas.
3. You can also use your photos by uploading them.
Change the Color of the Table
1. After inserting the table, you can change the color of a specific row, column, or entire table.
2. To do that, select the cells that you wish to change the color.
3. Click on the color palette option from the top-left and choose the color you want.
4. Automatically, the color of the table will be changed.
Merge Cells in a Table
1. Click on a cell inside the table.
2. Next, hold on to the Shift + arrow buttons and move in the direction you want to merge.
3. After that, right-click on the cells that you have selected, and a menu will arise.
4. Click on the Merge Cells option from the menu.
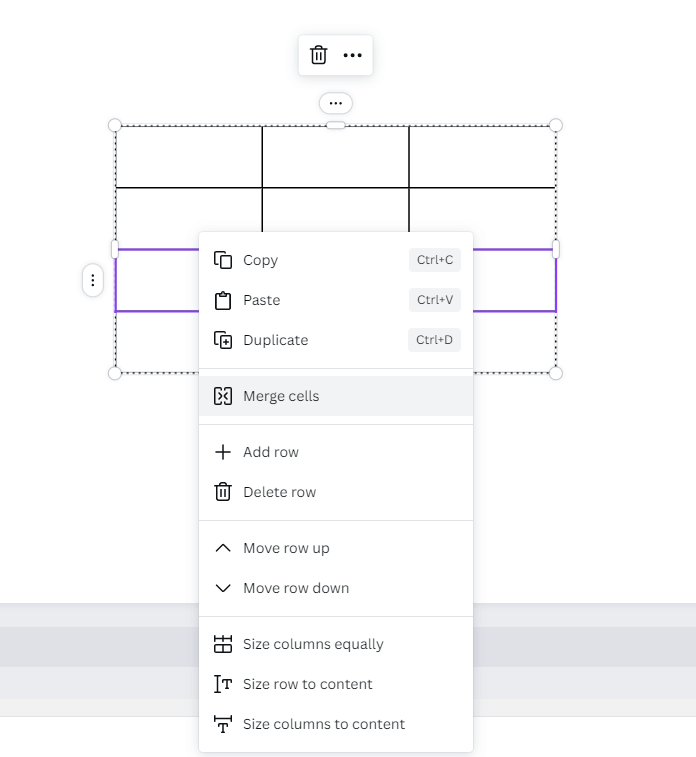
5. Instantly, the selected cells will be combined.
How to Make a Table Manually
There are three methods to make a table in Canva without using the Table element. You can use lines, a rectangle box, and a Calendar template to create a table. These elements are pre-loaded into Canva, so you can use them without restrictions.
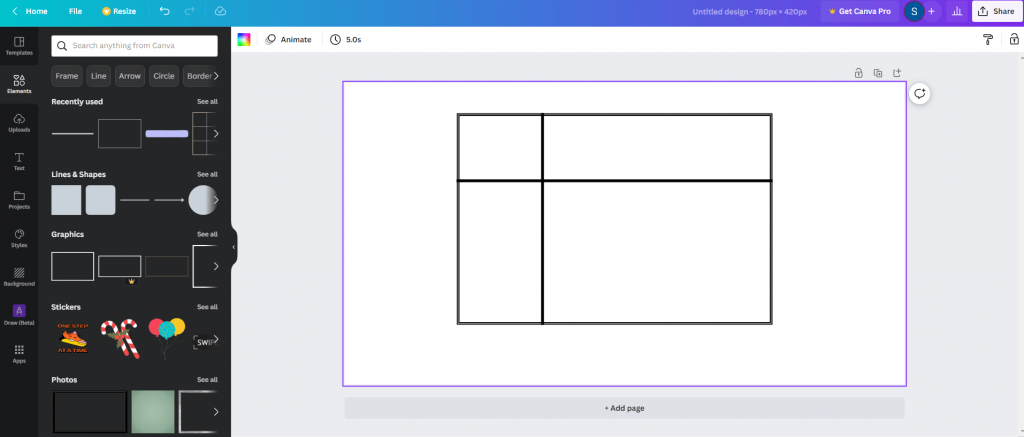
Using Rectangle Box
In this method, we are going to insert a rectangular box into the Canva sheet. After inserting the required boxes, relocate them and convert them into the form of a table.
1. Create a blank sheet in Canva.
2. Click on the Elements from the left panel and search for the rectangular box.
3. Insert the rectangle box on either side and create a table.
4. Resize the box as per your preference.
Using Line
In method 2, you are going to use lines instead of boxes and draw the table.
1. Click on the Elements from the left side panel.
2. Select the type of line that you want.
3. Next, keep the pointer in a specific position and begin to drag.
4. Likewise, draw lines on all the corners and create a table.
Using Calendar Template
If you don’t want to use lines and boxes, there is a specific template. This Calendar template contains various numbers of boxes that you can modify as per your preference.
1. Click on the Templates option from the left panel.
2. Now, search for Calendars.
3. Click on any calendar template that you want.
4. On clicking, the template will be inserted automatically into Canva.
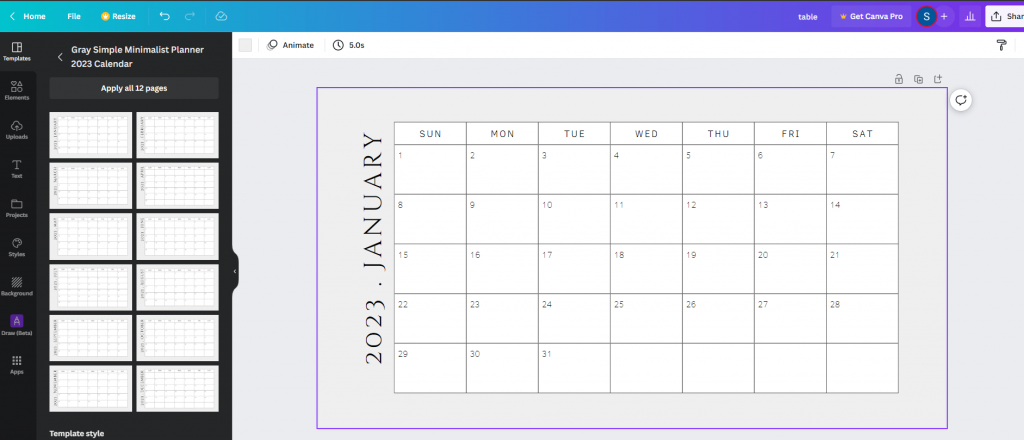
5. Now, start to edit the content and build a table.
Tip! Cancel the Canva Subscription if you don’t want to use the service anymore.
Frequently Asked Questions
Click on the Elements section on the left side panel and search for the grid. Choose your favorite grid and insert it into the sheet.