Key Highlights
- Open Voice Recorder → Start the recording→ Pause or Stop the recording→ Rename the audio file and use it on your device.
Windows 11 comes up with many new software features compared to other versions, which include better visual support, improvised multitasking, screen recording, customized widgets, and many more. Likewise, Windows 11 allows users to record the audio right from their PC using the Voice recorder app. After recording the audio, you can trim the audio file to save or share it with your friends and others.
Contents
How to Record Audio on Windows 11
Your PC must have built-in Microphone support to record the audio. Otherwise, you need to connect an external microphone to your PC for recording.
[1] Turn on your Windows 11 PC.
[2] After that, click the search box and look for Voice Recorder. If you can’t find one, open Microsoft Store and download Voice Recorder app for free.
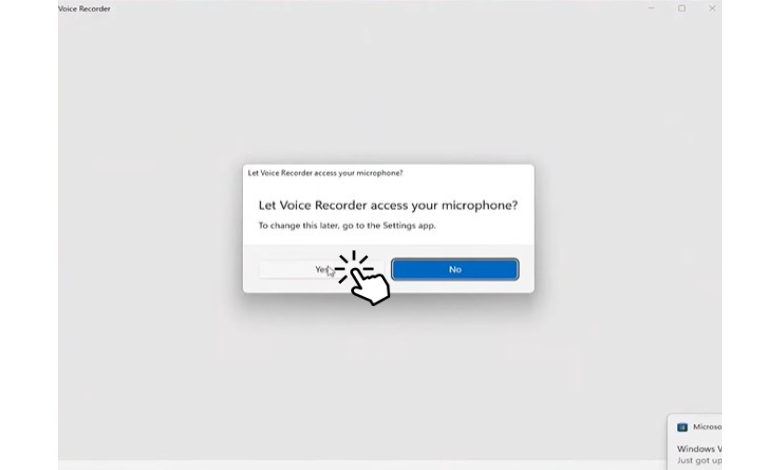
[3] Now, launch the Voice Recorder app on your Windows PC and give permission to use your microphone by selecting Yes.
[4] Then, click the Microphone (Record) button to start recording your audio.
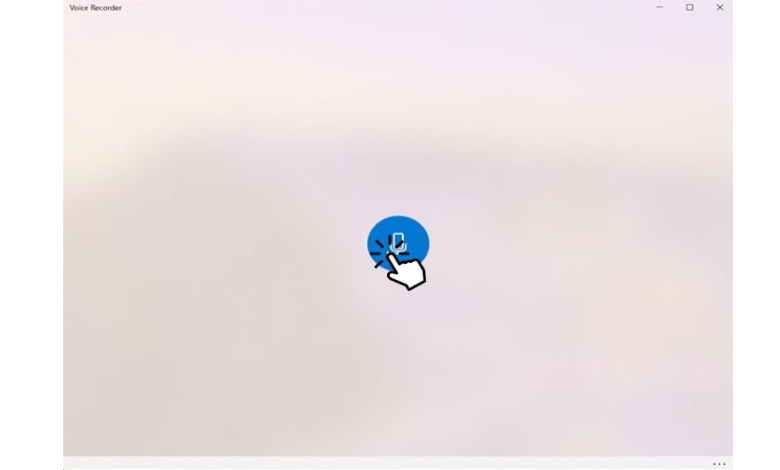
Note: You can use the shortcuts keys Ctrl + R key to start the recording
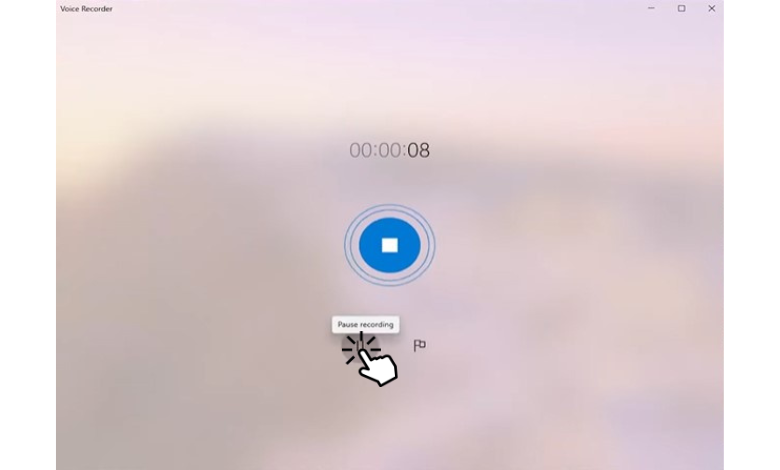
[5] Press the Pause button to pause the recording, and press the Pause button again to resume the voice recording.
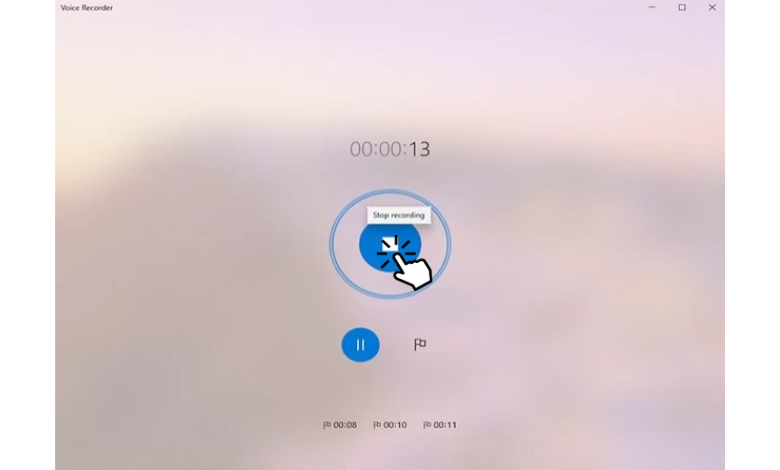
[6] When you want to stop the recording, just click the Stop button (a big black square icon).
[7] Now, the recording will automatically display on the left side of your screen.
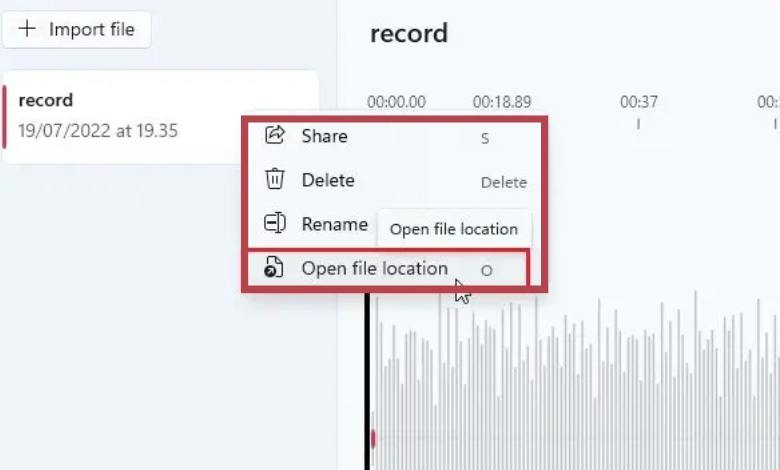
[8] You can right-click on it to Share, Delete or Rename the audio file.
Trimming Recorded Audio on Windows 11
Apart from recording videos on Windows 11, you can also trim the recorded audio to save or share it with others.
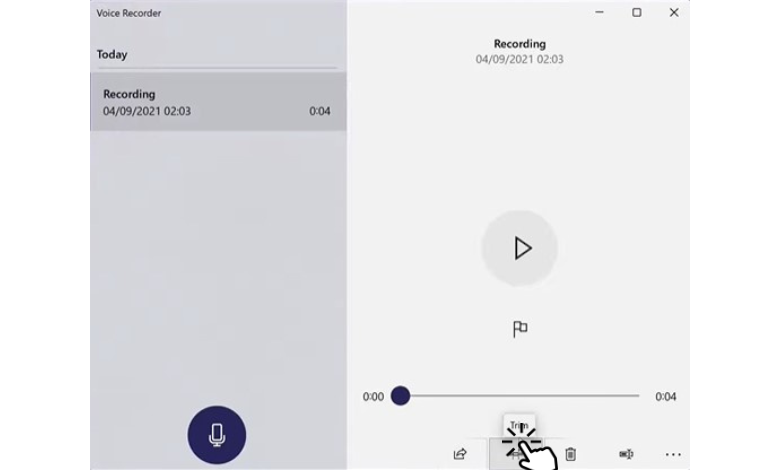
[1] Launch the Voice Recorder app and select the recording you want to trim.
[2] Now, you can see the Trim option under the audio file, click it.
[3] After that, drag and place the pins on the specific part.
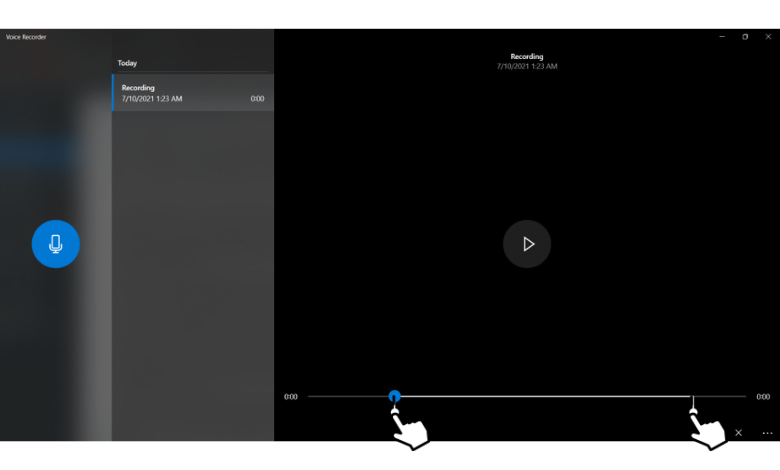
[4] After selecting the specific part, you can click on Save to store the trimmed audio file.
[5] Now, you can listen to the trimmed version of your recorded video.
Record Audio on Windows 11 Via Third Party App
Additionally, you can download and install third-party app audio recorders on Windows. There are many applications available for audio recording. Choose the wise one and install it on your PC. Once installed, open the app and allow access to record audio. After that, choose the input source for recording the audio and start recording it.
Some of the best Windows apps to record audio are
- EaseUS Screen Recorder
- Audacity
- Adobe Audition
- WavePad
- Wavosaur
Unlike the earlier version of Windows, you can check the on-screen time on Windows 11 within the settings.
Frequently Asked Questions
Select the recording that you want to rename, right-click on it, and tap the Rename option. After that, enter a new name to your audio file and hit the Rename option.
Deleting a recorded file is a straightforward method, just right-click the recordings and tap the Delete option.