Microsoft Windows 10 uses Windows Update (WU) as a service to provide updates for the Windows components. With this update, the company ensures that all its devices have stable improvements, provides better performance, and has the latest security patches. WU by default is set to check for any latest quality updates and install it automatically. Although auto-updates seem to be useful, it isn’t going to be sweet with the limited data connection. With auto-update turned on, you will find significant data to be consumed with every other update from Microsoft Windows. If you don’t want your device to update automatically, then you can turn it off. Find out how to turn off updates on windows 10 in detail right on this article.
Contents
How to Turn Off Windows Update in Windows 10?
If you don’t want your Windows PC to update automatically, then you can turn it off at any time. Here is the detailed procedure.
How to Turn Off Auto Update in Windows 10?
Learn to turn off Windows updates on the Windows Home or Professional PC’s right under this section.
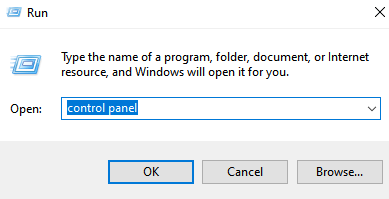
(1) Press Windows key + R to open Run command.
(2) Type as Control Panel and press OK.
(3) On the Control Panel, select Administrative Tools.
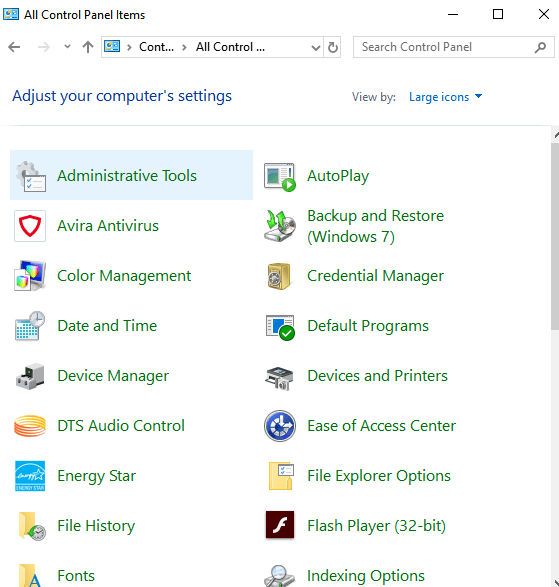
Note: If you don’t find, click on View by drop down and select Large icons.
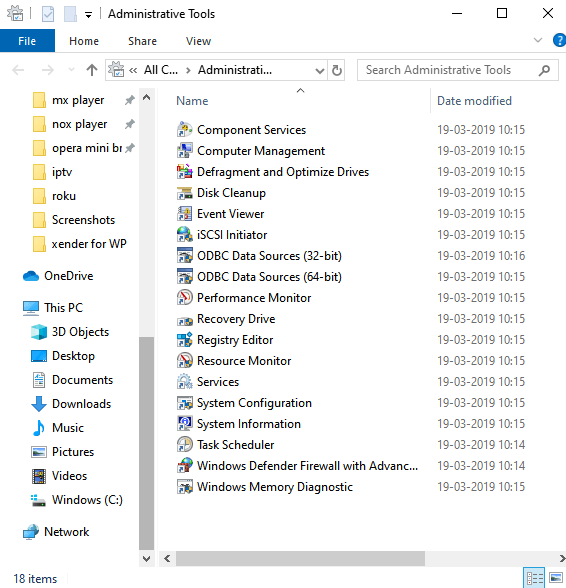
(4) Double click on Services.
(5) On the Services box, scroll down to select Windows Update and right-click on it to click on Properties.
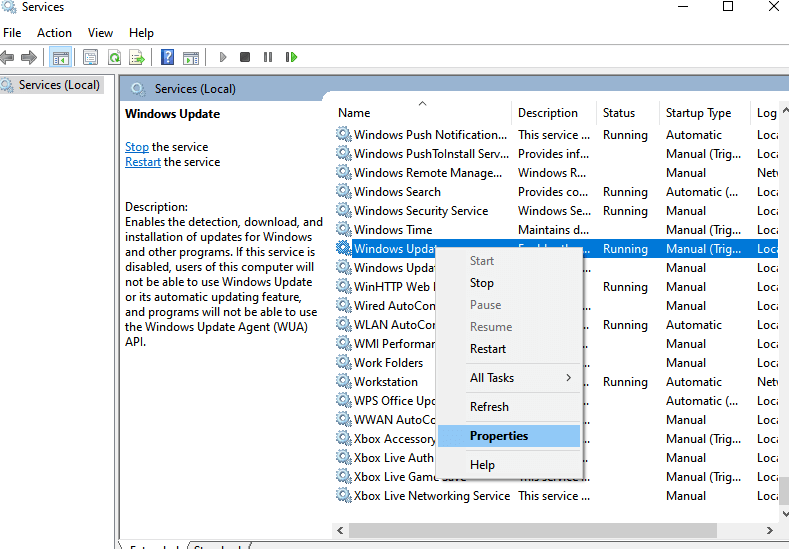
(6) Under the General tab, look for Startup type and click on the drop-down icon to choose Disabled. Click on OK.
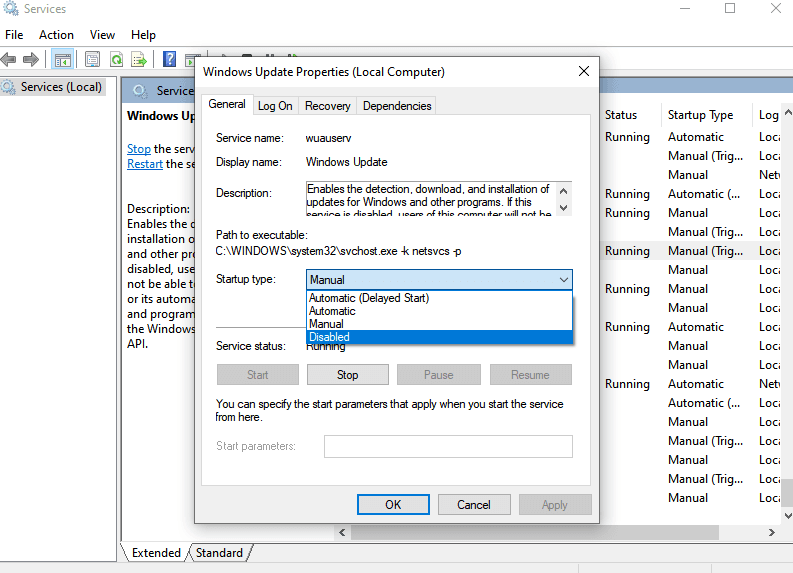
With this, WU will not be taking place automatically on your Windows 10.
How to Modify Windows 10 Update Settings?
It is possible to temporarily pause the WU settings on your Windows 10 PC for about 35 days. Learn how to do it from this section below.
(1) Press Windows key on your Windows 10 keyboard.
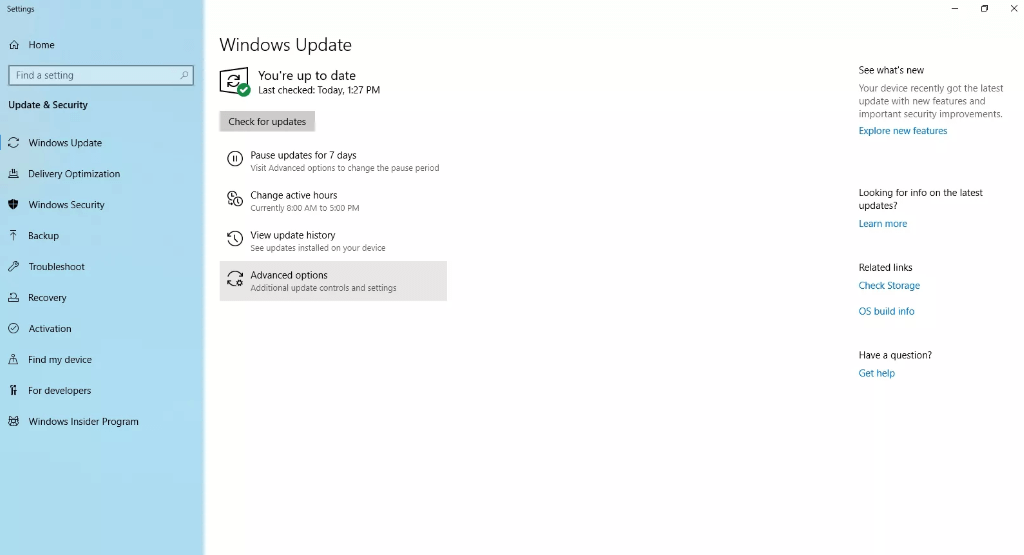
(2) Search for Windows Update Settings.
(3) Select Advanced Options on the WU screen.
(4) To pause the update, go to Pause Update and choose the date in the dropdown.
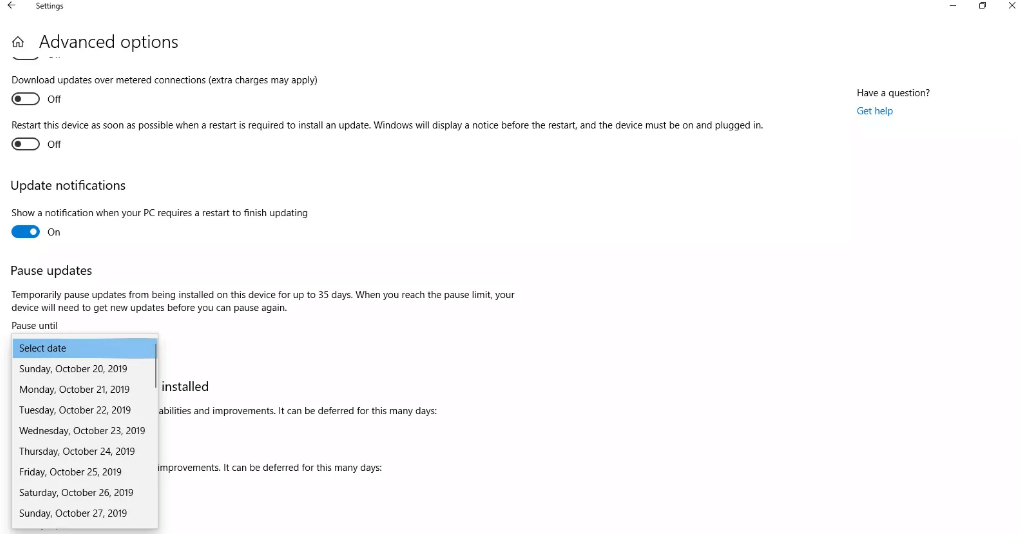
(5) Optionally, you can choose to defend Feature update and quality update.
Note: Feature updated can be deferred for 365 days and quality update is deferred for 30 days.
That’s all. This will defer WU for the set time.
Techowns Tip: How to Update Drivers on Window 10?
Our Opinion
In this way any Windows 10 users can postpone their WU. It is possible to turn off the updates on both Windows Home and Windows Professional. However, modifying the WU is limed to Windows 10 Professional models only. So, you can choose to turn it off permanently or modify its update settings for a temporary period based on your preference.
We hope this article is easy to understand and thereby helped you turn off Windows update. For any clarifications, comment us below. Stay connected on Facebook and Twitter page for the latest article updates.