Microsoft Outlook is a powerful email management software that allows you to send and receive emails. You can sync all your activities like calendars, reminders, schedules, web searches, contacts and more with it. The Outlook is well integrated with other Microsoft utilities which include Word, Excel, Spreadsheet and PowerPoint. So you can easily sync all the information and access them on all your devices whenever you want. In addition to these, the latest version of Microsoft Outlook is updated with Dark Mode feature. The Dark mode is more convenient for users who work during night time. It is pretty simple and easy to enable Microsoft Outlook dark mode across all your devices, including Android, iOS, Windows and Web version.
Contents
Steps to Turn on Microsoft Outlook Dark Mode – Android
Microsoft Outlook is an official app so that you can install it directly from the Google Play Store.
#1: Run the Microsoft Outlook app on your Android device.
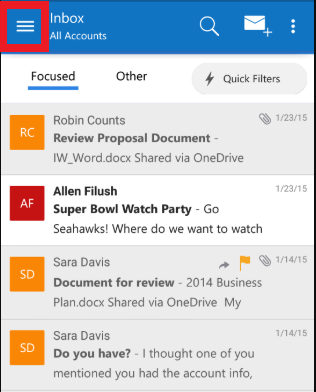
#2: Tap the Hamburger icon (three-lined icon) at the top left corner of the screen.
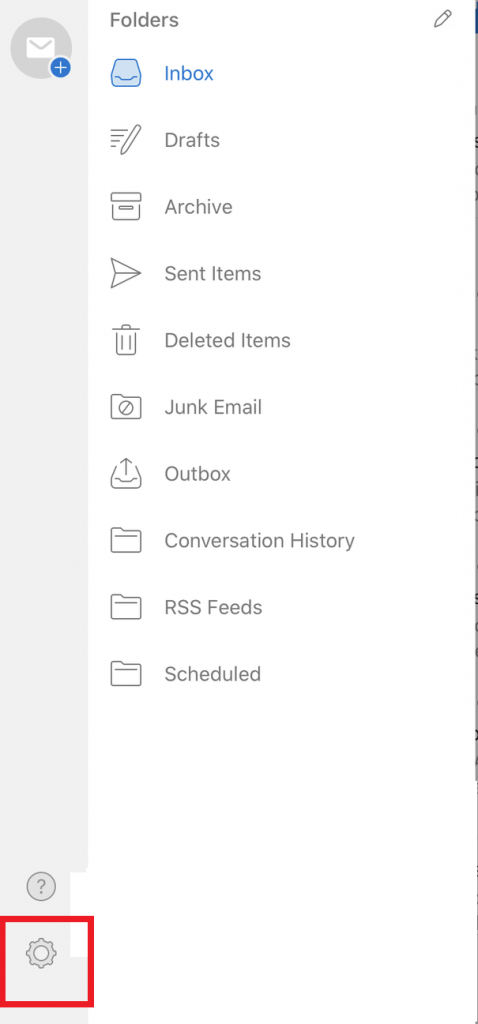
#3: Then, tap on the Settings icon at the left bottom side.
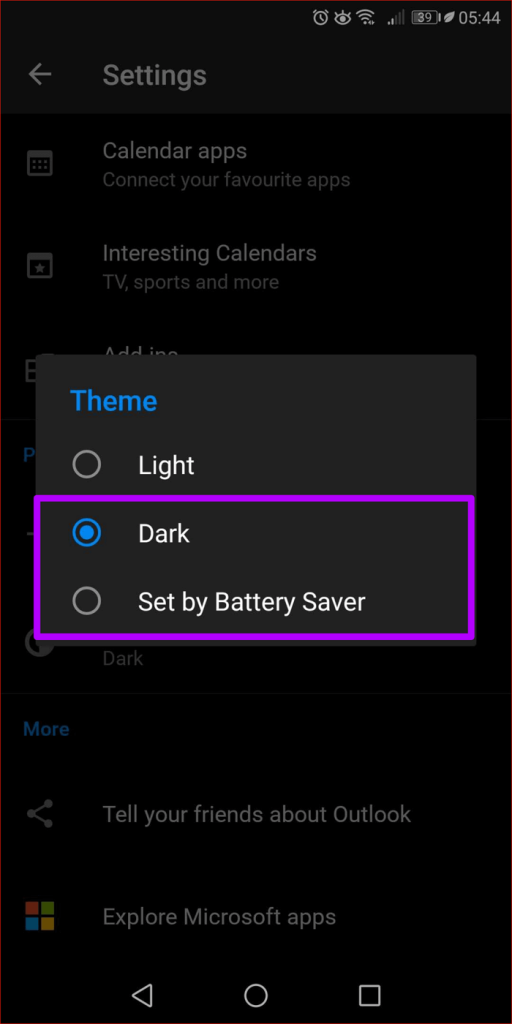
#4: Next, scroll down and select the Theme option. It will open the prompt with three options, Light, Dark and Set by Battery Saver.
#5: Choose Dark to turn on Outlook dark mode on Android.
#6: To disable the dark mode, click the Light option from the Themes settings.
Steps to Turn on Dark Mode on Microsoft Outlook – iPhone
#1: Open the Microsoft Outlook app on your iPhone or iPad.
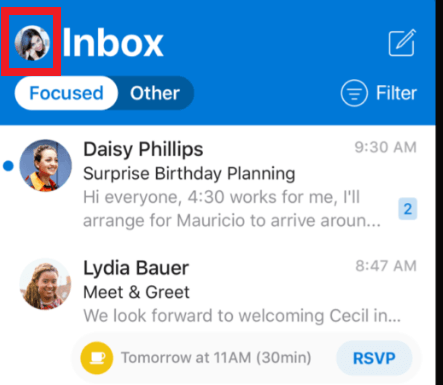
#2: Make a tap on your Profile icon at the top left corner of the app screen.
#3: Then tap Settings icon from the bottom of the menu.
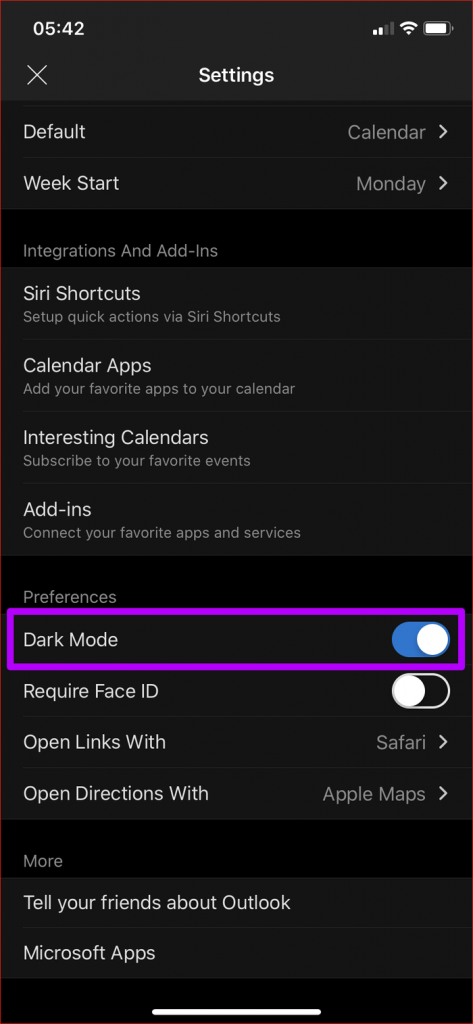
#4: Finally, tap the toggle to the right of Dark mode to enable it.
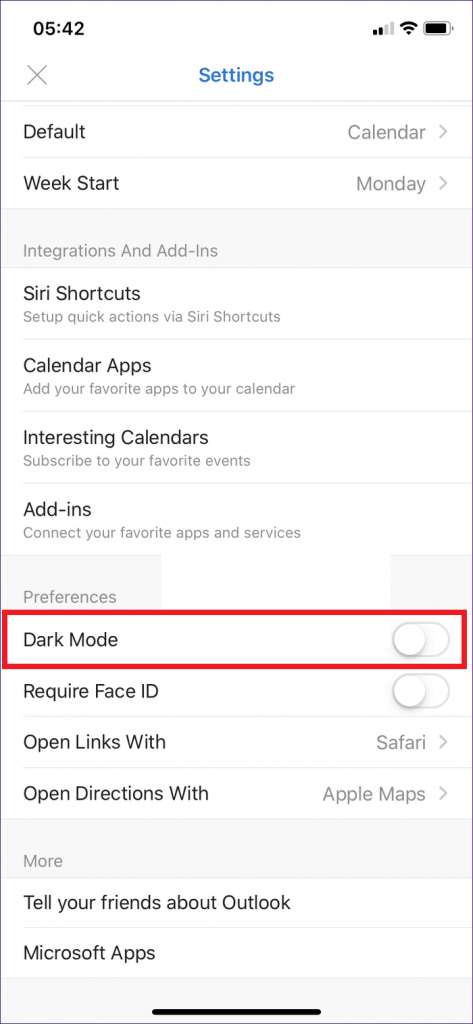
#5: Scroll down to Dark Mode under preference section.
#6: If you want to turn off dark mode, click the Dark Mode toggle to turn your app background white.
In some cases, you have to turn on iPhone dark mode to enable the dark theme on certain apps.
Steps to Enable Dark Mode on Outlook 365 Desktop Client
#1: Open the 365 Desktop Client and go to Toolbar.
#2: Select File option, followed by select Office Account.
#3: Next, click the Office Theme drop-down icon and choose Black from the list.
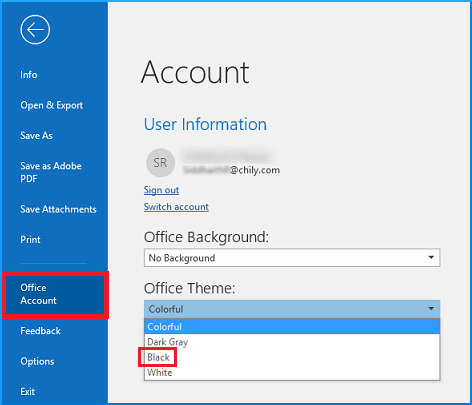
#4: Then, press the Enter key to apply the dark theme and exit.
Now, the dark theme is applied to all Microsoft Office applications.
Techowns Tip: Enable Microsoft Word Dark Mode
Switch between Normal and Dark Mode
Turning off dark mode is very simple, and it can be done even while reading messages on Outlook.
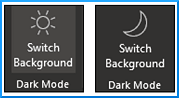
#1: Select the brightness icon (sun icon) in the message screen, instantly the background will turn white.

#2: If you want to enable dark mode, click the Moon Shaped icon to enable it.

#3: If you wish to change the screen background while composing a message, select the dark mode icon on the message toolbar to change the background of the message window.
Steps to Enable Dark mode in Outlook.com
#1: Open the Web browser and visit outlook.com.
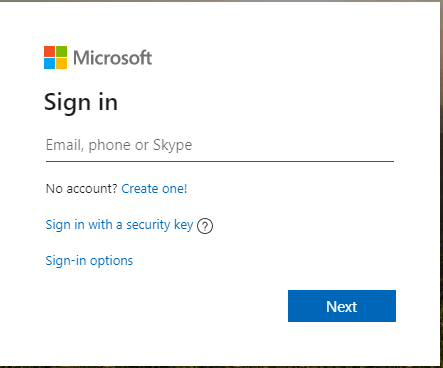
#2: Sign in with your Outlook credentials.
#3: Then select the Settings icon from the top of your outlook home page.
#4: Click the Dark Mode toggle to turn ON / OFF.
#5: To change the background of your reading pane, click the sun shaped icon to turn your reading background white.
To Conclude
By now, you have clearly understood the procedures to enable and disable the Microsoft Outlook dark mode on Android, iOS and Web. The dark mode feature is recently added to the Outlook. Likewise, Outlook intense to add many features in the upcoming years.
If you got better recommendations or any devices that we have left, kindly comment below. Stay connected with our social media profiles, Facebook and Twitter to get more tech-related tips and tricks.