Skype is one of the most popular communication services that allows users to make voice and video call over the internet. With Skype, you can send messages, share files, make group video calls, and even record calls. Especially recording calls on Skype can be used for a variety of purposes, such as keeping records of any important conversations, archiving principal information, and more. After recording the calls, you can save the file on your device and share and collaborate with your friends and colleagues for official purposes.
Contents
- How to Record Skype Calls [Mobile App]
- How to Save the Recording
- How to Share the Recording
- Alternative Method to Record Calls on Skype [Mobile App]
- How to Record Skype Calls [Desktop]
- How to Save the Recording
- How to Share the Recording
- Additional Options Available Under Skype Recordings
- Frequently Asked Question
How to Record Skype Calls [Mobile App]
[1] After updating the Skype app, launch the application on your smartphone [Android/iPhone].
[2] Log in to your Skype account with Microsoft credentials.
[3] Once logged in, navigate to the home screen and make a video call to any person or group by clicking the Start Meeting button.

[4] Once the recipient attends your call, tap the More (three-dots) icon and select Start Recording from the drop-down menu.
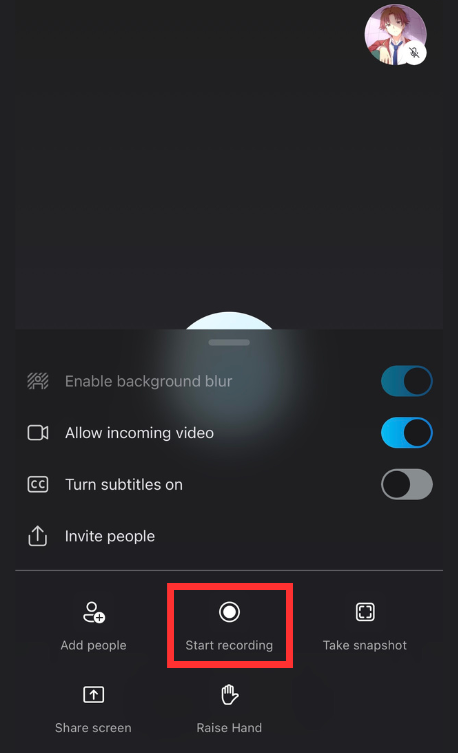
Note: Once you start recording, each participant or person will receive a notification at the top of their screen that lets them know the call is being recorded.
[5] When you’ve done recording, click the Stop Recording option at the top to stop recording.
After the call is recorded, the recordings are posted to your chat and it is available for 30 days and vanishes after that. So, you can save the recordings and share them with your friends within the time period.
How to Save the Recording
[1] Once the recording has been posted on the chat, press and hold the recording.
[2] A popup will appear, select Save from the list of options.
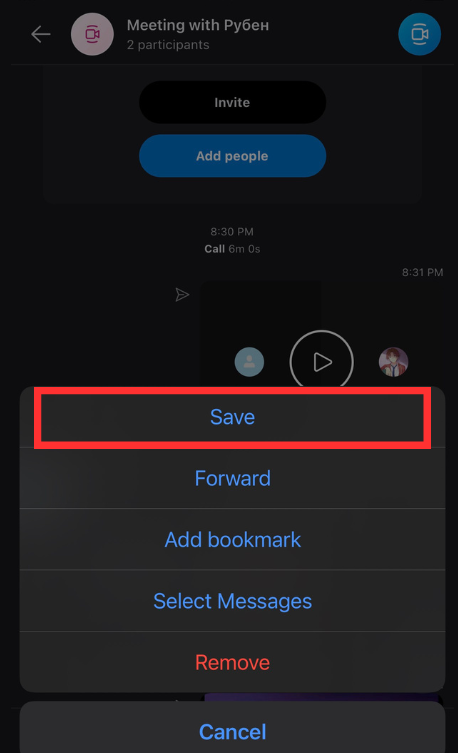
[3] After that, the call recording will automatically download and save to your device’s camera roll as an MP4 file.
[4] If the contact is not in the call, add the specific person to your Skype call and share the recording.
Note: If there are any issues while saving the video to your camera roll, select Allow Access to All Photos from your device’s settings to save the recording.
[1] To share a call recording on Skype, press and hold the recording and tap the Forward option.
[2] When the forward message box has been displayed, select the contact that you want to share the recorded call with.
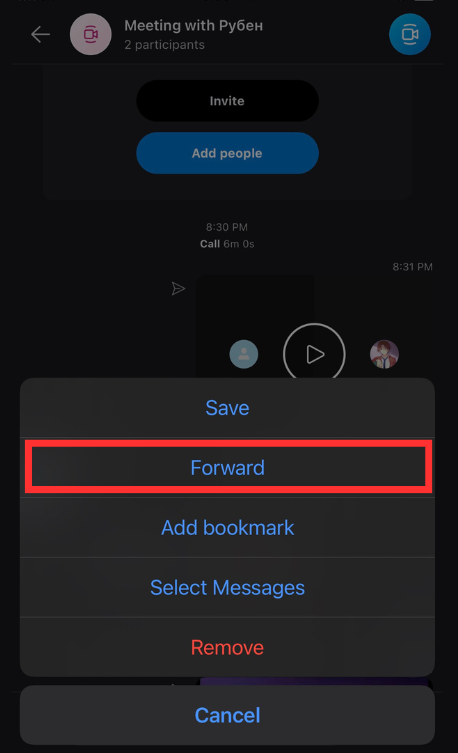
[3] Then, tap the Send button and click Done to share the recording with your contacts.

Alternative Method to Record Calls on Skype [Mobile App]
Apart from recording with the Skype app, you can also use the built-in screen recording option available on your iPhone or Android to record the calls. Luckily, it helps you to record calls secretly without exposing them to any members.
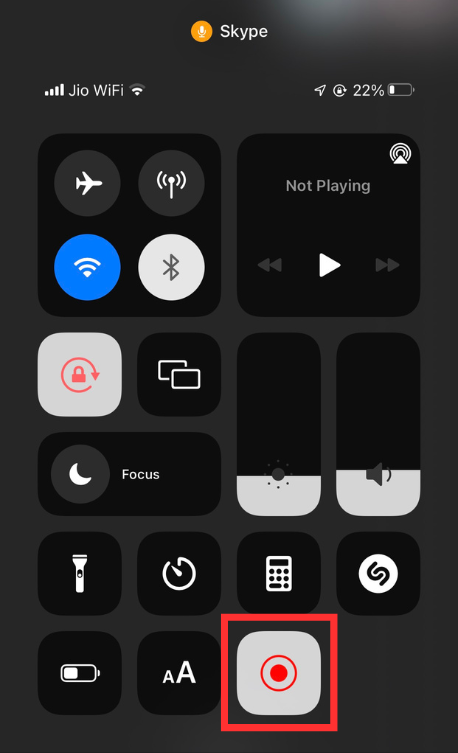
[1] Make a call on Skype and navigate the Control Center (iPhone)/Notification panel (Android).
[2] Then, click the Screen Recording icon to start recording the entire screen. It will record the entire call while you’re inside the Skype application.
[3] After done with the recording, click Stop Recording.
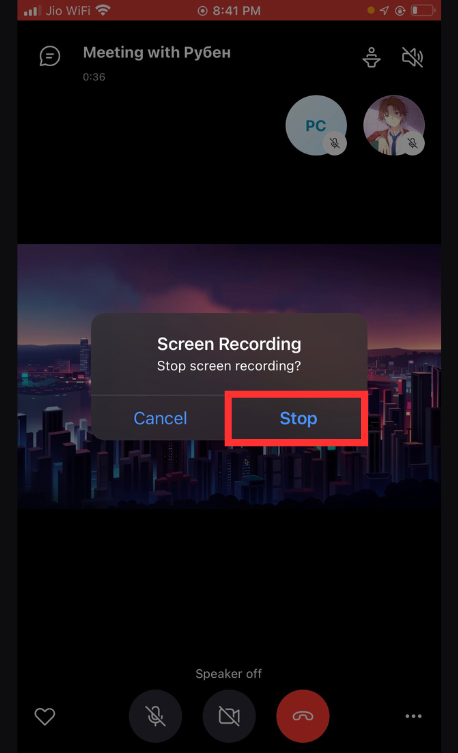
[4] The recorded calls will be saved on your device’s gallery.
How to Record Skype Calls [Desktop]
If you’re using the Skype application on Windows or Mac, you can follow the below steps to record a call.
[1] On your Mac or Windows PC, launch the Skype application.
[2] Make a normal video or audio call to your friends or group.
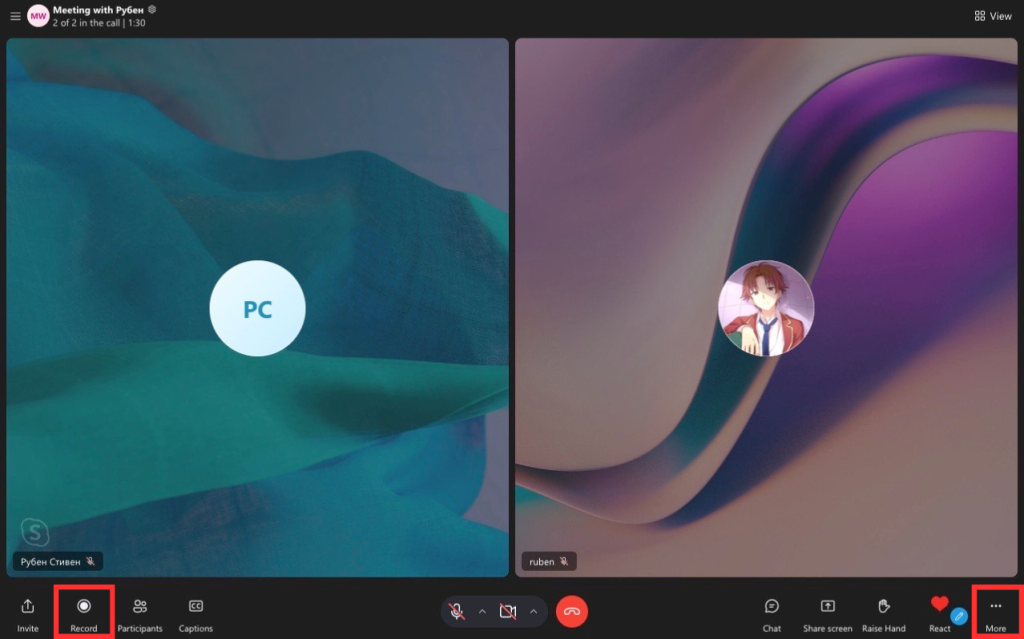
[3] After that, click the Record button to begin the recording. Sometimes, you should click the More (three-horizontal dot) icon to get the Record button.
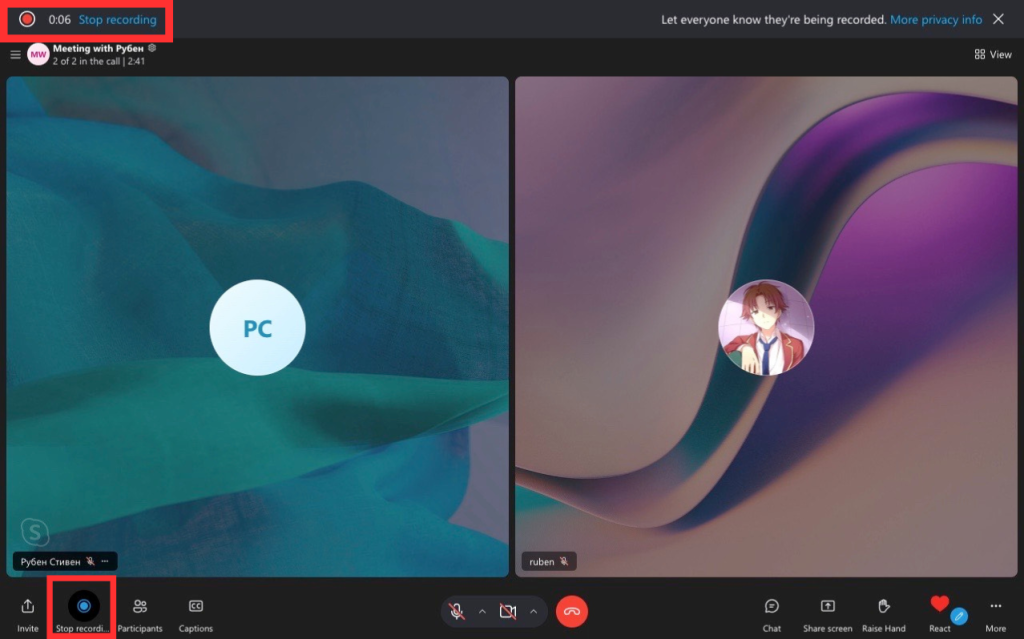
[4] After recording, click Stop Recording at the top of the screen to end the recording.
How to Save the Recording
[1] After the screen recording, the media will be posted on the respective chat page.
[2] Right-click the screen recording and click Save/Save to Downloads to save the recording directly to your downloads folder.
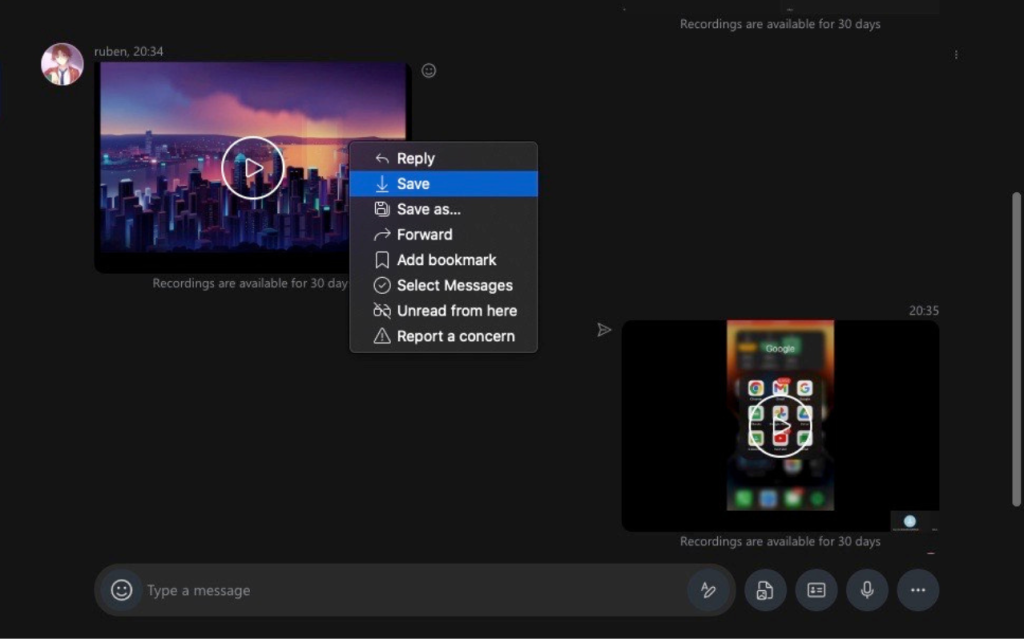
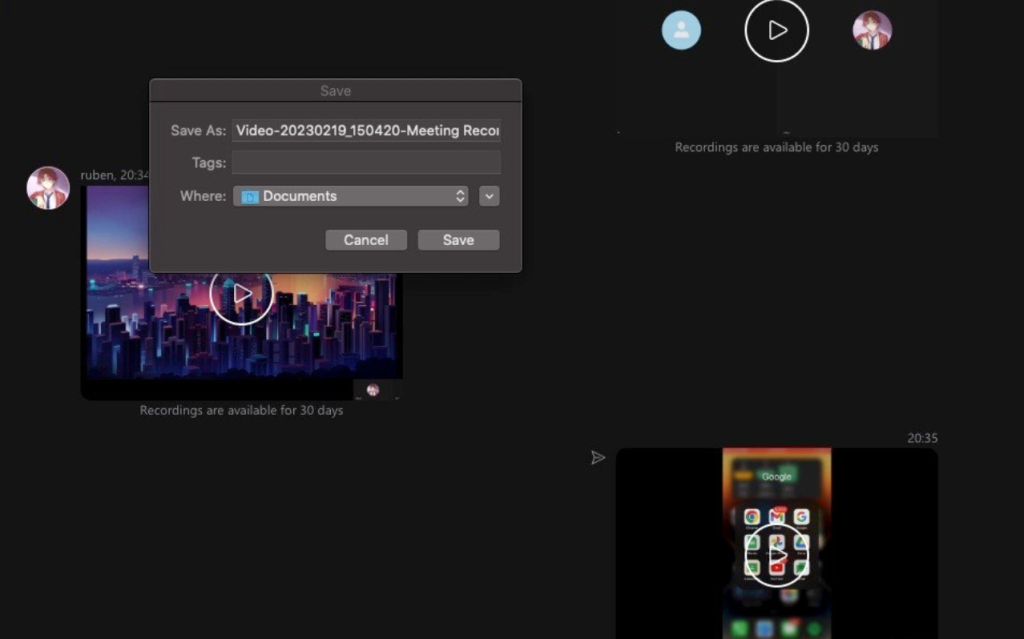
[3] You can also select Save as to choose the destination folder to save the recording.
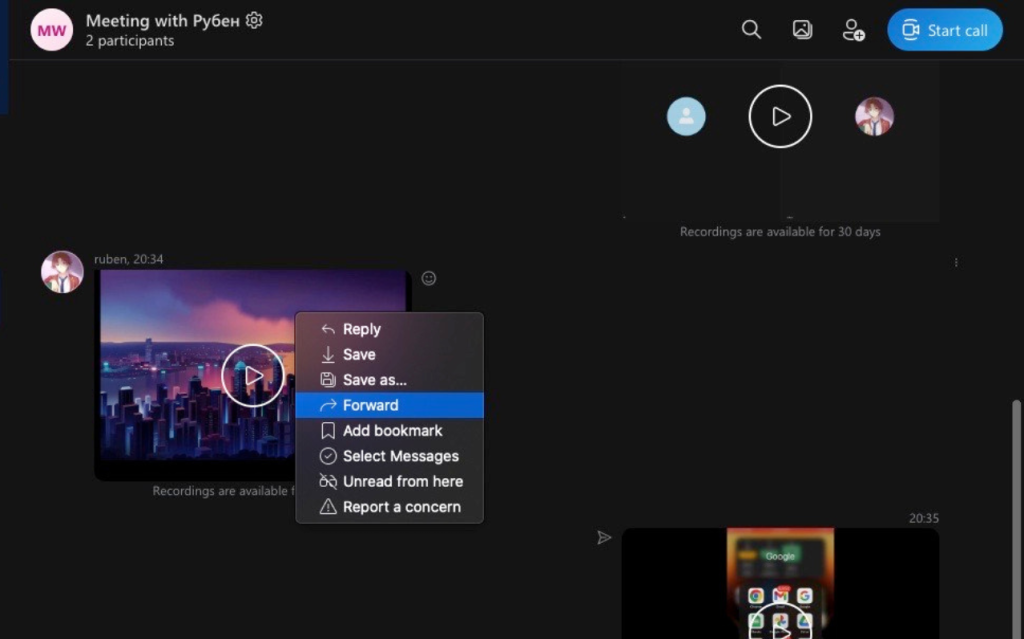
[1] Right-click the recording and click the Forward option
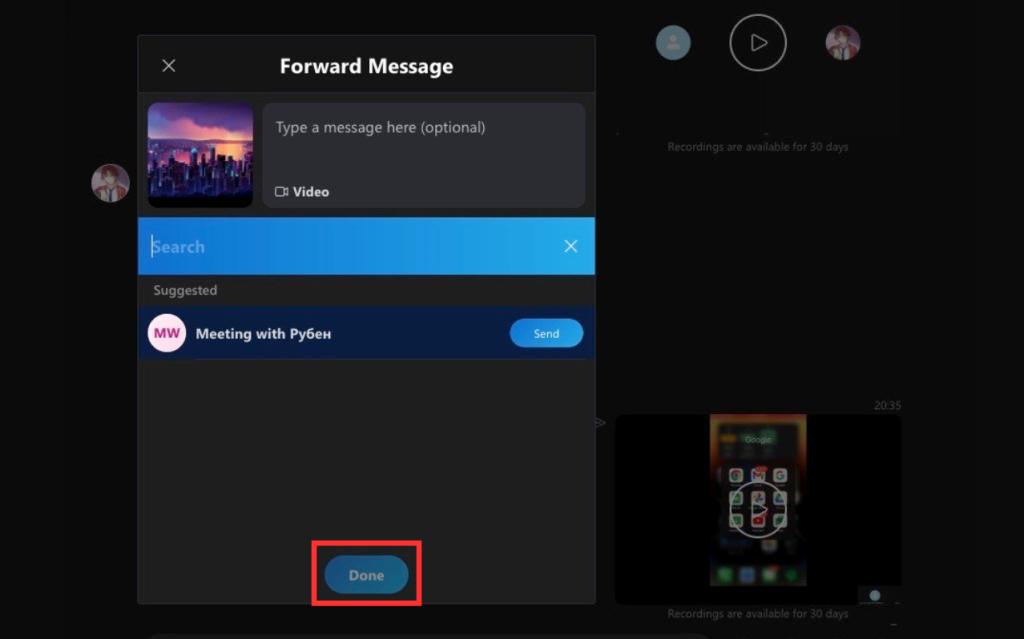
[2] After that, you can search for the contacts and select the Send button.
[3] Finally, hit Done to share the recording with others.
Tip! If you’re getting any unwanted or spam messages, you can block the member on Skype to maintain your privacy and security.
Additional Options Available Under Skype Recordings
Apart from recording, saving, and sharing, there are also three additional features available on Skype after you’ve done the recording.
- Select Messages – This option selects the recording or other text messages in your chat.
- Remove – It helps to remove the recording from your chat page.
- Report a Concern – You can report the call recording from someone in a group for abuse or spam.
- Bookmark – With this feature, you can mark important messages or media on your Skype chat for quick access.
Tip! If you got bored with the default light theme, you could also enable dark mode on the Skype platform for a new experience.
Frequently Asked Question
Yes, you can use the built-in screen recording feature on your smartphone and PC to record a call without knowing others. If you don’t have any screen recorder apps, check our list of best screen recording apps for Windows.