When it comes to sharing something interesting, then screen recording is one of the most used features. There are even more interesting reason for which a lot of you prefer recording. Screen recording is a handy feature when it comes to the smartphone. But it isn’t the same case when it comes to Windows PC. You should take some actions to record the screen if you are using Windows 10. A lot of Windows users don’t even know there is a way out there within the desktop PC itself. Find out how to screen record on Windows 10 right from this section using different methods in brief.
Contents
How to Screen Record on Windows 10?
If you want to screen record your Windows 10 PC, then here is the procedure.
How to Screen Record on Windows 10 using Game Bar?
The most convenient method to record Windows 10 screen is by using the game bar. Game Bar is also used to take a screenshot on Windows as well.
Note: By using Game Bar, you will be able to record the desktop or Windows Explorer only. This method will not record the entire screen.
(1) On the Windows 10 keyboard, press Windows Key + G together.
(2) Game Bar will show on your Windows PC. If no window pop-ups, then go to the Start menu to type in as Settings.
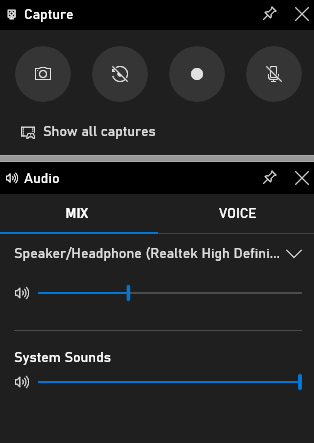
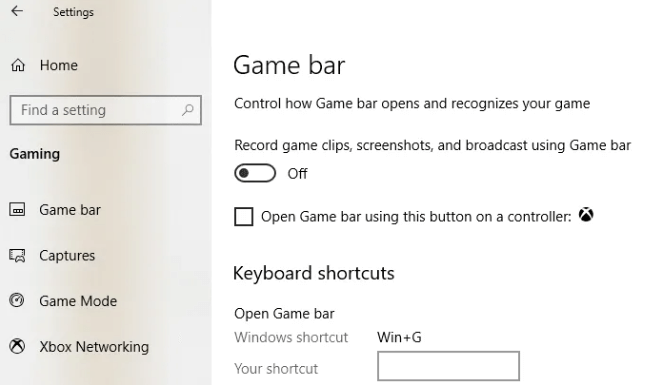
(3) Under Settings, use the search bar to type as Game Bar Settings.
(4) On the following screen, check if the Game Bar is turned on. Else, tap on the slider to turn it on.
(5) Press Windows Key + Alt + G to start recording. A small window will appear on the top right that shows the recording icon. Press the Dot icon.
(6) To stop the recording, press Windows Key + Alt +R. Alternatively, press Windows Key + G to bring up the Game Bar and tap on the Box icon on the floating bar.
Note: The screen recorded video will be available under This PC > Videos > Captures. Else, press Start menu > click on Captures icon on the left toolbar to view the recorded clips.
Tip!
- To record a video along with your voice, press Windows Key + Alt + M. Press the same key to turn it off.
- If you don’t want to record audio from the app you are using currently then press Windows Key + G to open Game Bar. Click on the Settings icon (cog) from the left side and scroll to choose Game Only listed under Audio to record.

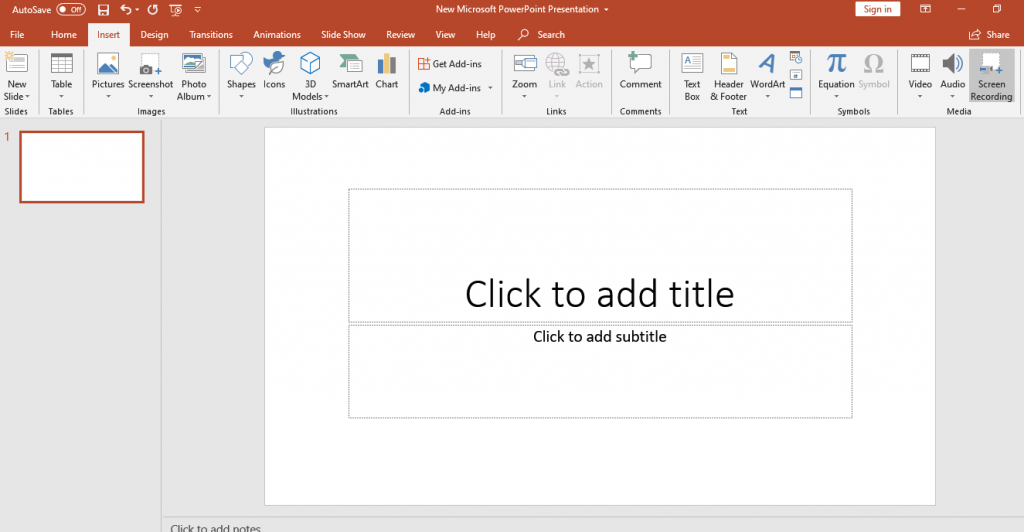
How to Screen Record on Windows using PowerPoint?
If you aren’t aware, you can use PowerPoint to record your Windows 10 screen.
(1) Launch PowerPoint on your Windows 10 PC and open a file.
(2) Hover to click on Insert tab and then choose Screen Recording button from Media Panel.
(3) Minimize the screen and go back to the screen to which you want to record.
(4) Now the screen will dim and you will find a pop up with different options to record screen.
(5) Tap on Record button or press Windows Key + Shift + R keys at the same time.
(6) The record button will replace into Pause and click on it to halt recording. To end the recording, tap on the Stop button.
(7) Right-click on the video to save the recording. Choose Save Media on the pop-up menu.
Alternative Method
There are apps available for Windows 10 and it lets you record your screen in an enhanced way. Some of the popular apps include
- OBS Studio
- Snagit
- ActivePresenter
- Flashback Express
- Bandicam
- Camtasia
- IceCream Screen Recorder
You can also take a look at our Best Screen Recorder for Windows as well.
Our Opinion
We hope you have learnt about how to record screen on Windows PC efficiently. Recording your Windows screen is that simple irrespective of the methods and you can opt to any of the possible ways. You can either use the inbuilt method or using third-party apps to record your screen on your Windows PC.
Have this article helped you out with the recording screen on Windows PC? Let’s hear it from the comments section. For more useful article updates, follow us on Facebook and Twitter page.