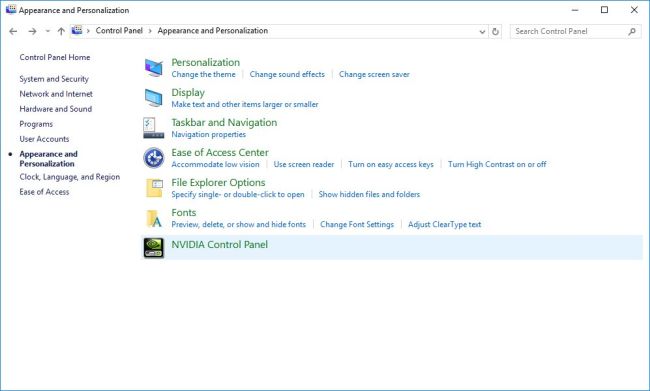
NVIDIA Control Panel Settings is the most important aspect of gaming. By changing the settings and customization options in the NVIDIA Control Panel, you can change the look and UI of the game. When you buy a new NVIDIA GeForce graphics card for your gaming PC, you will have the NVIDIA Control Panel Settings. At first, all the features in the settings are set to default. But you can customize the settings for your preferences. In the Control Panel, you will find a lot of advanced settings.
If you are a new user of NIVIDA, you will find it difficult to tweak the settings. In this article, we have explained all the important settings and how to use it.
Contents
NVIDIA Control Panel Settings That You Can Change
In the Control Panel, there are a lot of settings available. But to improve the performance of gaming and the gaming quality, you can customize a handful of settings in the control panel.
- 3D Settings
- Ambient Occlusion
- Anisotropic Filtering
- Dynamic Super Resolution
- Antialiasing
- Multi Frame Sample Antialiasing
- Power Management Mode
- Texture Filtering and Optimizations
Before getting into the NVIDIA Control Panel, make sure that you are using the latest version of NVIDIA Driver. You can check for the latest version on the NVIDIA website.
3D Settings
The first thing you need to change is the 3D Settings. These settings will adjust the visual quality.
(1) Open the NVIDIA Control Panel and click the 3D Settings on the Menu bar.
(2) Click the Adjust image settings with preview option on the left side.
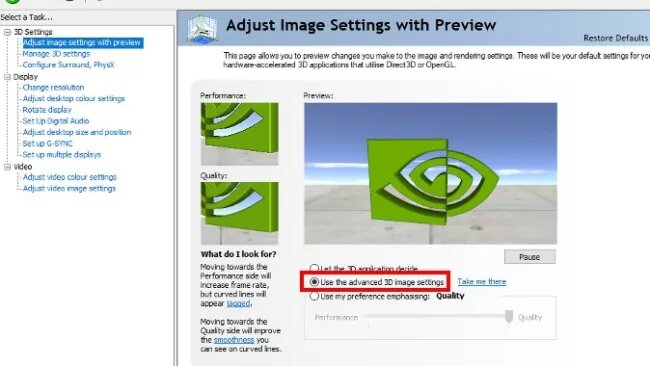
(3) You will see a slider named Performance. To get the maximum visual quality, set the slider to its maximum. Make sure that you have enabled the Use the advanced 3D image settings. You can see the preview on a small window.
(4) Now, click the Manage 3D Settings just below the Adjust image settings with preview option.
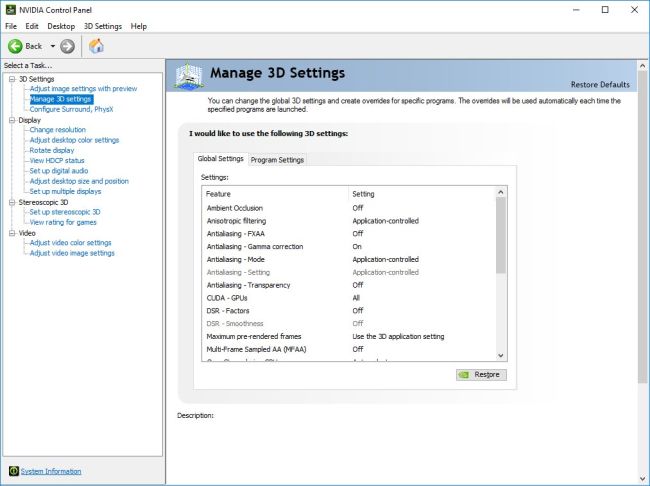
(5) Explore all the settings but it is the best not to change these settings.
All the features in 3D Settings are pre-optimized for the best gaming experience. If you change the settings, it will make your PC run hard and will overload it. The two tabs available, Global Settings, and Program Settings. The changes you made on the Global Settings will be effective on all your PC games and the changes you made on Program Settings will affect only the specific games of your choice.
Now, we will see all the settings available under the 3D Settings in a detailed view.
Ambient Occlusion
Ambient Occlusion is the first setting you will see on the 3D Settings window. This feature is responsible for the shadows and lighting effects. If you want the objects in your game to be more realistic, you can turn on this feature. Set the value to its maximum 16X to get the best results.

But this will consume higher memory bandwidth and lower framerate. The framerate speed depends on your PC specifications. If you have old hardware then you can turn on Ambient Occlusion as you will have a lower framerate. Make sure that your PC has the required specifications.
Anisotropic Filtering
The next one is Anisotropic Filtering (AF). This feature plays a major role in FPV and third-person view games. When you play an FPV game, the path or wall will be blurred. The view will be like short-sightedness. If you turn on the Anisotropic Filtering, you will get a clear path through the screen. For a better understanding, observe the image below.

Beyond the red line, the pathway is a little bit blurred and looks gloomy. When you turn on Anisotropic Filtering, the path will look like the image mentioned below.

Did you notice the difference? This is the role of Anisotropic Filtering. For the best results, set the quality to 16X. When you turn on Anisotropic Filtering, you are allowed to make the Texture filtering – Anisotropic Sample Optimization, which will improve the texture quality.
A lot of PC games are incorporated with this feature. You can change the built-in feature and if you are satisfied with that, you can change in NVIDIA Control Panel Settings.
Antialiasing
Antialiasing is a way to enable pixel-smoothing. This feature varies with games, so try it for individual games and set it accordingly. In Antialiasing, there are five types of customizations available.

Antialiasing – FXAA: This provides a smoothing layer and decreases the visibility of jaggies but the image will look blurred. Antialiasing – FXAA depends on DSR settings. This will show the best results in older games. In modern games, it is not recommended. Most of the time, you have to leave this as default.

Antialiasing – Gamma correction: It is one of the oldest settings in the NVIDIA Control Panel Settings. This will blend objects against contrasting backgrounds. This will work on older games only.
Antialiasing – Mode: In this, there are two modes are available. Override any application setting and enhance the application setting. Try these two options on your game and choose the one that suits your game or else leave it with Application-controlled.

Antialiasing – Setting: This feature controls the amount of antialiasing used. Set the quality that suits your game. For some games, if you set the amount to maximum, you will see some distortions.
Antialiasing – Transparency: This will smooth out the edges and corners in the walls. It will have a transparency effect on leaves, wires, and objects in the game.
Dynamic Super Resolution (DSR)
This will render the game at a higher resolution that is beyond the PC’s power. It will greatly improve the visual quality of gaming. But only a PC with strong gaming specifications can handle this feature. The values are available on the multiples of the screen resolution.
If a 1080p game is set on a 4X factor, you will get the 4K resolution.
DSR – Smoothness: This will control the amount of smoothness used in the DSR process. Leave it to default, 33%. Adjusting will lead to blurry images.
Multi-Frame Sampled Antialiasing (MFAA)
This feature is available only on the 90 series and later. Enable this feature if you want a performance boost and image quality boost in your gaming. But not all the games are supported, use it for only the game that supports.
Power Management Mode
Most of the modern gaming PCs will run on required clock speeds without any problem. Keep the setting to Adaptive, if you have issues. If it persists still, change it to Prefer Maximum Performance.
If your gaming laptop is draining the battery, switch to Optimal Power.
Texture Filtering and Optimizations
This setting is similar to Antialiasing. But these settings won’t affect the modern games by that much difference. It can be used on older games to improve the visual quality of the objects and characters.
Vertical Sync
Vertical Sync or Vsync is the property of frame rates. If your PC screen supports 60Hz, it will enable the game to run on 60 frames per second. This feature will eliminate the tearing when the GPU and display are out of sync. Set the Vsync to use the 3D application settings, it will make the framerates optimum to individual games.
Other common settings like Change resolution can be changed if you want.
Endnote
These are the gaming settings available on the NVIDIA Control Panel Settings. Change these settings according to your preferences. Play the games on your PC with the utmost satisfaction. Share your NVIDIA gaming experiences in the comments section.
Stay connected on our social media pages, Facebook and Twitter to get more updates.