NordLayer, earlier known as NordVPN Teams, is a VPN service for Windows, macOS, Linux, iOS, and Android. It is aimed at businesses, remote workers, and freelancers who need secure access to work resources.
NordLayer uses the same trusted NordVPN features as NordLynx, its proprietary alternative for OpenVPN and IPSec. It is the primary reason for NordLayer to perform seamlessly, unlike other VPN providers who have bottlenecks in server speed and bandwidth. NordLayer outperforms its competitors by a comfortable margin in terms of outright transfer speed. Also, NordLayer is meant to manage the network of a business, organization, and its staff in one private space.
Contents
Features of NordLayer
 Two Factor Authentication |  Single Sign-On |  Auto Connect |
 Site-to-Site |  AES 256-bit encryption |  NordLynx (WireGuard) |
 Dedicated IP / Fixed IP | 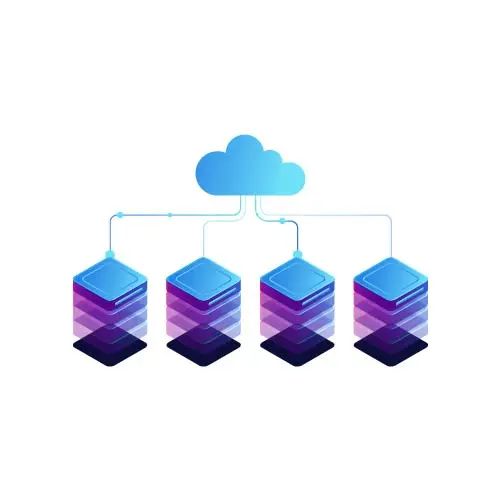 Smart Remote Access |
Features & Pricing
| Plan | Basic | Advanced |
| Monthly | $9 | $11 |
| Annually | $84 | $108 |
| Tech Support | ✅ | ✅ |
| Under One Minute Support | ✅ | ✅ |
| 2FA | ✅ | ✅ |
| Single Sign-On | ✅ | ✅ |
| Control Panel | ✅ | ✅ |
| Centralized Billing | ✅ | ✅ |
| Transfer License | ✅ | ✅ |
| Choose Server Location | ✅ | ✅ |
| Unlimited Users | ✅ | ✅ |
| Auto Connect | ✅ | ✅ |
| ThreatBlock | ✅ | ✅ |
| AES Encryption | ✅ | ✅ |
| Rooted Device Detection | ✅ | ✅ |
| 100% cloud-native | ✅ | ✅ |
| No traffic restriction | ✅ | ✅ |
| Shared Server Access | ✅ | ✅ |
| OS Integration | ✅ | ✅ |
| Dedicated Account Management | ❌ | ✅ |
| Dedicated Server with 1Gbps bandwidth | ❌ | ✅ |
| IP Allowlisting | ❌ | ✅ |
| Custom DNS | ❌ | ✅ |
| Network Segmentation | ❌ | ✅ |
| Site-to-Site Dedicated Gateways | ❌ | ✅ |
| Smart Remote Access | ❌ | ✅ |
| Biometrics | ❌ | ✅ |
| 24×7 Support | ❌ | ✅ |
NordLayer Servers
NordLayer is meant for small and medium businesses. Although it is just in its infancy, it has already onboarded 4000+ organizations to use its solutions and currently serving around 40,000+ users.
NordLayer has 30+ global server locations to offer a seamless experience on the web. These servers have the infrastructure shared with the trusted and proven NordVPN. In other words, using NordLayer would seem just as if you are using any normal internet. As a result, they are providing a great user experience.
However, the best part about NordLayer servers is that they operate 100% diskless (RAM only) servers to pursue higher user privacy & security. It means that all the information is stored only on the RAM with encryption, thus making it highly impossible for anyone to access the information. Also, there is no footprint left behind on the servers. User data is anonymous in that way. Moreover, any hacking attempt, even if successful, would yield very less information.
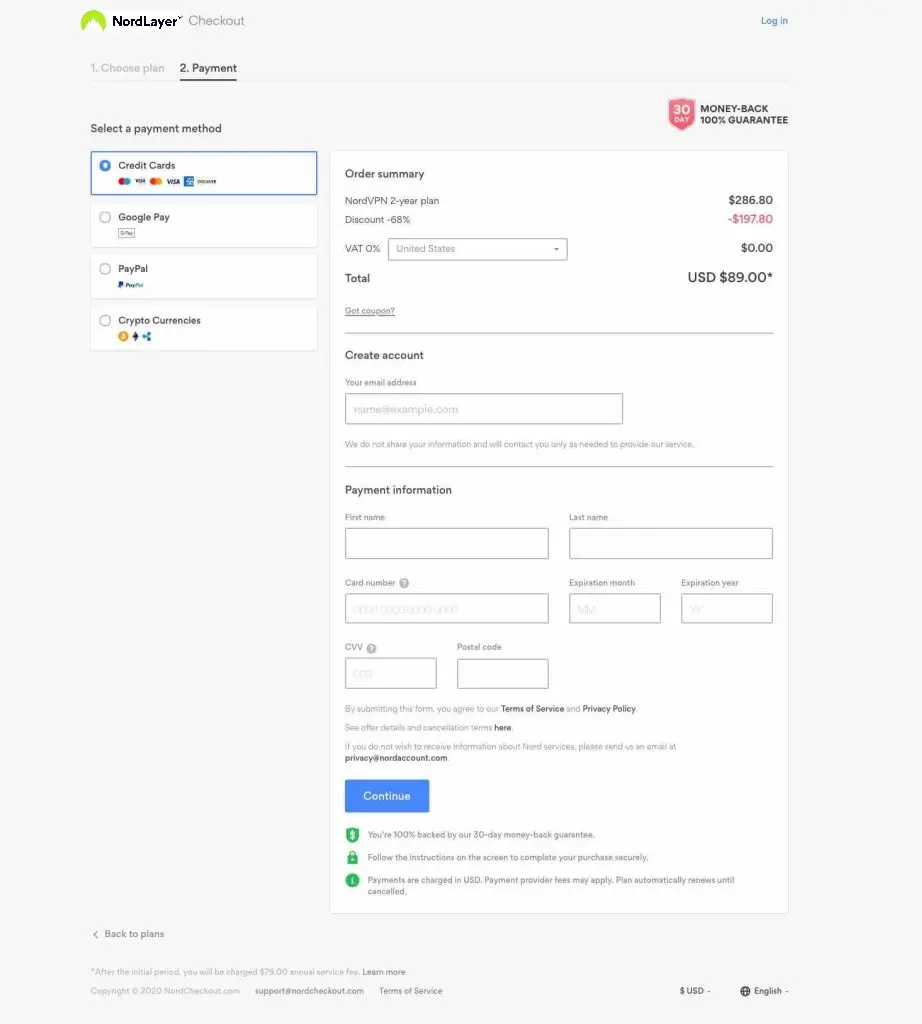
How to Subscribe to NordLayer
#1. Visit the webpage.
#2. Click on the Sign-up button on the top right of the landing page.

#3. Enter the required details and click on the Next button.

#4. Choose the preferred Plan.
#5. Finish the checkout by completing the payment.
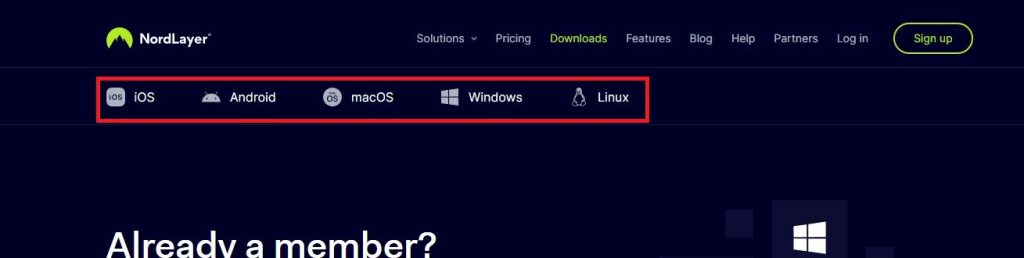
How to Install NordLayer (Windows / macOS / Linux)
#1. Visit the webpage.
#2. On the top horizontal menu bar, look for the Download item on the menu.
#3. Choose the platform you wish to download the software on.
#4. Install the software and set the environment variables.
- On Windows, run the executable.
- On Mac, run the package installer.
- On Linux, deflate the RPM file.
First Time Usage On Windows
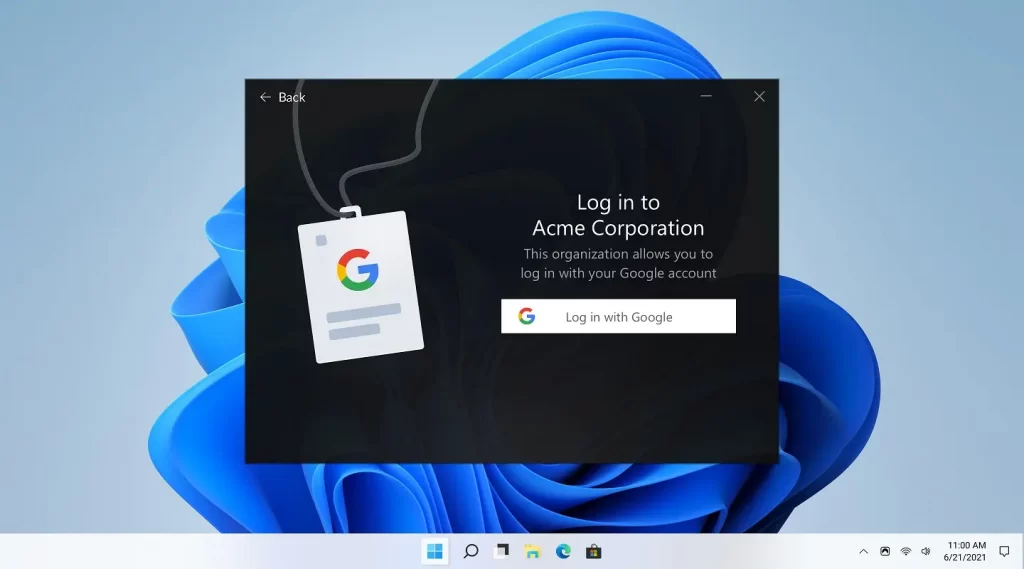
When you open the Windows application for the first time, you will be greeted with a screen as shown below.
1 – Enter your organization ID.
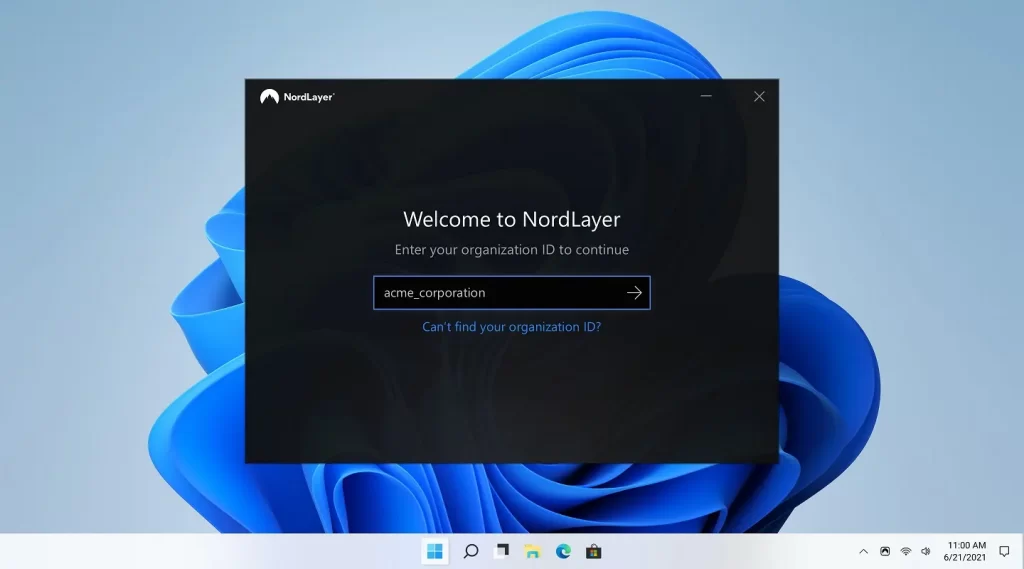
2 – Choose whether you want to log in with Microsoft Azure ID or Google Account.
Once login is successful, you will see a right sidebar with gateway lists. A single click on any gateway would show the status at the bottom of the right sidebar.
3 – Double-click on any gateway to connect to it.
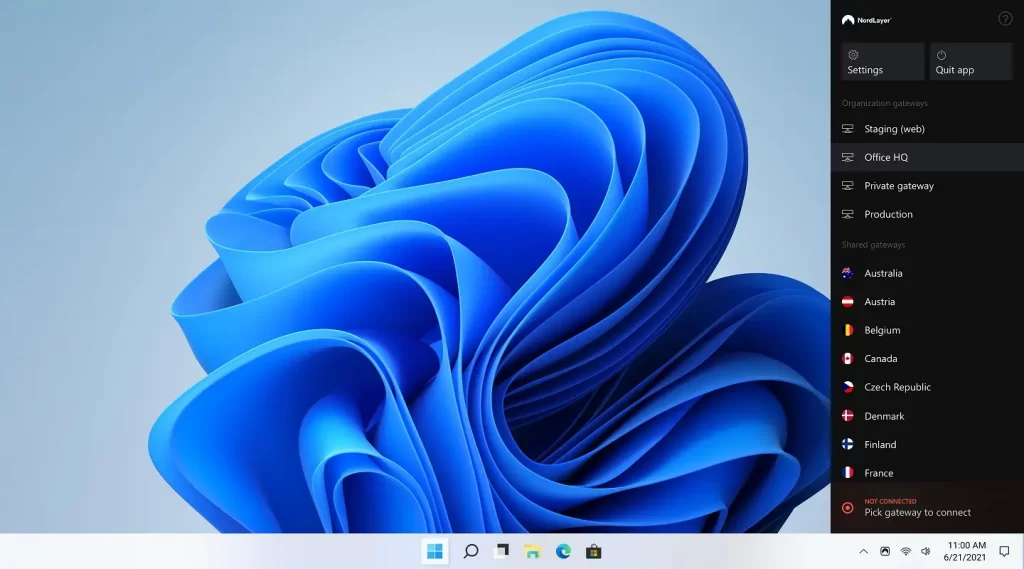
4 – All done! We are now connected to a dedicated gateway. Start browsing or using your desktop as usual, with the exception that you are now far more secure on the web.
Review
| Documentation | Installation | Setup | Server | UI | UX | Support | Overall | |
| Ratings | 5/5 | 5/5 | 4/5 | 4/5 | 4/5 | 5/5 | 5/5 | 32/35 |
Documentation
Documentation related to NordLayer VPN can be accessed through this link. The documentation is well organized into the following categories Getting Started Guide, General Information, Billing & Subscription related guide, Connectivity & troubleshooting, and Service Management Portal.
It had everything necessary to get the VPN working. We also felt the installation steps for macOS and Linux was really comprehensive, with all the command line syntax for NordLayer also provided.
Installation
The package for Windows was lightweight and just 19MB. The download was quick, and installation was a breeze, as the wizard did not prompt for any unnecessary details.
Setup
We just had to keep the Organization ID handy to log in to NordLayer, followed by signing in using our Google Account. We felt an OTP-based PhoneAuth could have been better and would have saved us some more time.
User Interface
We found the right sidebar to be the most welcome feature in NordLayer, as it saved a lot of space on the desktop. Also, the right sidebar was convenient to quickly change between gateways and also see if the gateway was connected or not.
User Experience
From the moment we downloaded the setup to get NordLayer working on our Windows 10 machine, the gap was sub 5 minutes.
Related – Surfshark Review
Our Verdict
NordLayer had the perfect documentation, straightforward installation, and was easy to set up. We felt that the login process could have been a bit smoother. An OTP-based PhoneAuth-based login could have worked wonders and saved us a lot of time. We felt that the UI could have been better, as it used the same dark UI from the usual NordVPN product. The user experience was amazing. The right sidebar layout had buttons and tools kept in the right places. We give NordLayer a 32/35, but we are not sure if it is at the top of the list yet.
Frequently Asked Questions – NordLayer
No. NordLayer is not free. It has excellent tools to manage teams. It would cost you 9$-12$ per month, which would vary based on the duration of the subscription.
Please make sure you have downloaded the correct repository on Linux. >>Then run the command, ‘sudo apt-get install ./nordlayer-latest_1.0.0_all.deb‘.
>>Run the update package list command – ‘sudo apt-get update
>>Next, install the package using the command – ‘sudo apt-get install nordlayer
>>Add the user to the application group using the command – ‘sudo usermod -a -G nordlayer $(whoami)